6 Unidrive M200/M201/M300 Step By Step Guide
Issue Number: 1
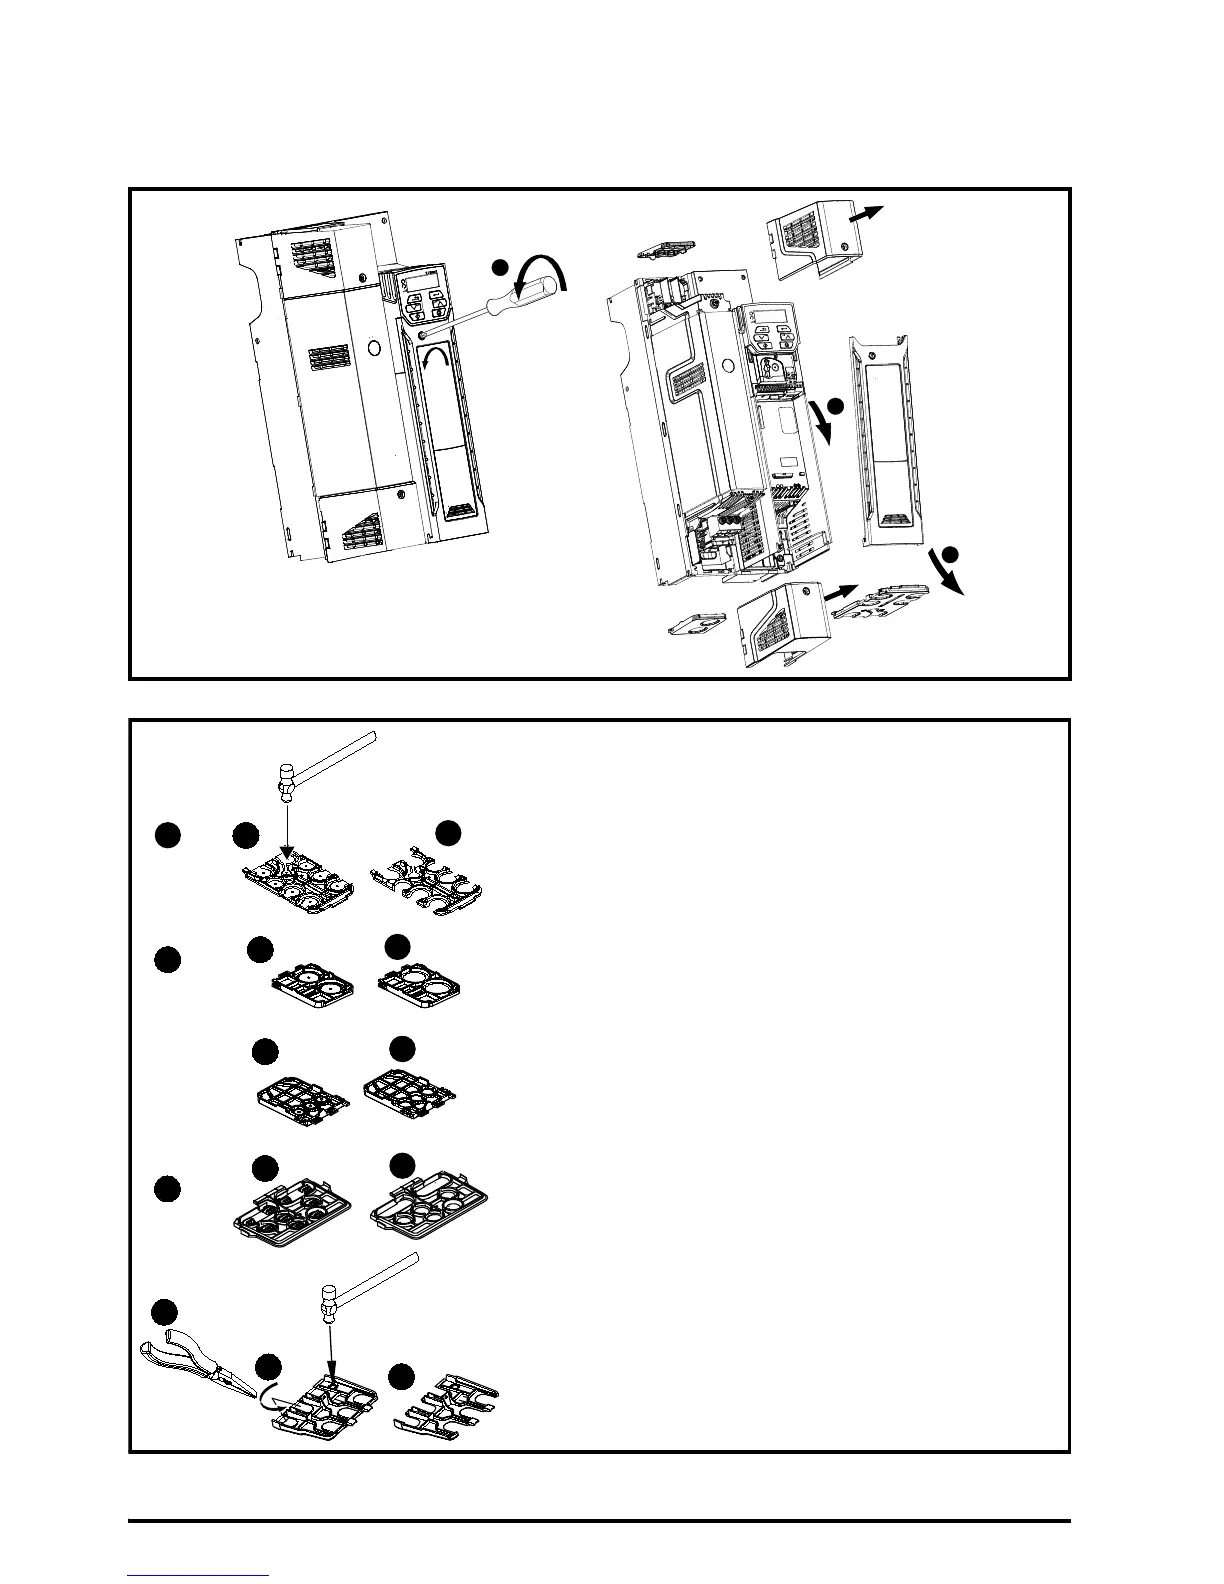
STEP 6: Remove the terminal cover
1. Using a flat bladed screwdriver, turn the terminal cover locking clip anti-clockwise by approximately 30°.
2. Slide the terminal cover down.
3. Remove terminal cover in direction shown.
Removing the finger-guard break-outs
A: Size 5 to 9
B: Size 5 only
C: Size 6 only
D: Size 7 to 9
Place finger-guard on a flat solid surface and hit relevant
break-outs with hammer as shown (1). For sizes 7 to 9 pliers
can be used to remove the break-outs, grasp the relevant
break-out with the pliers and twist it as shown (3). Continue
until all required break-outs are removed (2). Remove any
flash / sharp edges once the break-outs are removed.
Finger guard grommets are supplied in the kitbox for size 5
and 6.
 Loading...