Manual Addendum 1010FMA-4
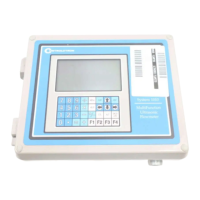
2.2 Flowmeter Setup
NOTE: The following instructions require the use of the keypad and the menu.
The installer should become familiar with their use before proceeding
further.
2.2 . 1 Switch the flowmeter on. Press the <MENU> key.
2.2 . 2 On multi-channel flowmeters, use the arrow keys to select [Dual Channel Flow]
or [Dual Beam Flow] depending on the mode utilized for the wet-flow calibra-
tion.
2.2 . 3 Use the arrow keys to select either [Clamp-on], [Flow Tube] or [Clamp-on Spool].
2.2 . 4 Select [Full Site Setup] and use the <Right Arrow> to select [Channel Setup];
then select [Recall Site Setup].
2.2 . 5 Use the <Down Arrow> to scroll to the site name indicated on the Calibration
Diagnostic Data Sheet. Then press <ENT>.
2.2 . 6 The meter will perform a momentary “Makeup” routine that will take a few
seconds and then begin operation.
2.2 . 7 Refer to your 1010 field manual for instructions on setting zero flow.
NOTE: Setting zero flow must be performed each time the transducers are in-
stalled. The zero adjustment has no effect on the wet-flow calibration
data or the calibration (Kc) factor.
2.2 . 8 Using the arrow keys, scroll to the Data Span/Set/Cal menu location. Verify that
the [Kc] (calibration) factor matches the value indicated on the diagnostic data
sheet.
2.2 . 9 If you are measuring a liquid other than ambient water, select the [Liquid Class]
menu cell and <Down Arrow> from there to [Viscosity]. Enter the correct vis-
cosity for the liquid you will be monitoring.
2.2 . 10 Setup is now complete. Press the <MENU> key twice to view the flow rate dis-
play. DO NOT utilize the [Save Site] command when it appears.
2.2 . 11 When measurements are completed, simply turn off the meter. DO NOT save
the site. This might contaminate the wet-flow calibration data already stored.
NOTE: Contact Controlotron’s Technical Services Department if any flow cali-
bration data is accidentally removed or overwritten.
2