HOW TO USE THE
D
D
E
E
L
L
A
A
Y
Y
T
T
I
I
M
M
E
E
R
R:
If you wish to Program your pressure cooker to automatically cook prepared food at a
later time, you can program the pressure cooker to delay cooking by up to 24-hours.
(*See Notes & Tips #7). This setting is used in combination with the MENU BUTTON
SELECTIONS in the chart shown on page 12 and with the PRESSURE COOK TIME BUTTON.
1. Prepare desired food and place into cooking pot.
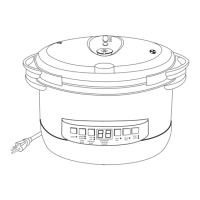
2. Secure the Lid (2) onto the unit, turn it Counter-clockwise to lock it in place.
3. Make sure the Pressure Limiting Valve (3) is set to the “Airtight” position.
4. Plug the power cord into a 120V power outlet.
5. The LED screen will display 0000.
6. Press the DELAY TIMER button. The LED screen will show 0:30 which is equal to 30
minutes of delay time. Press it again for each additional 0.5-hour or hold for rapid
increase. The maximum Delay period is 24-hours in half-hour increments. Pressing
the delay timer button again after reaching the 24-hour setting will automatically
reset the delay timer to zero. (The time that displays on the LED screen shows how
long the user wants the unit to wait before the cooking process begins.)
7. EX: If you wish to program the pressure cooker to automatically turn on
in 3-hours, press the DELAY TIMER button until the LED screen displays 03:00.
8. After programming a Delay time of 3 hours, choose a MENU BUTTON or customize
your PRESSURE COOK TIME.
MENU SELECT BUTTONS:
Select one of the 6 Pre-Set MENU BUTTONS.
Once you have selected your desired function, the pressure cooker will count
down the delay time of 3 hours and then start cooking.
PRESSURE COOK TIME:
Press a MENU BUTTON and then quickly press the PRESSURE COOK TIME button
to reach the desired cook time. Follow the instructions under "HOW TO USE
THE PRESSURE COOK TIME BUTTON."
Once the desired DELAY TIME and PRESSURE COOK TIME are selected, the DELAY
TIMER and the MENU BUTTON will illuminate and the unit will begin counting
down the delayed time before cooking begins.
9. Once the pressure cooker completes its countdown, the unit will begin to pressurize
and follow the cooking sequence for the chosen PRESSURE COOK TIME selection.
10. When cooking is complete, the pressure cooker will beep and automatically go to
KEEP WARM. The display will show bb during KEEP WARM.
11. The KEEP WARM indicator light will illuminate. This indicates the Pressure Cooker is
Naturally Releasing the pressure. (See Notes & Tips #6). This will take approximately
10-15 minutes.