ENGLISH
6
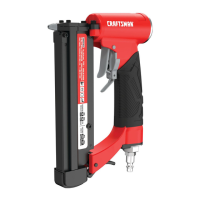
Proper Hand Position (Fig.D)
WARNING: To reduce the risk of serious personal injury,
ALWAYS use proper hand position asshown.
WARNING: To reduce the risk of serious personal
injury, ALWAYS hold securely in anticipation of a
suddenreaction.
Proper hand position requires one hand on the main
handle
9
.
OPERATION
WARNING: To reduce the risk of serious personal
injury, turn unit off and remove air supply before
making any adjustments or removing/installing
attachments or accessories. An accidental actuation
can causeinjury.
Using the Secondary Trigger (Fig.A)
WARNING: To reduce the risk of injury, Always wear
proper eye [ANSI Z87.1 (CAN/CSA Z94.3)] and hearing
protection [ANSI S12.6 (S3.19)] when operating
thistool.
WARNING: Do not keep trigger depressed when tool is
not in use. Serious personal injury mayresult.
WARNING: Disconnect air line from tool and remove
fasteners from magazine before making adjustments.
Serious personal injury mayresult.
The tool is locked off until the secondary trigger
2
isdepressed.
• Before you use the tool, be sure that the compressor
tanks have been properlydrained. NOTE: Use a filter and
regulator whenpossible.
• Wear proper eye, hearing and respiratoryprotection.
• Remove all fasteners from the magazine.
• Check for smooth and proper operation of contact trip
and pusher assemblies. Do not use tool if either assembly
is not functioning properly. NEVER use a tool that has the
contact trip restrained in the upposition.
• Check air supply: Ensure air pressure does not exceed
operating limits; 60to 100p.s.i.g., (4.1 to 6.9 kg/cm
2
).
• Lubricate tool:
‑ Use CRAFTSMAN pneumatic tool oil or a
non-detergent S.A.E. 20weight oil. DO NOT use
detergent oil or additives as they will damage O-rings
and rubberparts.
‑ Use a filter whenpossible.
‑ Add 5to 7drops of oil in the air fitting a least twice
aday.
• Keep tool pointed away from yourself andothers.
• Connect airhose.
• Check for audible leaks around valves and gaskets. Never
use a tool that leaks or has damagedparts.
Preparing the Tool
WARNING: Read the section titled IMPORTANT
SAFETY INSTRUCTIONS at the beginning of this
manual. Always wear proper eye [ANSI Z87.1 (CAN/
CSA Z94.3)] and hearing protection [ANSI S12.6 (S3.19)]
when operating this tool. Keep the fastener pointed
away from yourself and others. For safe operation,
complete the following procedures and checks before
each use of thefastener.
NOTICE: To reduce the risk of damage to the tool,
only use pneumatic tool oil or a non‑detergent SAE
20weight oil. Oil with additives or detergent will
damage toolparts.
Trigger (Fig.A)
WARNING: Keep fingers AWAY from trigger when not
driving fasteners to avoid accidental firing. Never carry
tool with finger ontrigger.
WARNING: Once the secondary trigger is pulled the
tool will drive a fastenere every time the primary trigger
ispulled.
This tool is equipped with with a dual trigger actuation
system. the secondary trigger
2
must be depressed in order
to depress the primary trigger
1
. Each time the primary
trigger is depressed the tool will fire afastener.
Air Fitting (Fig.B, C)
The tool is equipped with a 1/4” (6.4mm) male quick
connector coupling. A 3/8” (9.5mm) male quick connector
coupling may be used when a 1/4” (6.4mm) supply line is
not available.
NOTE: A 3/8” (9.5mm) supply line (and fittings) are required
for maximum tool performance. IMPORTANT: Always use
couplings that relieve all pressure from the tool when it
is disconnected from the power supply. Always use hose
connectors that shut off air supply from compressor when
the tool is disconnected.
To Install an Air Fitting
1. Wrap the male end of the fitting with thread seal tape
prior to assembly to eliminate airleaks.
2. To install a 1/4” (6.4mm) fitting: screw it directly into the
air inlet
3
and tighten firmly. NOTE: If a cap is in the air
inlet, remove it prior to inserting the fitting.
3. To install a 3/8” (9.5mm) fitting: screw the fitting into the
3/8” (9.5mm) adapter and then into the air inlet of the
tool and tightenfirmly.
FASTENER SPECIFICATIONS
Model
Nail 23 gauge pin nails
Lengths 1/2” (13 mm) –1” (25 mm)
Air Inlet 1/4” NPT (6.4 mm)
NOTE: Use only CRAFTSMAN approved fasteners.