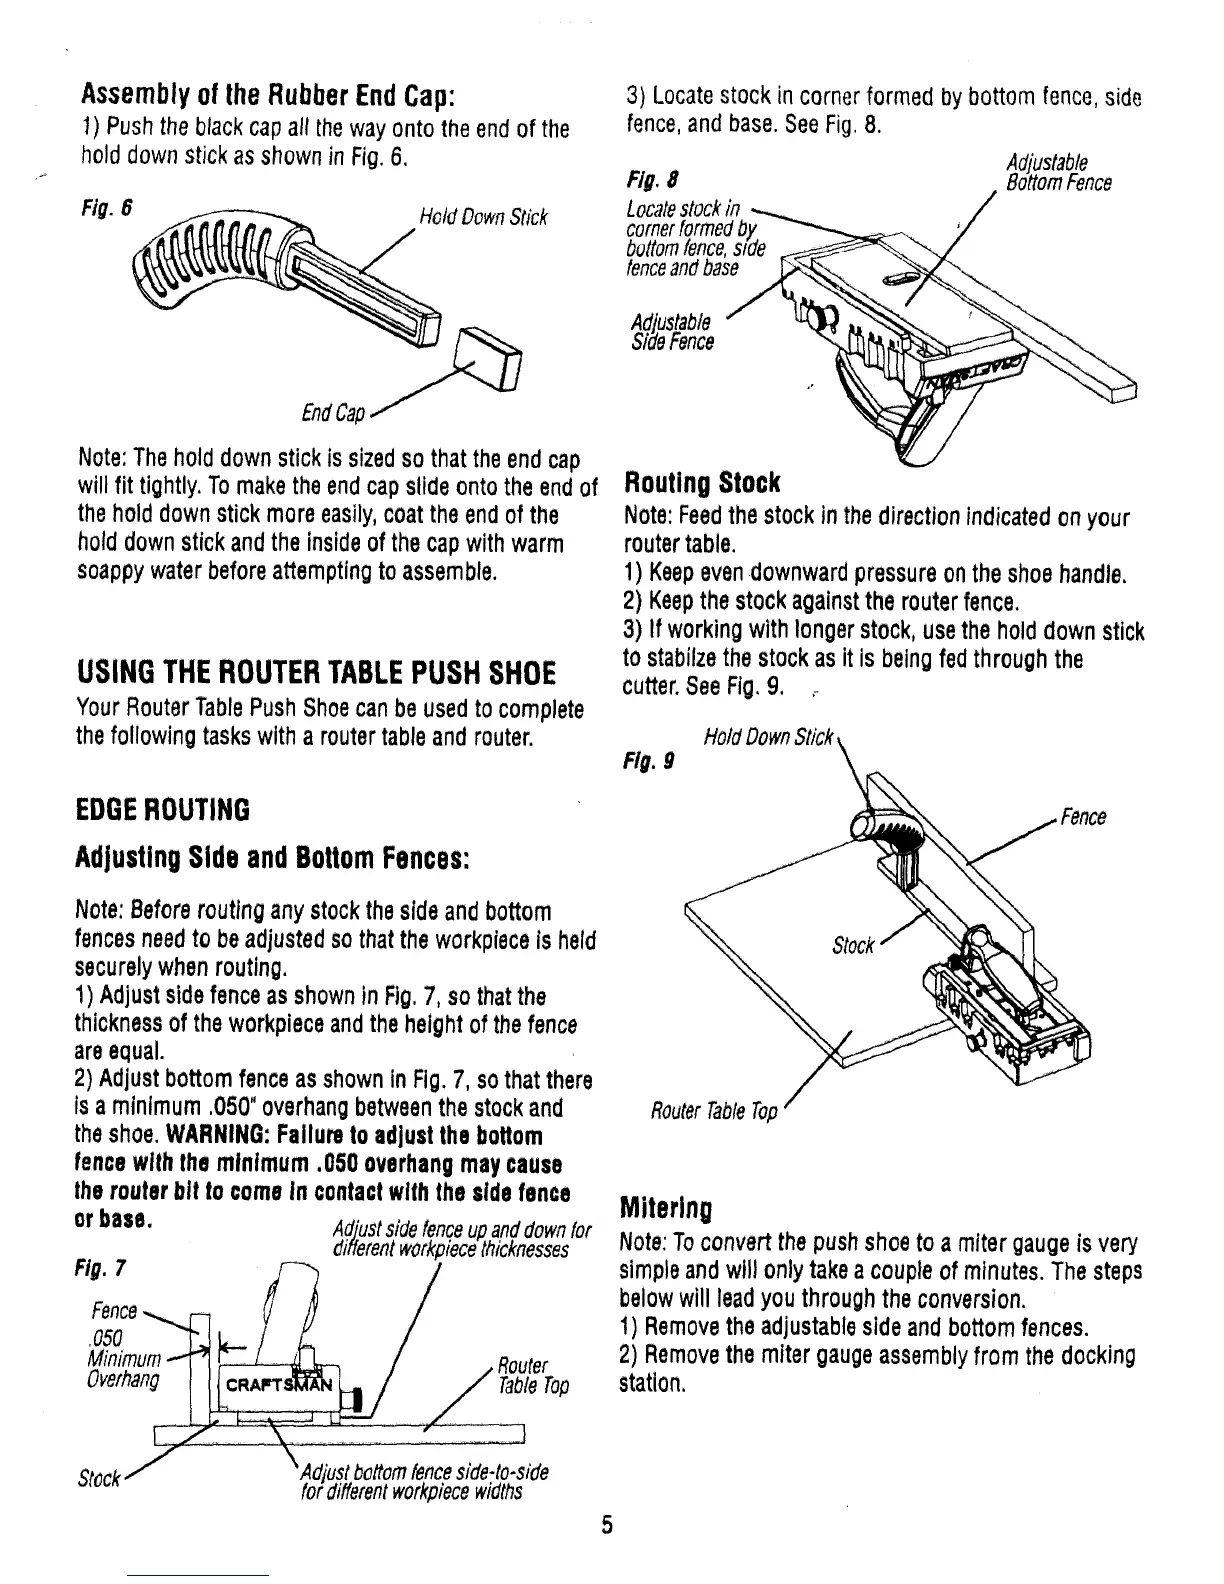
Assemblyofthe RubberEndCap:
1) Push the blackcap air thewayonto the endof the
hold down stick as shown in Fig.6,
Fig. 6 Hold DownStick
EndCaa
Note:The hold down stick is sizedso that theend cap
will fit tightly, To makethe endcap slide onto the endof
the hold down stick more easily,coat the endof the
hold down stick andthe inside of the cap with warm
soappy water beforeattempting to assemble.
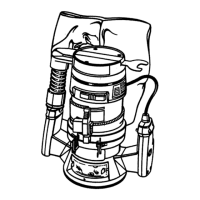
USINGTHEROUTERTABLEPUSHSHOE
Your RouterTablePush Shoecan beused to complete
the following tasks with a router table and router.
EDGEROUTING
3) Locatestock in corner formed by bottom fence,side
fence, and base.SeeFig,8.
Adjustab_le
Fig.8 Bottomfence
Locatestockin
comerformedbj_ '
bottomfence,s(de
fenceandbase_._
Adjust.able/ _
SidePence "<_
RoutingStock
Note:Feedthe stockin thedirectionindicated on your
routertable.
1) Keepevendownward pressureonthe shoehandle.
2) Keepthestockagainstthe routerfence.
3) If workingwith longerstock,usethehold down stick
to stabilzethe stockasit isbeingfed throughthe
cutter.SeeFig.9, ;
Fig. 9 HoldDownStick_
AdjustingSideandBottomFences:
Note: Beforeroutingany stockthesideand bottom
fencesneedto beadjusted sothat the workplece is held
securelywhen routing.
1) Adjustsidefence as shownin Fig.7, so thatthe
thickness of the workpiece andthe height of the fence
areequal.
2) Adjustbottomfence asshownin Fig.7, sothatthere
isa minimum.050"overhangbetweenthestockand
theshoe.WARNING:Failureto adjustthe bottom
fence with the minimum ,050 overhangmay cause
therouterbit to comeIn contactwith the side fence
or base. Adj.ustside fenceup and down for
differentworkpiecethicknesses
Fig. 7
Fence
.050
Minimum
Overhang
RouterTableTop
Mitering
Note:Toconvert thepush shoeto a miter gaugeis very
simpleandwill only take a couple of minutes. The steps
belowwill leadyou through the conversion.
1) Removethe adjustablesideandbottomfences.
2) Removethe miter gaugeassemblyfrom the docking
station,
Stock
differentworkpiecewidths
5
 Loading...