Isys
®
8.4” WiFi Touch Screen Crestron TPMC-8X-GA
3. Select the Network Authentication and Data encryption from the dropdown
lists.
4. Enter and confirm the Network key.
5. Touch OK.
After the wireless network has been configured, either by the wizard or manually, the
network name will appear in the Preferred networks box in the “Wireless Network
Connection Properties” window (refer to illustration on page 29). To delete a
network from the list, select the network, then touch Remove.
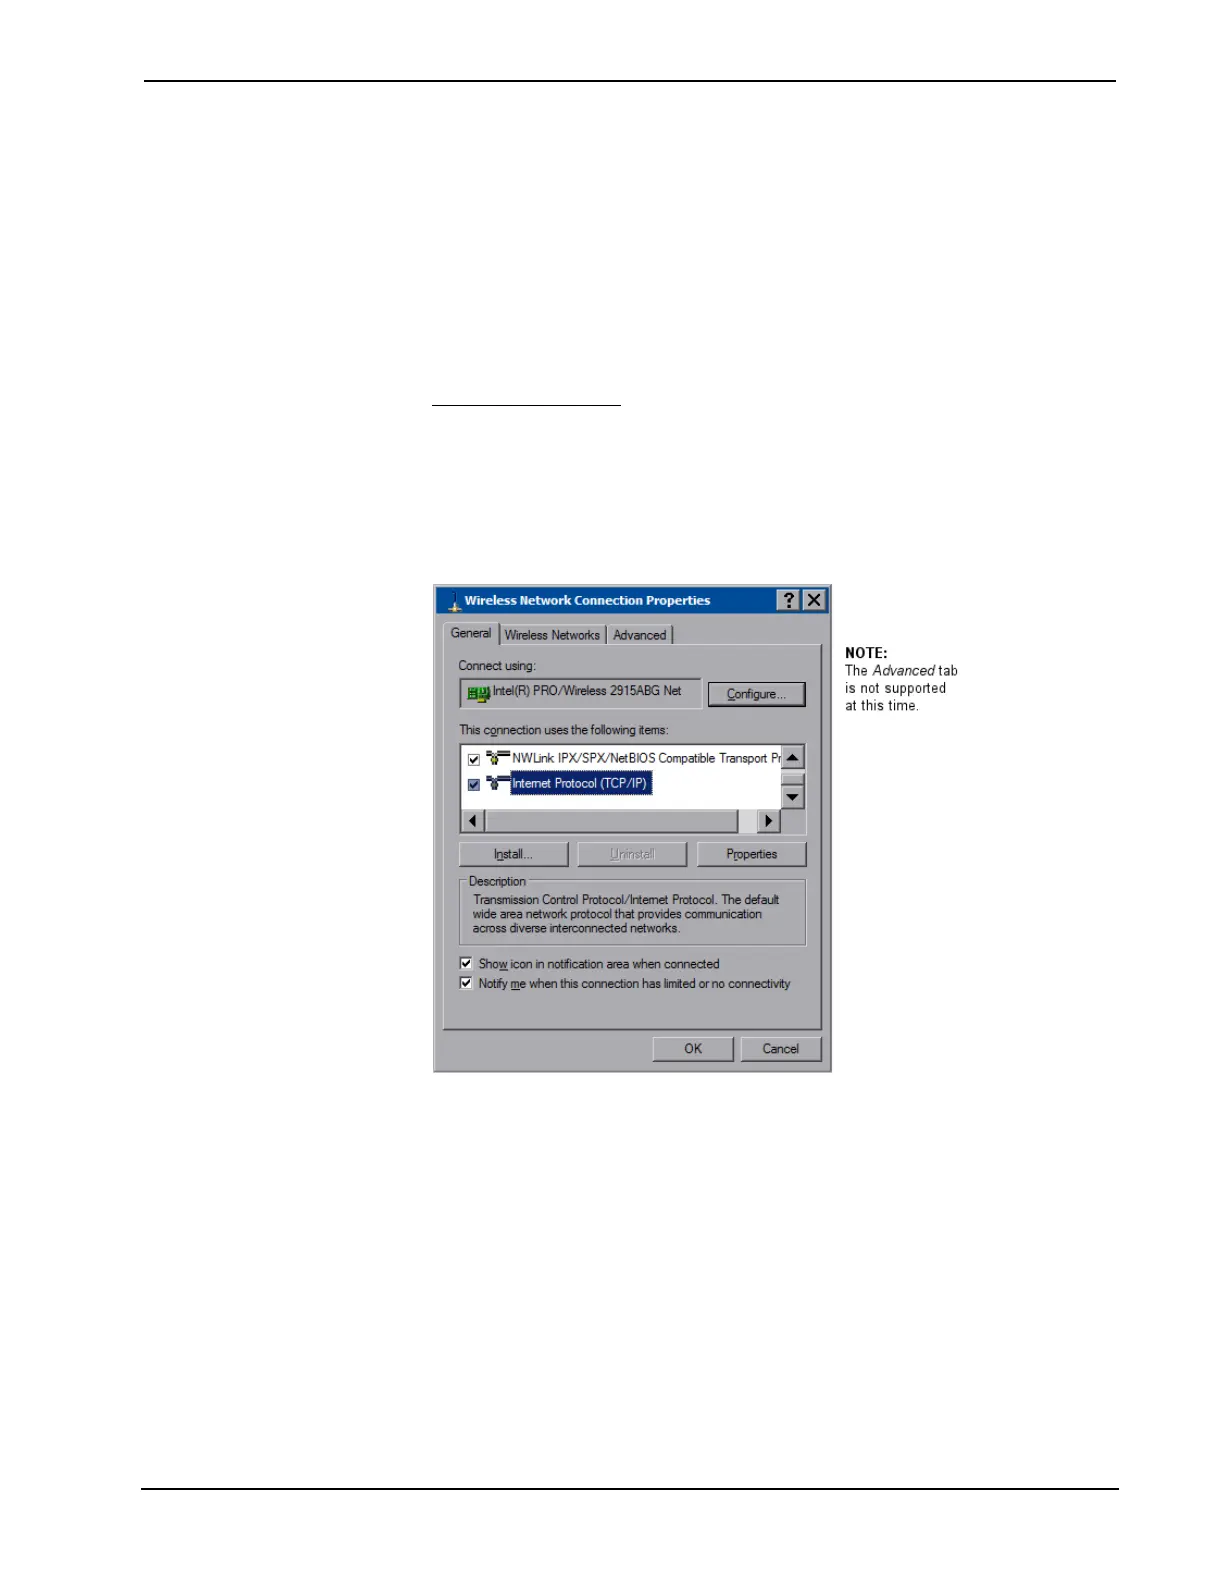
Configure IP Settings
The procedure for configuring IP settings for both wired and wireless networks is the
same. The TPMC-8X-GA is configured for DHCP by default. To establish static
processing or to switch between DHCP and static IP, use the General tab of the
“Wireless Network Connection Properties” window (refer to illustration below),
select Internet Protocol (TCP/IP) and touch Properties.
“Wireless Network Connection Properties” Window (General)
The “Internet Protocol (TCP/IP) Properties” window will open.
32 • Isys
®
8.4” WiFi Touch Screen: TPMC-8X-GA Operations Guide – DOC. 7078C

 Loading...