Do you have a question about the Cricut Expression Provo Craft and is the answer not in the manual?
Legal definitions of terms used in the agreement.
Grants a non-exclusive, limited license to use the Cricut™ system.
Outlines limitations on modifying, copying, or distributing software and hardware.
Details conditions for permanently transferring rights under the agreement.
Specifies conditions under which the agreement will terminate.
Covers compliance with U.S. export control laws for software and data.
Acknowledges Provo Craft's ownership of CRICUT™ trademarks.
States that Utah law governs the agreement.
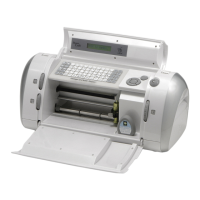
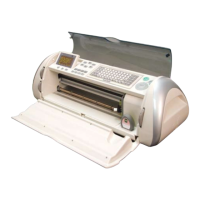
Lists the main cutting machine as an item in the box.
Identifies the user manual included in the packaging.
Lists the specific cartridge and related materials included.
Mentions the cutting blade assembly as a component.
Lists the cutting mat provided with the machine.
Includes the Cricut™ Quick Start Guide for initial setup.
Lists the power adapter necessary for machine operation.
Describes the Liquid Crystal Display screen for information output.
Details the arrangement of keys on the machine's keypad.
Explains the dial used to control cutting speed.
Explains the dial used to control cutting pressure.
Identifies key operational buttons like STOP, CUT, and ON.
Locates the slot for inserting cartridges.
Describes the dial for adjusting the size of cuts.
Steps to prepare the machine before blade installation, including pressing the ON button.
Instructions for safely removing the blade assembly from its packaging.
Guide on fitting the blade assembly into the machine's cradle.
Details on tightening the thumbscrew to fix the blade assembly in place.
Recommendations for placing the Cricut™ machine safely and effectively.
Steps to connect and turn on the Cricut™ machine for the first time.
Steps to remove protective film and align paper on the cutting mat.
Instructions for inserting the loaded cutting mat into the Cricut™ machine.
How to select designs to be cut from the LCD screen.
Operation of the STOP button to halt cutting processes.
Using directional buttons to move the cutting blade.
Using the Shift and Shift Lock keys for accessing features.
Using Space and Back Space keys for text input and correction.
Clears the LCD screen contents.
Returns all settings to factory defaults.
Re-inserts the last selected cut onto the screen.
Toggles the machine's audible feedback on or off.
Controls for loading and ejecting the cutting mat.
Adjusting the height of cuts using the Size Dial.
Pressing the CUT button to start the cutting process.
Instructions for gently removing finished cuts from the cutting mat.
Introduction to special feature keys found on cartridges.
Applies a proportionally larger shadow to selected images.
Creates a solid, shadowed version of the selected image.
Provides a solid, filled-in version of a base shape.
Details on buttons like Blade Navigation and Set Paper Size.
Adjusts the machine for smaller paper sizes than the standard 6x12.
Resumes cutting from the last stopped point.
Optimizes paper usage by arranging cuts efficiently.
Explains how characters are sized based on Key Height or dial settings.
Sizing based on the tallest character in a font set.
Sizes cuts directly according to the Size Dial setting.
Guidance on adjusting settings for different paper types.
Steps to adjust the blade depth for optimal cutting.
Fine-tuning the cutting speed for various materials.
Adjusting the cutting pressure for different paper types.
Information on how long the cutting blade is expected to last.
Detailed instructions for replacing a dull or worn cutting blade.
Tips for maintaining the cutting mat for longevity.
Recommended methods for cleaning the exterior of the machine.
Answers to common user queries about the Cricut™ machine.
Solutions for common problems encountered during operation.
| Brand | Cricut Expression |
|---|---|
| Model | Provo Craft |
| Category | Cutter |
| Language | English |