Advanced Keys and Buttons
Blade Navigation Buttons are the four directional buttons marked
with arrows and arranged around the CUT button. They allow you
to move the cutting head up, down, left, or right so you can easily
position the cutting head exactly where you want to start a cut.
Use the
Set P
aper Size
key when you are using a paper size smaller than
6" x 12" (15.2 cm x 30.5 cm). Place the paper on the Cutting Mat, aligning
it in the lower LEF
T corner of the mat as indicated. Once the paper has
been placed on the mat, insert the mat arrow first into the machine, hold
-
ing it firmly between the roller bar and the deck. Then press
Load P
aper
.
Move the cutting blade to the upper RIGHT corner of the paper using the
Blade Navigation Buttons, and then push the Set P
aper Size
key
. The size
of your paper will appear on the LCD screen. Y
ou can now begin entering
your project information.
TIP: Because the maximum cut height is 5.5 inches, and because the Shadow and
Shadow Blackout Features are proportionately larger than the original character, these
Features don’t always work when the Size Dial is set at 5.5 inches. A warning on the LCD
screen will appear if you try to cut a character that will not fit on the paper.
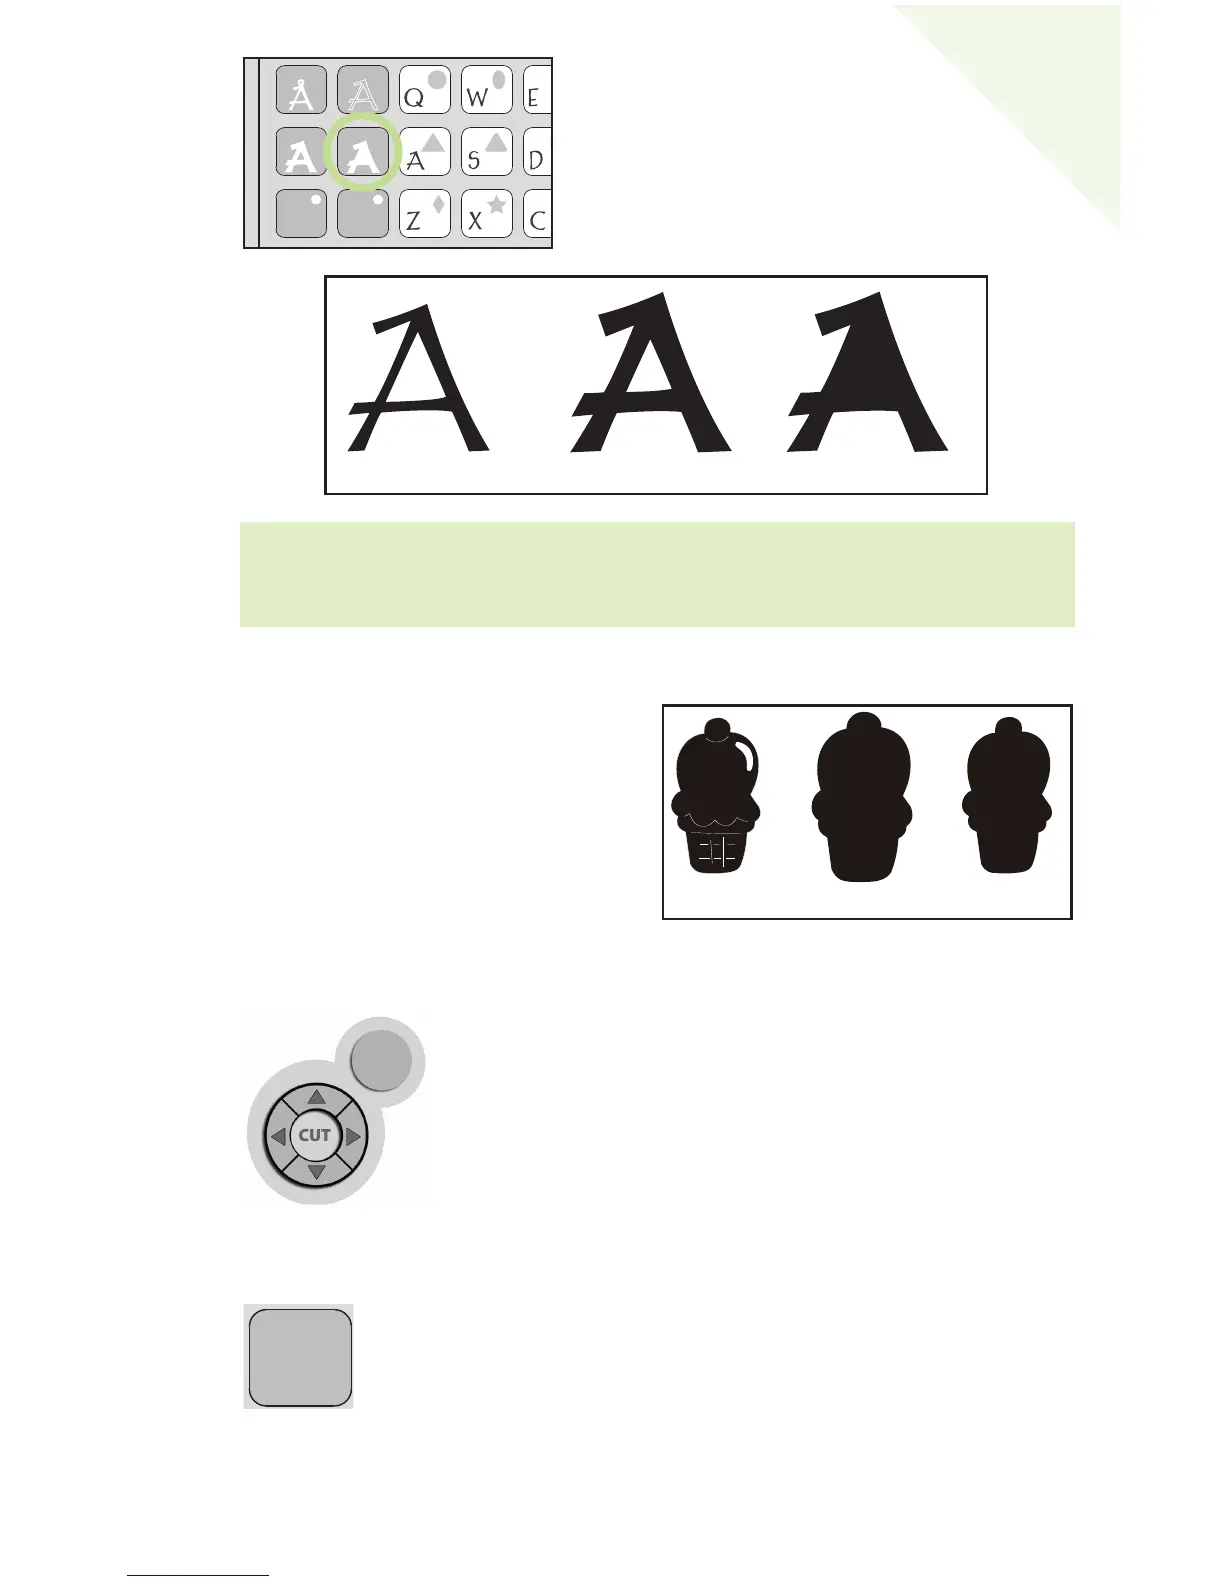
Shadow Blackout Feature
This is the solid version of the Shadow
Feature. When sizing a Shadow Blackout to
fit a letter, shape, or phrase, use the same dial
size that was selected on the base image or orig-
inal letter. Example: If you’ve cut a 2-inch “A” and
you now want a Shadow Blackout of it, keep the Size
Dial set at 2 inches.
Base Image
Shadow Shadow Blackout
STOP
Blackout Feature
The Blackout Feature (not included in the
George and Basic Shapes™ but found in
most shapes sets) is the solid version of
the base shape. Images from the
Doodlecharms cartridge are shown here.
Base Shape
Shadow Blackout
13
E
N
GL
ISH