9
CroozerCargo14-ENG-2-14
Initial Assembly and Unfolding the Croozer Cargo
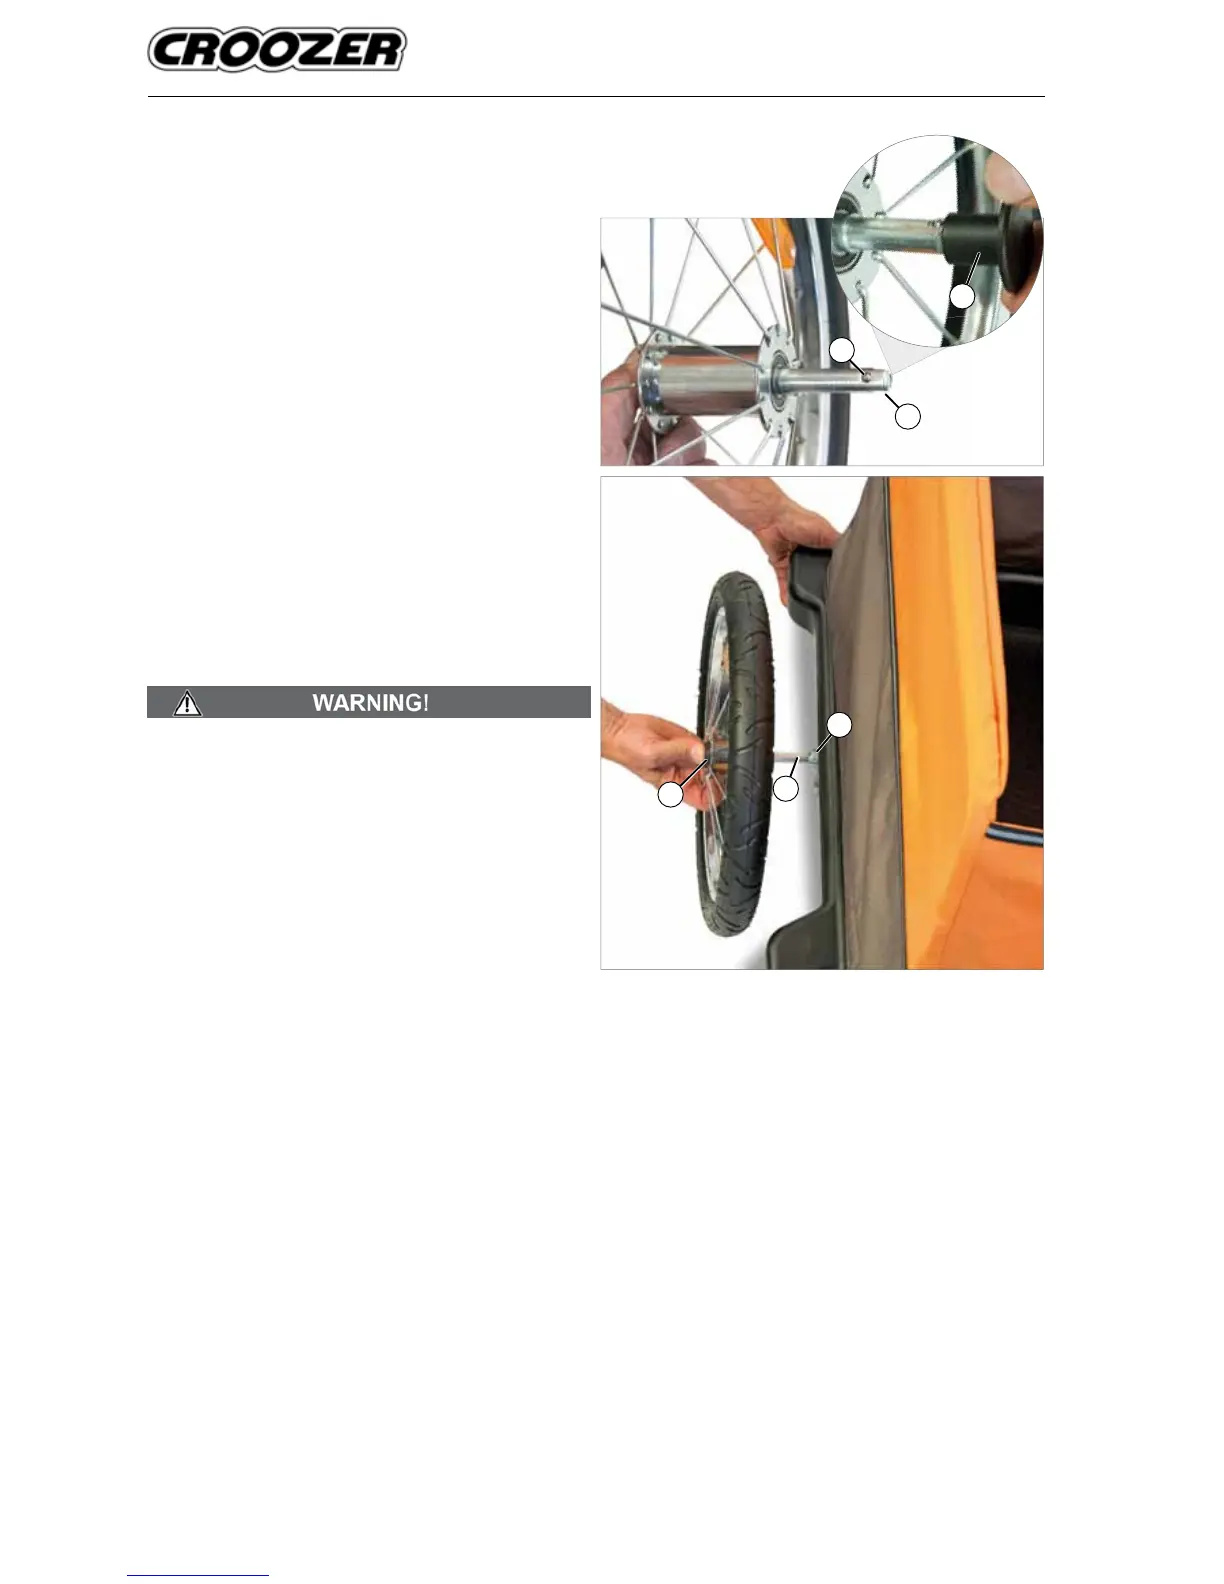
Attaching and removing the wheels
The wheels of the Croozer Cargo are equipped with push-
button axles. By pressing the dust cap (1) on the wheel
hub, the retaining balls (2) will retract within the axle to
permit the attachment or removal of the wheel. The wheels
cannot be attached or removed unless the dust cap is
pressed in.
1. Remove the protective caps (3) from the wheel axles.
It is advisable to keep the protective caps for future
use, e.g. when transporting the Croozer Cargo.
2. Use one hand to lift up the back of the Croozer Cargo.
3. Press the dust cap (1) of the wheel hub with the mark-
ing “PUSH”.
4. Insert the wheel axle (4) into the axle receiver (5) of
the Croozer Cargo as far as it will go and release the
dust cap.
5. Check whether the wheel is locked securely into the
axle receiver by pulling rmly on the wheel without
pressing the dust cap. It should not be possible to
remove the wheel unless the dust cap is pressed.
6. Repeat steps 2-5 to attach the second wheel.
Wheels that have not been securely attached can fall
off when riding, resulting in accidents with serious injury
or death. After you have attached the wheels, it is vitally
important that you check whether the axles are securely
locked into the axle receivers by firmly pulling on the
wheels. It should not be possible to remove the wheels
without pressing on the dust cap.
7. To remove the wheels, follow these instructions in the
reverse order. Press the dust caps (1) and pull the
wheel axles out of the receivers.
1
4
5
2
3
2