Form I-RA/D 350/500, Page 32
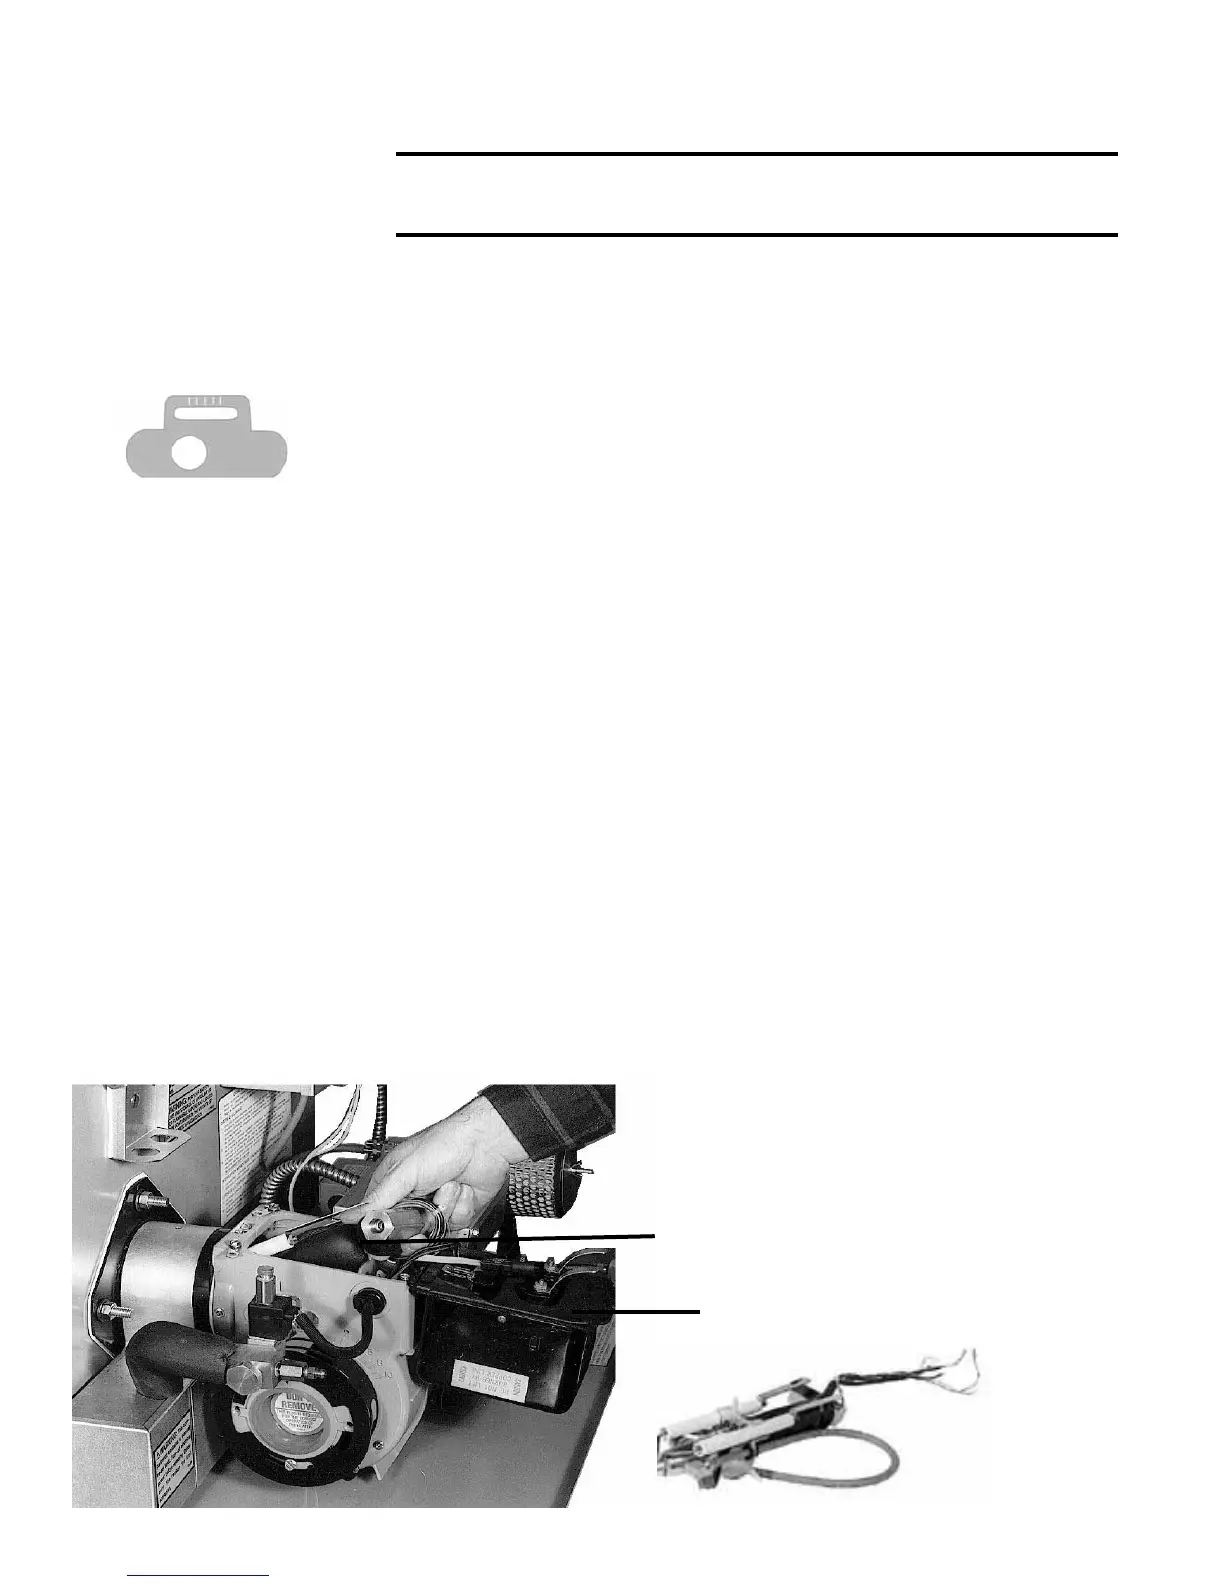
Removing Fuel Line Assembly to Service Controls and Spark
Electrodes (Alternate method for servicing nozzle)
Escutcheon Plate
WARNING: Turn off the electric power before removing
the fuel line assembly.
NOTE: In order to service the fuel line assembly controls and spark
electrodes, it is necessary to remove the fuel line assembly.
Removing the Fuel Line Assembly
1. Loosen the connection nut one or two turns.
2. Disconnect the fuel connection assembly by loosening the 5/16”
inverted are tting. Do not change the position of the escutcheon
plate.
• Pull the fuel connection assembly clear of the burner housing.
3. Loosen the two transformer hold-down screws.
• Lift the hinged transformer to its open position.
4. There are eight wires in the fuel line assembly wire bundle.
• Mark and disconnect the wires from their terminals in the burner
junction box.
5. Disconnect the nozzle air hose from the tting at the air
compressor.
• Pull the hose through the opening “into” the burner housing.
6. The fuel line assembly may now be removed by either
• Pulling the assembly up slightly and toward the rear of the burner
housing.
• OR removing the burner and end cone and pulling straight out of
the blast tube. See page 31 for details.
Servicing/Replacing Spark Electrodes
To service or replace the Spark Electrodes
Remove any carbon formation on the spark electrodes.
• Check the electrodes for deterioration and the insulators for
cracks or damage.
Transformer in the “open” position
Fuel Connection
Fuel Line
Assembly
Removed
• Replace the electrode assemblies with
kit P/N 269820 if any damage or dete-
rioration exists.
• After service or replacement, check
the position of the electrodes.
• Adjust the electrode location precisely.