5
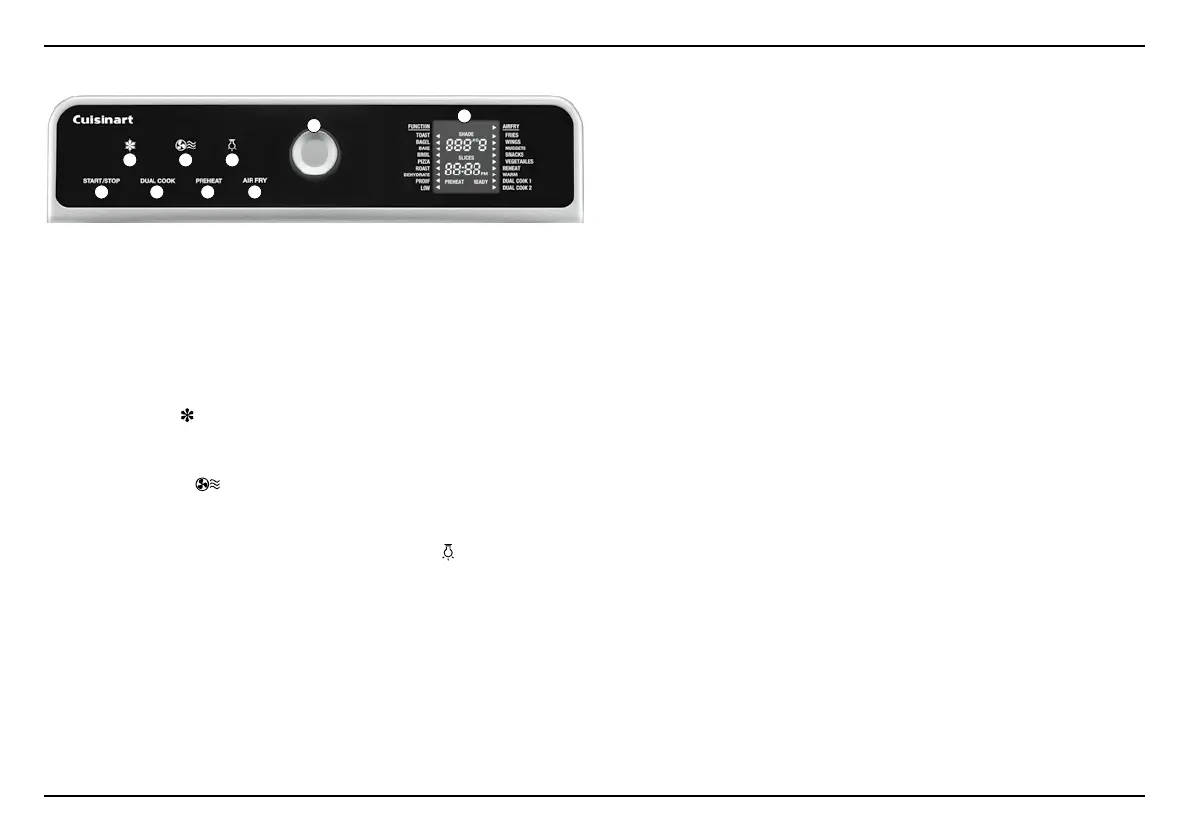
1. Selector Dial
Rotate Selector Dial to scroll through options on the LED screen.
Press center of dial to confirm selections.
2. Digital Display Screen
Displays cooking function, Toast Shade and Slices, Temperature,
Cooking/Countdown Timer and Clock Time.
3. Defrost
For use with Toast, Bagel, Pizza, and certain AirFry presets. When activated,
the Defrost icon
will illuminate to full brightness.
4. Fan Speed
To change the fan speed from Low to High, press the Fan Speed Button.
When the fan icon
is illuminated to full brightness, fan speed is set
to high.
5. Light
To turn on/off the interior oven light, press the light icon
. Interior light will
turn off automatically after 20 seconds.
6. Start/Stop
Use to start and stop cooking. Start/Stop will illuminate when cooking.
7. Dual Cook
Use to program two-stage cooking operation.
8. Preheat
Use to preheat your oven before cooking.
9. AirFry
Use to select manual AirFry function or AirFry presets.
BEFORE FIRST USE
1. Place your Digital AirFryer Toaster Oven on a flat, level surface.
2. Move oven 2 to 4 inches away from the wall or from any objects on
the countertop. Do not use on heat-sensitive surfaces.
NOTE: OBJECTS SHOULD NOT BE STORED ON THE TOP OF THE
OVEN. IF THEY ARE, REMOVE ALL OBJECTS BEFORE YOU TURN ON
YOUR OVEN. THE EXTERIOR WALLS GET VERY HOT WHEN IN USE.
KEEP OUT OF REACH OF CHILDREN.
3. Check that the Crumb Tray is in place and that there is nothing in the oven.
4. Plug power cord into the wall outlet.
SETTING THE CLOCK
Clock can be set when unit is first plugged in. Alternatively, the clock can be set
only when the oven is not cooking and the time is displayed on the screen.
To set the clock:
1. If Digital Display is not displaying the clock, scroll through the function menu
until clock is displayed.
2. Press and hold the Selector Dial for 3 seconds.
3. The clock hour will flash; turn the Selector Dial to set hour, then press
Selector Dial to confirm.
4. The clock minutes will flash; turn the Selector Dial to set minutes, then press
Selector Dial to confirm.
5. PM will flash; turn the Selector Dial to select AM or PM. Be sure the
PM indicator is on if a PM time is desired. Press Selector Dial to confirm.
6. Turn the Selector Dial to exit clock setting.
NOTE: When setting clock, if nothing is pressed after 10 seconds, clock will
automatically set to currently displayed time.
GETTING TO KNOW YOUR CONTROL PANEL
4
6
2
1
3
5
7 8 9