14
3. USE
A. Before using for the rst time
t 6OQBDLUIFVOJU
t 3FNPWFQSPUFDUJWFCPYFTBOECBHT
t $BSFGVMMZDMFBOUIFKBSGPSNPSFJOGPSNBUJPOSFGFSUP
the section ‘Cleaning and Maintenance’).
t &OTVSFUIBUBMMQBSUTBOEJOQBSUJDVMBSUIFDPOOFD-
tors located under the jar) are perfectly dry before
assembling the unit.
t "TTFNCMFUIFVOJUGPSNPSFJOGPSNBUJPOSFGFSUP
section 3B).
t 'JMMUIFVOJUXJUI-XBUFSBOEIFBUGPSNJOVUFT
At this stage the unit may smoke a little and release
a slight odour, this is normal.
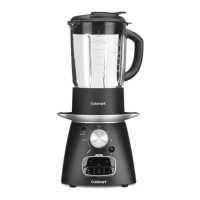
B. Assembly
t 1MBDFUIFMJEPOUIFKBSBOEQSFTTJUEPXOöSNMZUPöU
it properly onto the jar.
t 1MBDFUIFNFBTVSJOHDVQJOUPUIFPQFOJOHJOUIFMJE
t .BLFTVSFUIFMJEBOEUIFNFBTVSJOHDVQBSFBMXBZT
in place before starting the unit.
WARNING: Steam will escape around the measu-
ring cup when the unit is heating up; this is normal,
but handle the cup with care.
t 1PTJUJPOUIFKBSPOUIFNPUPSCBTF5PEPTPIPMEJU
by its handle and line up the arrow on the jar with
the arrow on the motor base. If you have diculty,
turn the motor shaft slightly and repeat.
N.B. Take care when placing the jar on the motor
base. If it is improperly positioned, the interlock
switches may be damaged and this could prevent
the unit from running.
C. Dismantling
t 4XJUDIUIFVOJUPòBOEVOQMVHGSPNUIFNBJOTPVU-
let.
t -JGUUIFHMBTTKBSVQBOEBXBZGSPNUIFNPUPSCBTF
Do not turn the jar.
WARNING: if the jar contains hot liquid, pour it out
carefully.
t 3FNPWFUIFMJEGSPNUIFHMBTTKBS5PEPUIJTIPME
the jar rmly by the handle with one hand and
grasp the lip of the lid with your other hand to pull
it o.
t 5IFOMJGUUIFNFBTVSJOHDVQGSPNUIFMJE
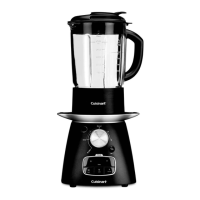
D. Using the product
switch
t 1MVHUIFVOJUJOUPUIFBNBJOTPVUMFU5IFPOPò
switch will begin to ash. This mechanism prevents
accidental activation of the functions.
t 1SFTTUIJTCVUUPOBOEUIFMJHIUXJMMTUPQøBTIJOH5IF
unit is now in the ‘stand-by’ mode and is ready to
use.
t :PVDBOOPXVTFUIFCMFOEGVODUJPOPSTFUCPUIUIF
timer and the cooking temperature.
N.B.: If you wish to reset the settings, press the on/
PòTXJUDIBHBJO5IFCVUUPOXJMMTUBSUøBTIJOH
again. Any setting that you selected will be cancel-
led.
N.B.:To switch this ashing button o, remove the
plug from the unit.
Setting the timer
t 5IFUJNFSDBOCFTFUGPSVQUPNJOVUFT