Conguring strap length and printing | JetScan
®
MPX 8200 strapping and corner module | 13
b. Set the Bin Limit to 10, 20 or 30 straps. Press the button to select the limit. The
limit can be different for each strapping module.
c. Set the Strap Face to Up (portrait side up in strapper) or Down (portrait side
down in strapper). Repeatedly press the button and stop on the desired facing.
d. If desired, press Apply to All Strappers to use the selected settings on all
congured strapping modules.
5. Press Save to save all changes. A successful save conrmation screen appears. To
return to the main-processing screen, do the following:
a. Press OK to prompt the Configure Sort Mode screen.
b. Press OK to prompt the SelectSortModeToCongure screen.
c. Press OK to prompt the Sort Setup tab screen.
d. Press the ExitSetup tab to prompt the Menu tab screen.
e. Press the Processing tab to prompt the main-processing screen.
Toprintacustommessage,date,timeandoperatorIDonstrappingpaper:
1. Press the Menu tab on the main-processing screen.
2. Press Setup on the Menu tab screen.
3. Press ProcessingTypeSetup to prompt the Settings screen below.
The Machine Setup and Backup/Restore tabs are for use only by trained
Cummins Allison service technicians.
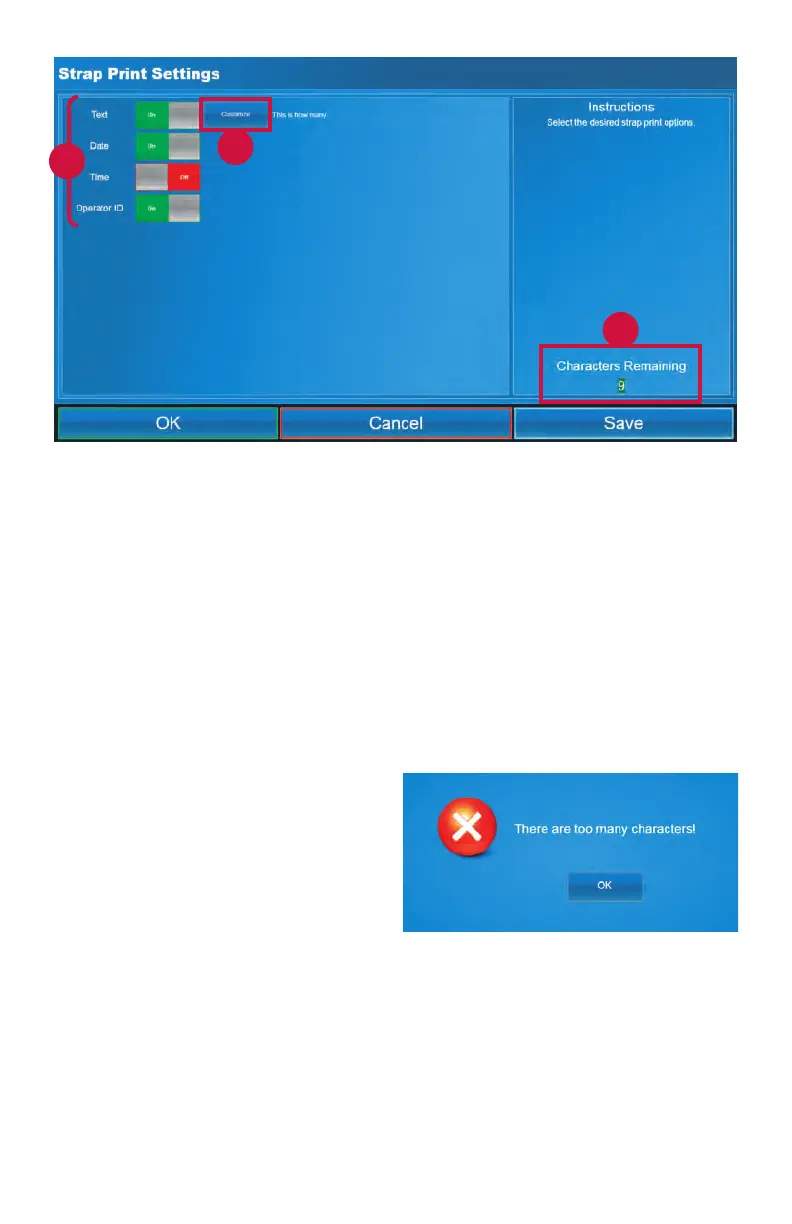
4. Press Strap Print to prompt the Strap Print Settings screen.
4
3
6
8
5
5. Press On or Off to enable or disable printing of the following information on
strapping paper: Text (custom message), Date, Time and Operator ID. Operator ID
refers to the user who is signed onto the system during the strapping operation.
6. Press Customize to prompt a keyboard screen and type a custom alpha-numeric
message.
When complete, do one of the following:
•PressOK to save the custom message.
•PressCancel to delete and eliminate the custom message.
The Strap Print Settings screen appears.
7. The maximum length for all elds
combined – Text (custom message),
Date, Time and Operator ID – is 40
characters.
When the 40-character limit is
exceeded, the screen at right appears.
 Loading...