SENIOR ELECTROL
®
INSTRUCTIONS
3
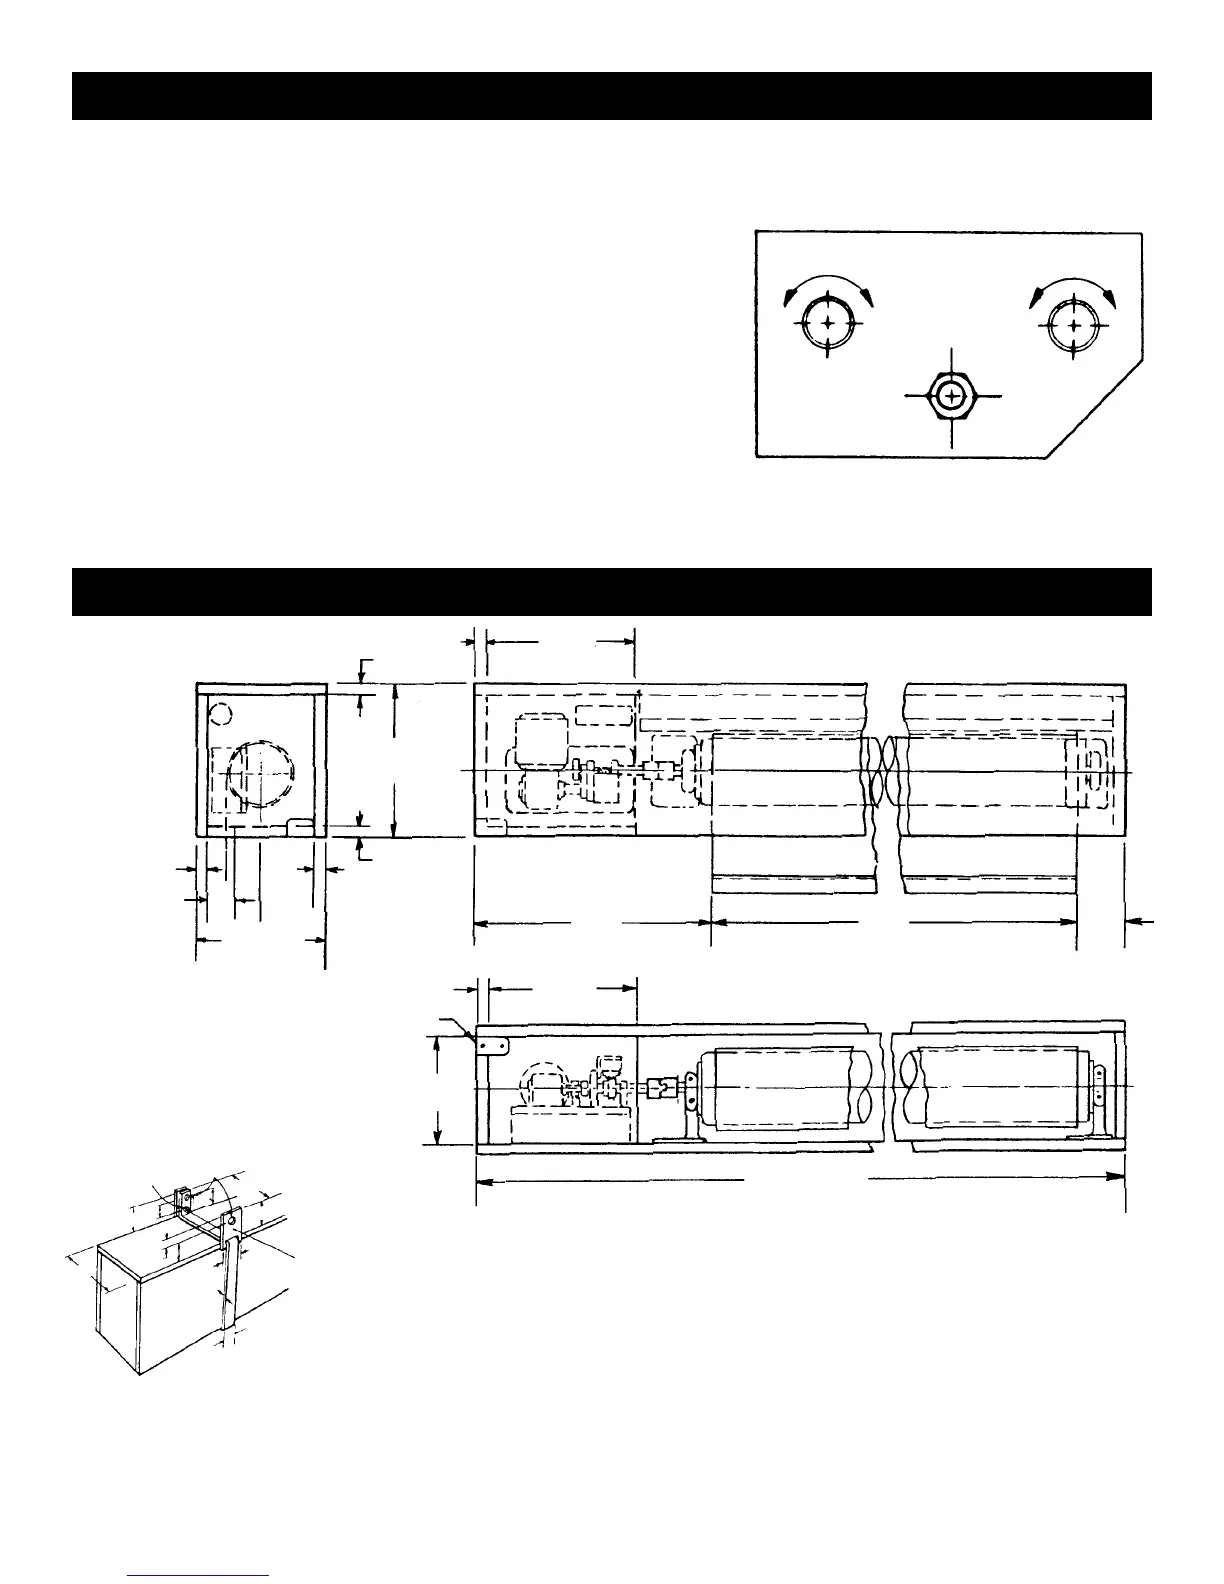
SIDE VIEW
END VIEW
BOTTOM VIEW
OUTLET
BOX
SUGGESTED
SLOT WIDTH
PICTURE SURFACE
WALL OR CEILING TYPE HANGER
12
3
⁄16
12
3
⁄16
3
⁄4
3
⁄4
3
⁄4
3
⁄4
3
⁄4
11
3
⁄8 ±
1
⁄16
18
5
⁄8
2
9
1
⁄2 ±
1
⁄4
“
B“
3
⁄4
HINGED ACCESS PANEL IN BOTTOM (FOR ALL WIRING & ADJUSTMENTS)
8 ±
1
⁄4
“
A“±
1
⁄4
LENGTH A=FABRIC WIDTH “B“
PLUS 23" ALL SIZES
NOTE: INSTALL THIS BRACKET FOR
CEILING TYPE HANGER ONLY
10" OVERALL WIDTH OF BRACKET
3
⁄4" DIAMETER
HOLES
3
⁄8" NUT & BOLT
2"
2
7
⁄8"
2
7
⁄8"
2"
4"
3
3
⁄4"
3
⁄16"
7
⁄8"
9
1
⁄2"
3
3
⁄4"
4
3
⁄8
FIG. 3
NOTE: Adjustments should not be necessary to screen in the rolled up or closed position. If necessary, use the following
procedures:
PICTURE SURFACE ROLLS TOO FAR INTO CASE
1. Lower picture surface approximately two feet with operating switch.
2. Place operating switch in “off” position.
3. Turn the “up” limit knob one-quarter turn clockwise.
4. Press operating switch to raise picture surface. Repeat operation if
picture surface continues to roll too far into case.
PICTURE SURFACE DOES NOT ROLL COMPLETELY INTO CASE
1. Place operating switch in “up” position.
2. Turn the “up” limit knob one-quarter turn counterclockwise.
3. Test by lowering picture surface approximately two feet with operating switch, then raise picture. Repeat operation
if desired position is not reached.
PICTURE SURFACE ROLLED UP OR CLOSED POSITION
RAISE LOWER
RAISE LOWER
DOWN
UP