Page 9-
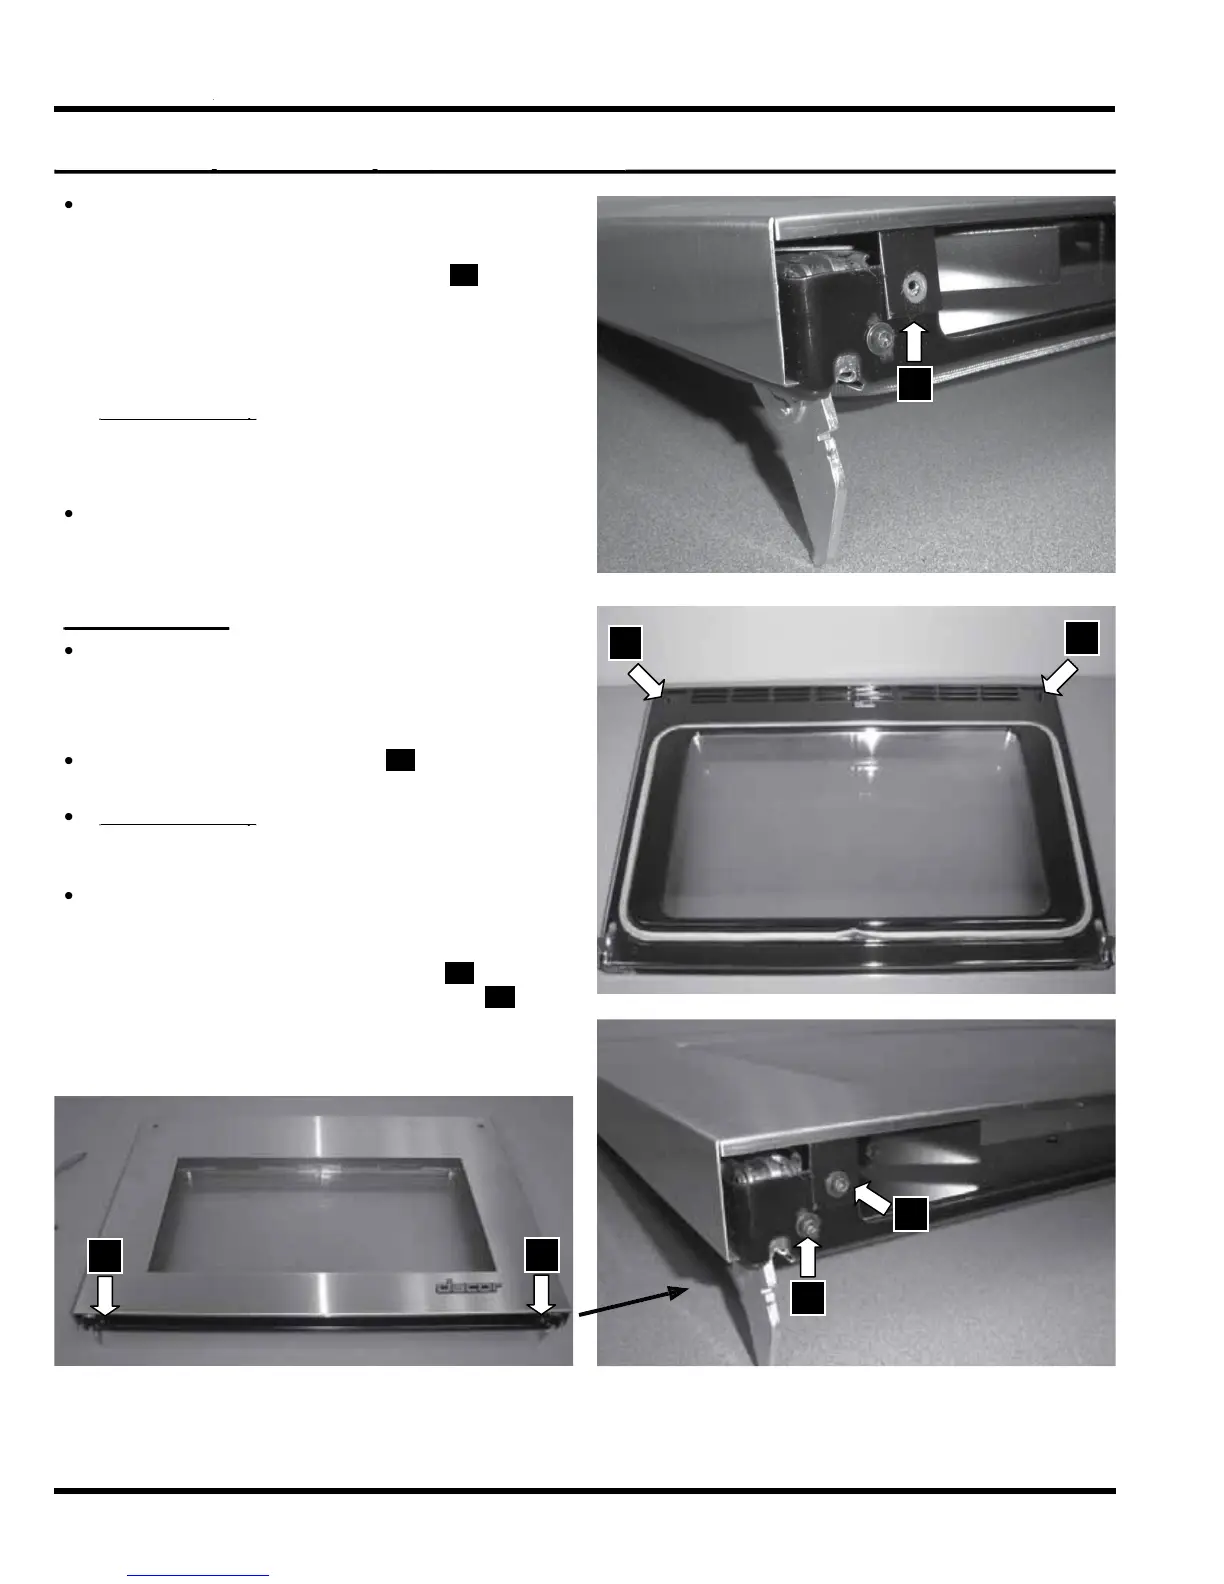
When putting the
ront door glass assembly
back in
lace, be careful not to knock loose
the door spacers which are
lued to the top
r
r
. Also, make sure the tabs E
n the
bottom rest on the outside of the door liner
einst
ll the screws
n the
tt
m
f the
oor, then grasp the top o
the door with both
an
s an
turn it
r.
: Hold the top end of the doo
p with one hand. Position the handle unde
t
e
oor an
ower t
e
oor on to
. Re
ace
t
e
an
e screws. Do not
r-ti
ten.
einst
ll the
en
r. See the
r
Insta
ation
ection on page 8-2
•
•
em
e the
n
r. See the D
r Rem
v
l
section on page 8-1.
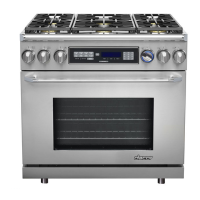
ay the door, handle down, on a flat, padded
sur
ace with the door gasket
acing up.
emo
e t
e two
2
screws B in t
e to
rners
f the
r.
:
rasp the top end o
the
oor wit
one
an
an
u
u
. Pu
t
e
oo
handle out from underneath
Grasp the top o
the door with
t
h
n
s
nd turn it o
er on the
added sur
ace so that
the door
asket faces up
em
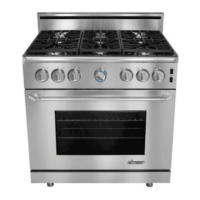
e the two (2) inner screws C
n the
bottom o
the door. The outer screws D
the bottom of the door are part of the hin
e
ssembly. Do not rem
them
•
•
E
B
B
D
C
C
C
Continued..