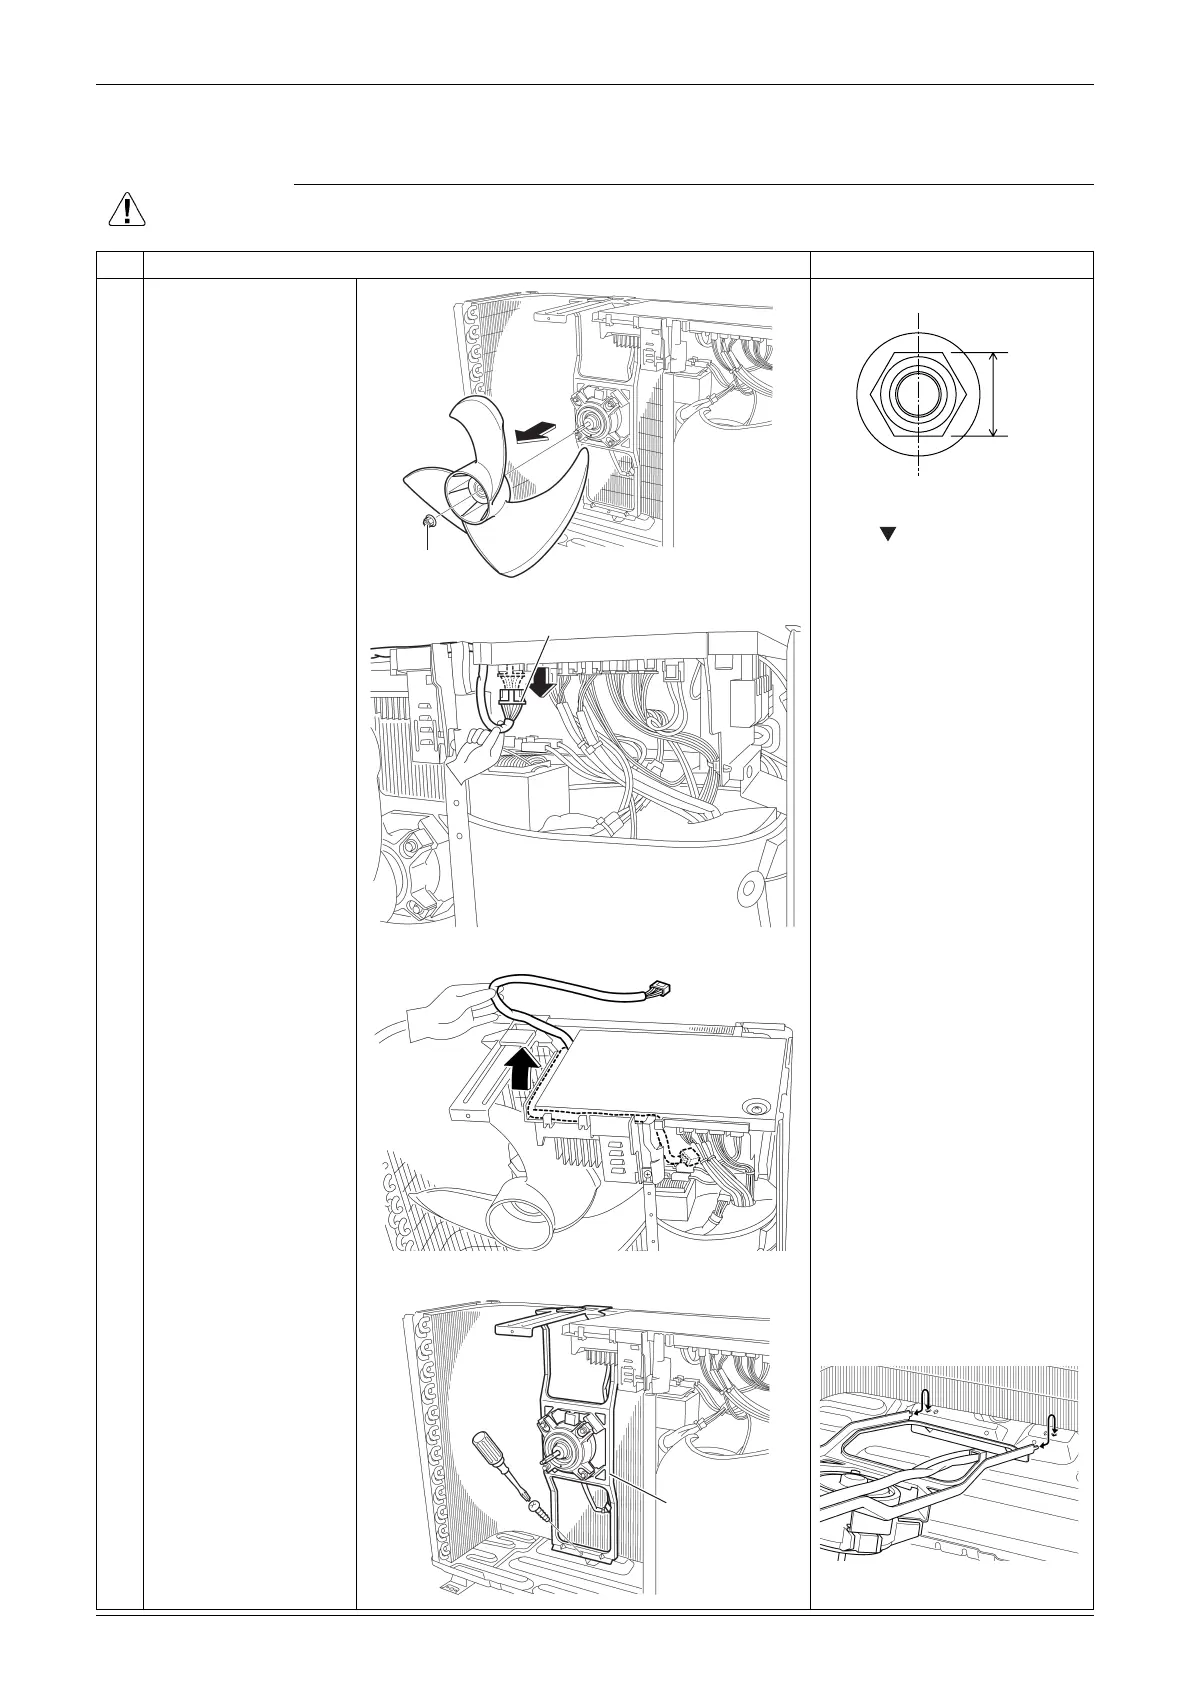
Si121295 Outdoor Fan / Fan Motor
Removal Procedure 3
2. Outdoor Fan / Fan Motor
Warning
Be sure to wait for 10 minutes or more after turning off all power supplies before
disassembling work.
Step
Procedure Points
1
Remove the nut and
remove the outdoor fan.
Nut size: M6
When reassembling, align
the mark of the outdoor
fan with the D-cut section of
the motor shaft.
2
Disconnect the
connector [S70]. [S70]: fan motor
3
Release the fan motor
lead wire.
4
Remove the screw and
remove the fan motor
fixing frame.
When reassembling, fit the
lower 2 hooks into the
bottom frame.
(R18756)
Nut
10 mm
(R17216)
[S70]
(R7621)
(R7579)
(R7623)
Fan motor
fixing frame
(R18757)
 Loading...