EasyManua.ls Logo

Daikin EEV Series User Manual

Daikin EEV Series
28 pages
To Next Page IconTo Next Page
Page #1 background imageLoading...
Page #1 background image
Our continuing commitment to quality products may mean a change in specications without notice.
© 2015-2019
5151 San Felipe St., Suite 500, Houston, TX 77056
www.daikincomfort.com
DV**PEC / DV**FEC (EEV SERIES AIR HANDLERS)
IOD-4018J
11/2019
INSTALLATION INSTRUCTIONS
1 Important Safety Instructions ............................................................... 2
2 Shipping Inspection ...............................................................................3
2.1 Parts ........................................................................................................3
2.2 Handling ..................................................................................................3
3 Codes & Regulations ............................................................................. 3
4 Replacement Parts.................................................................................3
5 Pre-Installation Considerations ........................................................... 3
5.1 Preparation .............................................................................................. 3
5.2 System Matches ...................................................................................... 3
5.3 Interconnecting Tubing ............................................................................ 3
5.4 Clearances ..............................................................................................3
5.5 Horizontal Applications ............................................................................3
6 Installation Location ............................................................................. 4
6.1 Upow Installation ................................................................................... 4
6.2 Horizontal Left Installation ....................................................................... 4
6.3 Downow/Horizontal Right Installation .................................................... 4
7 Refrigerant Lines ................................................................................... 7
7.1 Tubing Size .............................................................................................. 7
7.2 Tubing Preparation .................................................................................. 7
7.3 Tubing Connections ................................................................................. 8
8 Condensate Drain Lines ........................................................................ 8
9 Ductwork.................................................................................................9
9.1 Return Ductwork ...................................................................................... 9
10 Return Air Filters ..................................................................................9
11 Electric Heat ......................................................................................... 9
12 Electrical and Control Wiring ............................................................ 11
12.1 Building Electrical Service Inspection .................................................. 11
12.2 Wire Sizing .......................................................................................... 11
12.3 Maximum Overcurrent Protection (MOP) ............................................ 11
12.4 Electrical Connections – Supply Voltage ............................................. 11
12.4.1 Air Handler Only (Non-Heat Kit Models) ........................................... 11
12.4.2 Air Handler - Non-Circuit Breaker Heat Kits ..................................... 11
12.4.3 Air Handler With Circuit Breaker Heat Kit ......................................... 11
13 Achieving 1.4% & 2% Low Leakage Rate ........................................ 12
14  Airow Trim ........................................................................................ 12
15 Miscellaneous Start-Up Checklist .................................................... 12
15.1 Auxiliary Alarm Switch .........................................................................13
15.2 Circulator Blower ................................................................................. 14
15.3 Motor Orientation ................................................................................. 14
15.4 Accessory Contacts ............................................................................. 14
16  Troubleshooting .................................................................................. 15
16.1 Electrostatic Discharge (ESD) Precautions ....................................... 15
16.2 Diagnostic Chart ................................................................................. 15
16.3 Fault Recall.........................................................................................15
17 Fully Communicating Daikin System ................................................ 16
17.1 Overview..............................................................................................16
17.2 Airow Consideration ...........................................................................16
17.3 Thermostat Wiring ...............................................................................16
17.3.1 Two-Wire Outdoor and Four-Wire Indoor Wiring ......................... 16
17.4 Network Troubleshooting ..................................................................... 16
17.5 System Troubleshooting ...................................................................... 17
Troubleshooting ........................................................................................ 18
Diagnostic Codes ......................................................................................21
Setting the mode display .......................................................................... 22
Wiring Diagram .......................................................................................... 24
Routine Maintenance ................................................................................ 25
NOTICE
If an “Ed” error is encountered
on startup, verify that the
electric heater DIP switches
have been set to the appropriate 
heater size. See Tables 9 and 10 
for the heater kit airow delivery
and DIP switch settings.
Only personnel that have been trained to install, adjust, service or
repair (hereinafter, “service”) the equipment specified in this manual
should service the equipment. The manufacturer will not be
responsible for any injury or property damage arising from improper
service or service procedures. If you service this unit, you assume
responsibility for any injury or property damage which may result. In
addition, in jurisdictions that require one or more licenses to service
the equipment specified in this manual, only licensed personnel
should service the equipment. Improper installation, adjustment,
servicing or repair of the equipment specified in this manual, or
attempting to install, adjust, service or repair the equipment specified
in this manual without proper training may result in product damage,
property damage, personal injury or death.
RECOGNIZE THIS  SYMBOL 
AS A SAFETY PRECAUTION.
Cancer and Reproductive Harm -
www.P65Warnings.ca.gov
PROP 65 WARNING
FOR CALIFORNIA CONSUMERS
0140M00517-A
Question and Answer IconNeed help?

Do you have a question about the Daikin EEV Series and is the answer not in the manual?
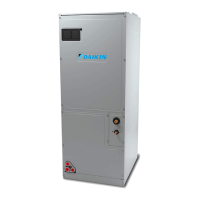
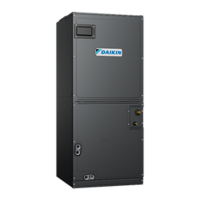
Daikin EEV Series Specifications

General IconGeneral
BrandDaikin
ModelEEV Series
CategoryAir Handlers
LanguageEnglish

Summary

Important Safety Instructions

WARNING (High Voltage)

Disconnect all power before servicing. Risk of injury or death.

WARNING (Electrical Ground)

Unit must have an unbroken electrical ground. Risk of shock.

DANGER/PELIGRO (Carbon Monoxide Poisoning Hazard)

Special warning for enclosed areas. Risk of CO poisoning.

WARNING (Non-approved devices)

Do not use non-certified devices. Risk of damage/injury.

WARNING (Sensor wires)

Improper sensor wire connection may cause errors.

Shipping Inspection

2.1 Parts

Inspect unit for required components. Report missing parts.

2.2 Handling

Use caution when transporting. Avoid straps/hooks.

Codes & Regulations

EPA Regulations

Follow EPA regulations for refrigerant handling and disposal.

Replacement Parts

Pre-Installation Considerations

5.1 Preparation

Read all instructions, gather tools, and supplies before starting.

5.2 System Matches

Use only manufacturer-approved, AHRI-listed systems.

5.3 Interconnecting Tubing

Minimize tubing length and allow for coil removal.

5.4 Clearances

Maintain service clearance and proper slope for condensate lines.

5.5 Horizontal Applications

Install secondary drain pan and route drain line to visible location.

Installation Location

6.1 Upflow Installation

Remove drip shield, side drain pan, and extension for optimal efficiency.

6.2 Horizontal Left Installation

Use primary drain port B. Consider Condensate Management Kit for high humidity.

6.3 Downflow/Horizontal Right Installation

Use mandatory downflow kit (DFK) to prevent pan sweating.

Refrigerant Lines

7.1 Tubing Size

Refer to outdoor unit manual for correct tubing size.

7.2 Tubing Preparation

Cut ends must be round, burr-free, and clean. Avoid leaks.

WARNING (R410A Pressure)

Unit shipped with R410A under pressure. Use proper tools.

WARNING (Quenching Cloth)

Use quenching cloth when brazing near painted surfaces.

Condensate Drain Lines

Drain Pan Connections

Primary/secondary drains use 3/4" NPT female connections. Torque hand-tighten.

Insulation

Insulate drain lines to prevent sweating. Install trap.

Auxiliary Drain Pan

Mandatory for locations where overflow damage may occur.

"P" Style Trap

Install a "P" style trap near the indoor unit coil for proper drainage.

Ductwork

CAUTION (Ductwork Operation)

Do not operate without all ductwork attached.

System Sizing

Size ductwork for 350-450 CFM/ton, max 0.5" w.c. static pressure.

9.1 Return Ductwork

Do not locate return ductwork in areas with toxic fumes or odors.

Return Air Filters

Electric Heat

Heat Kit Installation

Install only Daikin HKS series kits per manual.

Transformer Sub-Assembly

Uninstall/reinstall transformer sub-assembly when installing heat kit.

Temperature Rise

Use tables or formula to determine temperature rise based on kW, voltage, CFM.

Electrical and Control Wiring

12.1 Building Electrical Service Inspection

Verify supply voltage matches unit nameplate.

12.2 Wire Sizing

Use correct wire size for MCA and voltage drop. Follow NEC/CSA.

12.3 Maximum Overcurrent Protection (MOP)

Install approved overcurrent protection device, sized per MCA and MOP.

12.4 Electrical Connections – Supply Voltage

Use copper conductors. Ensure proper grounding and connections.

12.4.1 Air Handler Only (Non-Heat Kit Models)

Connect power supply wires to stripped conductors. Ensure ground connection.

12.4.2 Air Handler - Non-Circuit Breaker Heat Kits

Use terminal block for power supply and air handler connections per HKS manual.

12.4.3 Air Handler With Circuit Breaker Heat Kit

Install circuit breaker in upper access panel. See HKS instructions.

Achieving 1.4% and 2.0% Airflow Low Leakage Rate

Gasket Integrity

Ensure all gaskets are intact for low leakage rates. Seal breaker cover gap.

Airflow Trim

CFM Adjustment

Trim airflow via outdoor unit user menu. Use actual measured CFM values.

Miscellaneous Start-Up Checklist

Pre-Start Checks

Verify wiring, panel security, leak-free tubing, and proper drainage.

Thermostat Wiring Plug

Use wire nuts for terminal connections; avoid multiple wires per terminal.

Auxiliary Alarm Switch

Operation Modes

ON, OFF, IND modes for humidifier functionality. Select fan speed in IND mode.

Circulator Blower

Setting with communication thermostat

Visit Daikin One+ website for detailed procedure.

Setting with DIP Switch

Set DIP switches per tables for heater kit selection. Check for "Ed" error.

Motor Orientation

Motor Rotation

Rotate motor for downflow position to prevent water collection.

Accessory Contacts

Accessory Relay

Relay can close for humidification or anytime blower runs.

Troubleshooting

16.1 Electrostatic Discharge (ESD) Precautions

Discharge static electricity before touching components.

16.2 Diagnostic Chart

Refer to chart for problems. 7-segment LED displays fault codes.

16.3 Fault Recall

Use FAULT RECALL button to display last six faults. Clear error history.

Fully Communicating Daikin System

17.1 Overview

System uses digital communication between units and thermostat.

17.2 Airflow Consideration

System determines airflow demand based on operating mode.

17.3 Thermostat Wiring

Use 18 AWG wire. Max 250ft between indoor/outdoor, 125ft indoor/thermostat.

17.3.1 Two-Wire Outdoor and Four-Wire Indoor Wiring

Connect data lines, 24VAC hot (R), and common (C) wires.

17.4 Network Troubleshooting

Use on-board tools (LEDs, learn button) to troubleshoot network issues.

System Troubleshooting

Outdoor Unit Info

Refer to outdoor unit manual for specific troubleshooting.

SYSTEM WIRING (Figure 20)

Shows wiring for communicating thermostat and control modules.

Troubleshooting

Error Code E_EE (No display)

Check power supply, fuses, breakers. Check PCB fault.

Error Code E_Eb (No heater kit)

Select valid heater kit or set dip switches correctly.

Error Code E_Ed (Heater Kit Dip Switches)

Ensure heater kit dip switches are set properly.

Error Code E_E5 (Fuse Open)

Check and replace fuse F1U. Check communication connection.

Error Code E_EF (Auxiliary Switch Open)

Check water level, alarm device, and TB4/TB5 terminals.

Error Code E_d0 (Data not on Network)

Check network wiring and connection. Populate shared data.

Error Code E_d1 (Invalid Data on Network)

Check network wiring and connection. Populate shared data.

Error Code E_d4 (Invalid Memory Card Data)

Populate shared data set using memory card.

Error Code E_b0 (Blower Motor not running)

Check for obstructions, voltage, and wiring.

Error Code E_b1 (Blower Motor Communication error)

Check wiring, voltage, and connections. Replace motor/board.

Error Code E_b2 (Blower Motor HP Mismatch)

Check motor installation and wiring. Replace motor/board.

Error Code E_b3 (Blower Motor operation in Power, Temp, or Speed Limit)

Check for obstructions, filters, voltage, and wiring.

Error Code E_b4 (Blower Motor Current Trip or Lost Rotor)

Check for obstructions, voltage, wiring, and motor.

Error Code E_b6 (Low Indoor Airflow)

Check airflow, ductwork, filters, motor rotation, and voltage.

Error Code E_b7 (ID blower motor does not have required parameters)

Check wiring, data network, and motor parameters.

Error Code E_b9 (Low Indoor Airflow)

Check airflow, ductwork, filters, motor rotation, and voltage.

Error Code E_70 (EEV disconnection detected)

Check EEV coil connection and resistance. Replace EEV or board.

Error Code E_73 (Liquid side thermistor abnormality)

Check thermistor connection and resistance. Replace thermistor/board.

Error Code E_74 (Gas side thermistor abnormality)

Check thermistor connection and resistance. Replace thermistor/board.

Error Code E_75 (Pressure sensor abnormality)

Check sensor connection and output voltage. Replace sensor/board.

Error Code E_77 (Indoor Unit - Thermostat communication error)

Check indoor/thermostat wiring. Recover system.

Diagnostic Codes

Normal Operation (Dn)

Indicates normal system operation.

No Heater Kit Installed (Eb)

Minor error for system calling for auxiliary heat without kit.

Heater Kit Dip Switches Not Set Properly (Ed)

Indicates incorrect DIP switch configuration for heater kit.

Fuse Open (E5)

Indicates a blown fuse, likely F1U.

Auxiliary Switch Open (EF)

Indicates an open auxiliary switch, check water level or terminals.

Data Not On Network (d0)

Indicates a communication issue with the network.

Invalid Data On Network (d1)

Indicates incorrect data received over the network.

Invalid Memory Card Data (d4)

Indicates an issue with the memory card.

Blower Motor Not Running (b0)

Indicates the blower motor is not operating.

Blower Motor Communication Error (b1)

Indicates communication failure with the blower motor.

Blower Motor HP Mismatch (b2)

Indicates mismatch in blower motor horsepower.

Blower Motor Current Trip or Lost Rotor (b4)

Indicates motor overcurrent or rotor issue.

Over/Under Voltage Trip or Over Temperature Trip (b6)

Indicates voltage or temperature protection activation.

Incomplete Parameter Sent to Motor (b7)

Indicates incomplete data sent to the motor.

Low Indoor Airflow (b9)

Indicates reduced airflow through the indoor unit.

EEV Disconnection Detected (70)

Indicates the EEV is not connected or communicating.

Liquid Side Thermistor Abnormality (73)

Indicates an issue with the liquid side thermistor.

Gas Side Thermistor Abnormality (74)

Indicates an issue with the gas side thermistor.

Pressure Sensor Abnormality (75)

Indicates an issue with the pressure sensor.

Indoor Unit - Thermostat Communication Error (77)

Indicates communication failure between indoor unit and thermostat.

Humidification Demand (HU)

Indicates a call for humidification without heating.

Fan Cool (FC)

Fan operation for cooling mode in communicating systems.

Fan Heat (FH)

Fan operation for heating mode in communicating systems.

Fan Only (F)

Fan operation in manual mode.

Electric Heat Low (H1)

Electric heat operation at low setting.

Electric Heat High (H2)

Electric heat operation at high setting.

Defrost (dF)

Indicates defrost cycle operation in communicating systems.

Setting the Mode Display

Mode Display Introduction

2-digit display serves as backup for thermostat. Access error codes.

Display Button Layout

Learn and Fault Recall buttons navigate and select display items.

Fault Code History Navigation

View and erase the last six system faults from the display.

Wiring Diagram

Notes on Wiring Diagram

Specific to DV**PEC models. Follow diagram for connections and component codes.

WARNING (High Voltage)

Disconnect all power before servicing. Risk of injury or death.

Air Handler Homeowner's Routine Maintenance Recommendations

REPLACE OR CLEAN FILTER

Never operate without a filter. Clean/replace filters regularly.

ALUMINUM INDOOR COIL CLEANING

Flush coil with water. Avoid corrosive cleaners.

BEFORE YOU CALL YOUR SERVICER

Check thermostat, wait 15 min, check breakers, disconnect switch, obstructions, filter, and noise.

Customer Feedback

Product Registration

Related product manuals