9 | Electrical installation
Installer reference guide
99
ERLA03DAV3 + EHFZ03S18DJ3V
Daikin Altherma 3 R F
4P596821-1B – 2021.10
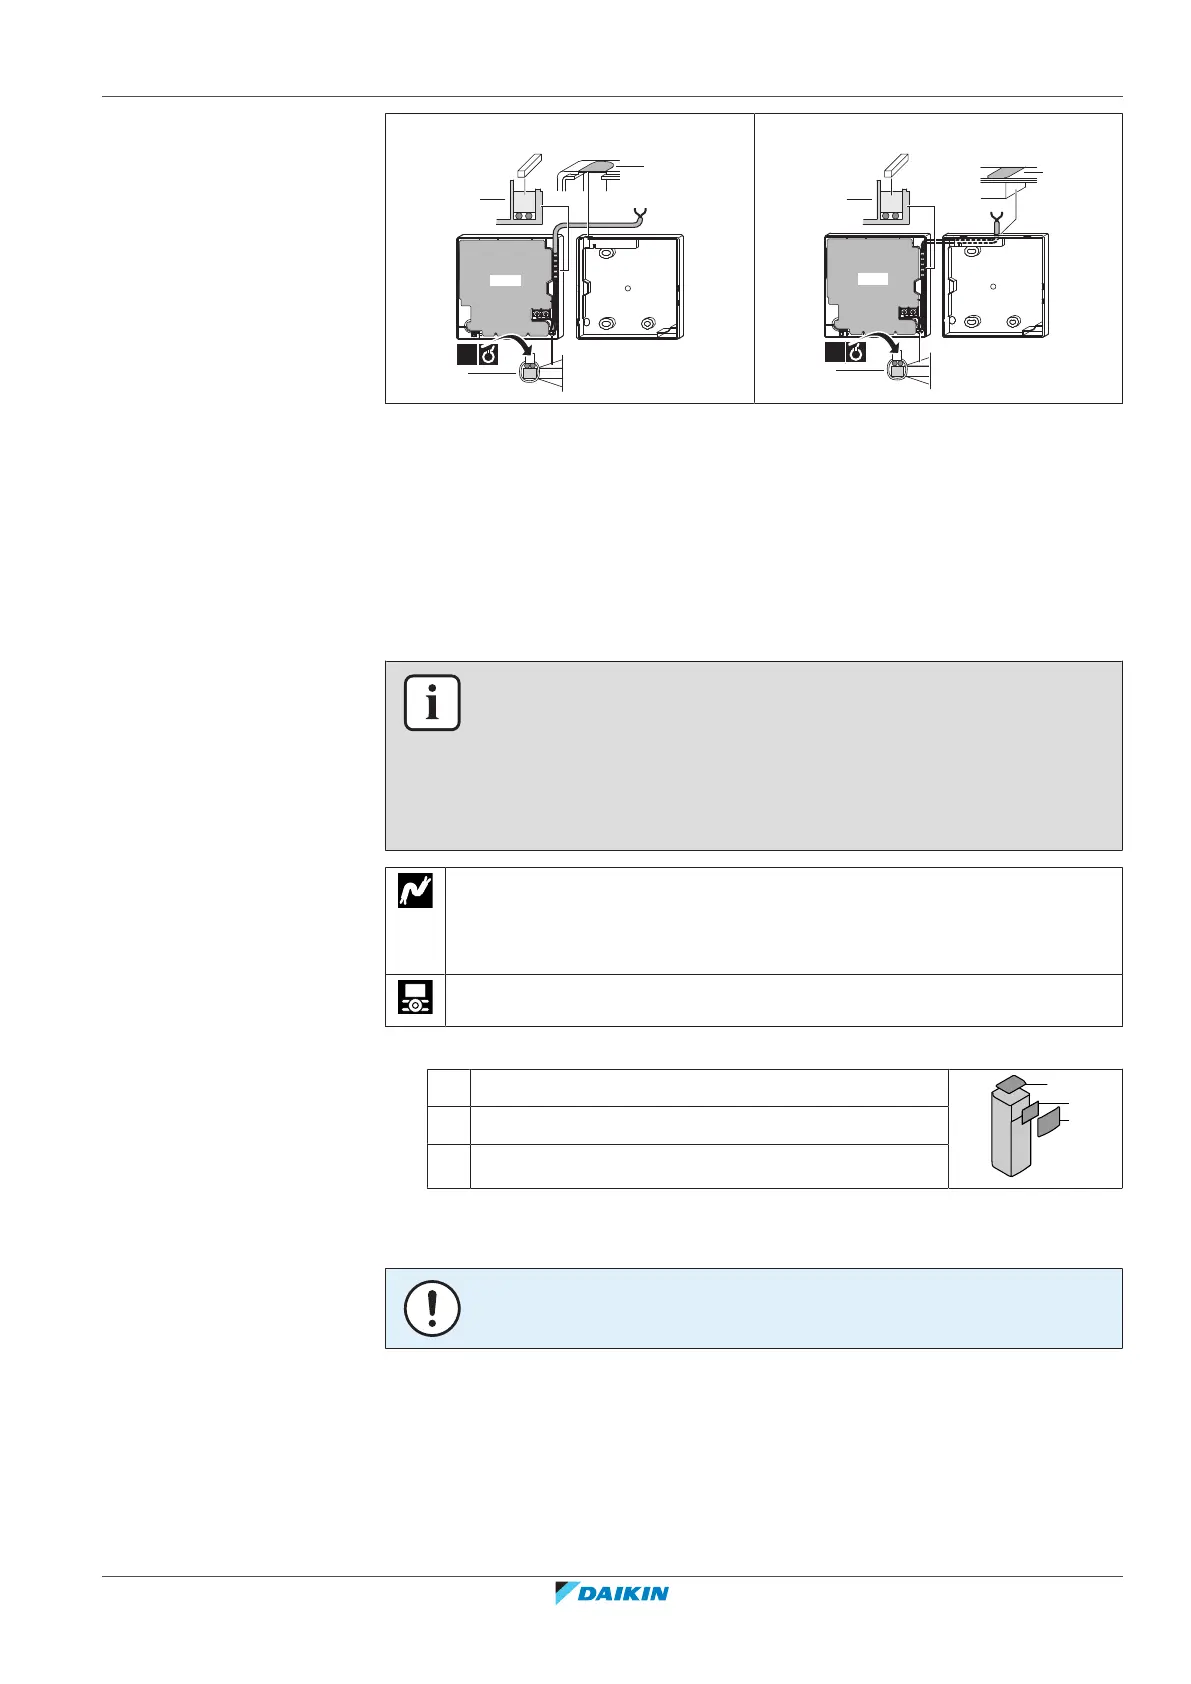
C From the top
D From the top centre
a Notch this part for the wiring to pass through with nippers etc.
b Secure the wiring to the front part of the casing using the wiring
retainer and clamp.
6 Reinstall the faceplate onto the wallplate. Be careful NOT to pinch the wiring
when attaching the frontplate to the unit.
9.3.4 To connect the shut-off valve
INFORMATION
Shut-off valve usage example. In case of two LWT zones, and a combination of
underfloor heating and heat pump convectors, install a shut-off valve before the
underfloor heating to prevent condensation on the floor during cooling operation. In
this case, the main zone cooling setpoint will not be adjustable. The cooling setpoint
for the heat pump convectors can be adjusted via the additional zone setpoint
screen.
Wires: 2×0.75mm²
Maximum running current: 100mA
230VAC supplied by PCB
[A.3.1.1.6] Shut-off valve
1 Open the following (see "7.2.4To open the indoor unit"[455]):
1 Top panel
2 Upper front panel
3 Upper switch box cover
2 Connect the valve control cable to the appropriate terminals as shown in the
illustration below.
NOTICE
Wiring is different for a NC (normally closed) valve and a NO (normally open) valve.