IO-DPV www.daikincomfort.com 3
Installaon
i
Installation
WARNING!
To reduce the risk of re, electric shock and injury to
person, observe the following:
General Installation Steps
CAUTION!
Make sure power is switched o at service panel before
starng installaon.
1. Use this unit only in the manner intended by the
manufacturer. If you have quesons, contact Daikin.
2. Before servicing or cleaning the unit, switch power o at
service panel and lock the service disconnecng means to
prevent power from being switched on accidentally.
When the service disconnecng means cannot be locked,
securely fasten a prominent warning device, such as a tag,
to the service panel.
3. Installaon work and electrical wiring must be done by
qualied person(s) in accordance with all applicable codes
and standards, including re-related construcon.
4. When cung or drilling into a wall or ceiling, do not damage
electrical wiring or other hidden ulies.
5. To avoid motor bearing damage and noisy and/or
unbalanced impellers, keep drywall spray, construcon
dust, etc. o power unit.
6. Read all instrucons before installing or using venlator.
7. For residenal installaons only.
8. Must use suitable air intake hood with insect screen to
protect air intake.
i
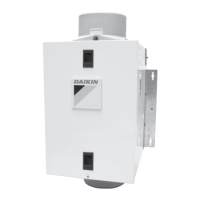
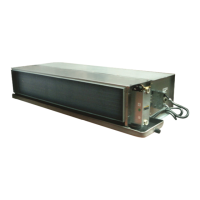
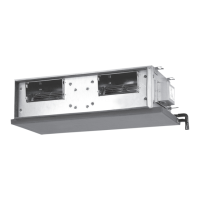
Preparing the Venlator
1. Unpack venlator from the carton and conrm that
all pieces are present. In addion to the venlator you
should have:
2 - Collar Assemblies (aached at factory)
2 - Mounng Brackets (aached at factory)
1 - Controller (aached at factory)
1 - Installaon and Operaon Manual
2. Choose the locaon for your venlator. This venlator will
require at least 12" of clearance from the ceiling or wall
to access the control compartment. It can be mounted
using the mounng brackets provided or can be surface
mounted to a wall or ceiling. To ensure the best air and
sound performance, it is recommended that:
− The length of ducng and the number of elbows should
be kept to a minimum,
− The radius of each elbow should be as large as possible
for the installaon, and
− Insulated rigid duct should be used where possible.
NOTE: The venlator must be installed in a locaon where
it can be easily accessed for service once installed.
3. No addional vibraon deadening materials are needed
for this venlator.
Mounng the Venlator
1. Conrm that the venlator is posioned so the airow is in
the correct direcon.
2. Mounng
a. Surface Mounng: Place the venlator in a posion so
that at least one of the mounng brackets is centered on
a stud or joist and mark the locaon for the four (4) holes
in the mounng brackets for securing the venlator.
Remove the venlator and install properly rated wall/
ceiling anchors for any of the holes that do not go
directly
into a joist or stud. The venlator weighs
approximately
15 pounds not including the duct work
aached to it. Posion venlator in place by securing
with screws (not included) through the four (4) holes in
the mounng brackets (Figure 1).
b. Mounng to a Joist: Install two, 2" x 4" headers (not
included) between the joists to support the venlator.
Posion the venlator housing on the headers
and secure the mounng brackets with screws
(not included) to the headers (Figure 2).
c. Hanging Rods Mounng: Li unit up onto the
threaded rods and secure in place using appropriate
hardware (not included). Threaded rods must each be
a minimum of 24" in length (Figure 3). The installaon
shown in Figure 3 is upside down when installing to
the threaded rod
WARNING!
For general venlang use only. Do not use for exhausng
hazardous or explosive materials and vapors.
WARNING!
Do not use this venlator with any solid-state speed
control device.
CAUTION!
Do not use in kitchens.
CAUTION!
The ducng from this venlator to the outside of the building
has a signicant eect on the airow, noise and energy con-
sumpon of the venlator. Use the shortest, straightest duct
roung possible between the venlator and the home’s exte-
rior for best performance, and avoid installing the venlator
with smaller ducts than recommended. Insulaon around the
ducts can reduce energy loss and help inhibit mold growth.
Venlators installed with exisng ducts may not achieve their
rated airow.
i
i
i
i
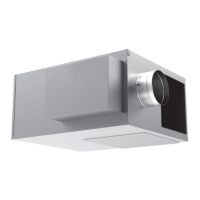
Venlator Accessories
The capabilies of the Daikin One Powered Venlator can be
enhanced by adding any of the following oponal accessories
(sold separately):
Heater (70 CFM & Higher) DQ-P-70-AH-H
Motorized Damper kit DQ-P-MDV
Air Intake Hood DQ-P-AIH
Daikin North America LLC reserves the right to disconnue or change at any me, specicaons or designs without noce or without incurring
obligaons. Performance of the Venlator and/or Accessories will depend on house plan design, duct design and heang/cooling equipment
.
 Loading...