22English
1
2
3
1 %QPVTQNDQZEQXGT
2 Inspection door
3 =5GTXKEGRTGECWVKQPU?.CDGNNQECVKQP
NOTE
• Open the slit holes with a cutting nipper or similar tool.
• After cutting the slit holes, it is recommended to remove burrs in the
slit holes and paint the edges and areas around the edges using the
repair paint to prevent rusting.
• When passing wiring through the slit holes, remove burrs around
the slit holes and protect the wiring with protective tape.
• #HVGTRCUUKPIVJGYKTKPIDGUWTGVQƂNNCP[ICRKPFKECVGFD[VJG
JCVEJKPIKPVJGƂIWTGDGNQYYKVJUGCNKPIOCVGTKCNƂGNFUWRRN[VQ
prevent small animals and dust from entering.
Transmission line
Power line
9.4. Transmission wiring connection procedure
• 4GHGTTKPIVQVJGƂIWTGDGNQYEQPPGEVVJGVTCPUOKUUKQPYKTKPIDG-
tween outdoor unit and indoor unit, outdoor unit and outdoor unit of
other system, outdoor unit and outdoor unit of same system.
• In order to reduce the risk of PCB failure due to contamination, the
A1P has been sealed off and a relay terminal block X2M will be used
for wire connection. X2M is equivalent of A1P connection below table.
TO IN/D UNIT TO OUT/D UNIT TO MULTI UNIT
A1P F1 F2 F1 F2 Q1 Q2
X2M X0 X1 X2 X3 X4 X5
A1P
X2M
A1P
X2M
A1P
X2M
5
1 1
2
7
X0 X1 X2 X3 X4 X5
X2M
X4 X5
21
43
X2M
5
1
1 1
2
9
11
10
9
10
8
6
TO OUT/D UNIT
TO IN/D UNIT
TO OUT/D UNIT
TO IN/D UNIT
:
F1 F2
F1 F2 F1 F2 F1 F2 F1 F2
F1 F2
F1 F2
F1 F2 F1 F2 F1 F2
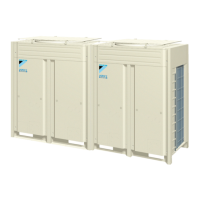
1 Master unit (*)
2 Sub unit (*)
3 Outdoor unit A
4 Outdoor unit B
5 %QPVTQNDQZ
6 Never connect the power wire.
7 To outdoor unit of other system
8 7UGFWRNGZYKTGU0QRQNCTKV[
9 Branch Selector unit
10 Indoor unit
11 Indoor unit (Cooling only)
(*) : The outdoor unit that connect the transmission wiring to
Branch Selector unit is Master unit of the multi system.
#PFVJGQVJGTWPKVUCTG5WDWPKV+PVJKUƂIWTGQWVFQQT
unit A is the Master unit.)
Check operation in installation work, onsite settings and so
on are done by operating the printed circuit board (A1P) of
Master unit.
NOTE
• Do not connect the power wiring to terminals for the transmission
wiring. Doing so would destroy the entire system.
• Wiring to the indoor unit by way of Branch Selector unit should be
wired to X0 and X1 on the outdoor unit’s terminal block (X2M).
• The above wiring should be wired using AWG18-16 stranded, non-
shielded wiring.
• All transmission wiring is to be procured onsite.
See the table below for the tightening torque of the transmission
wiring terminals.
Screw size Tightening torque
M3.5 (X2M)
0.59-0.71 ft
x
lbf (0.8-0.97 N
x
m)
• Transmission wiring should be done within the following limitations.
+HVJG[CTGGZEGGFGFVTCPUOKUUKQPRTQDNGOUOC[QEEWT
1
Between outdoor unit and Branch Selector (indoor) unit
Between outdoor unit and outdoor unit of other systems
/CZYKTKPINGPIVJHVO
/CZVQVCNYKTKPINGPIVJHVO
/CZPQQHDTCPEJGU
=0QVG?0QDTCPEJKUCNNQYGFCHVGTCDTCPEJ5GGVJG
HQNNQYKPIƂIWTG
/CZPQQHQWVFQQTWPKVUQHQVJGTU[UVGOVJCVECPDGEQP-
nected : 7
a
b
F1 F2 F1 F2
F1 F2 F1 F2
F1 F2
a Branch
b Branch after branch
2
Between outdoor unit and outdoor unit of same system
/CZYKTKPINGPIVJHVO
B(1B0DLQB959B,0LQGG
 Loading...