Motorized Outside Air Damper Wiring
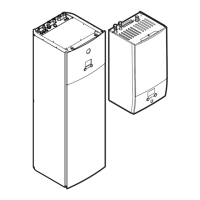
Figure 21: Right-hand unit installation detail
Bushing,
Strain Relief
Wire Tie
Housing Plug
Housing Receptacle
Front View of Unit
Snap Bushing
Gasket
(See Note 2)
Screws
(See Note 1)
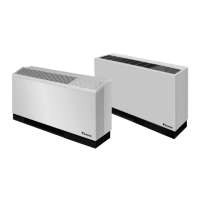
Figure 22: Left-hand unit installation detail
Bushing,
Strain Relief
Wire Tie
Housing Plug
Housing Receptacle
Route wires along
with power wires
Damper Assembly
Front View of Unit
Subbase
Chassis
Gasket
(See Note 2)
Screws
(See Note 1)
Notes: 1. Remove appropriate knock-outs and install damper using two (2) #8-18 screws provided.
2. Install gasket material as shown to prevent inltration of ambient conditions. It is the responsibility of the
installing contractor to assure that eld-installed gasketing matches up with the wall opening or that ad-
ditional material is used to assure a positive seal.
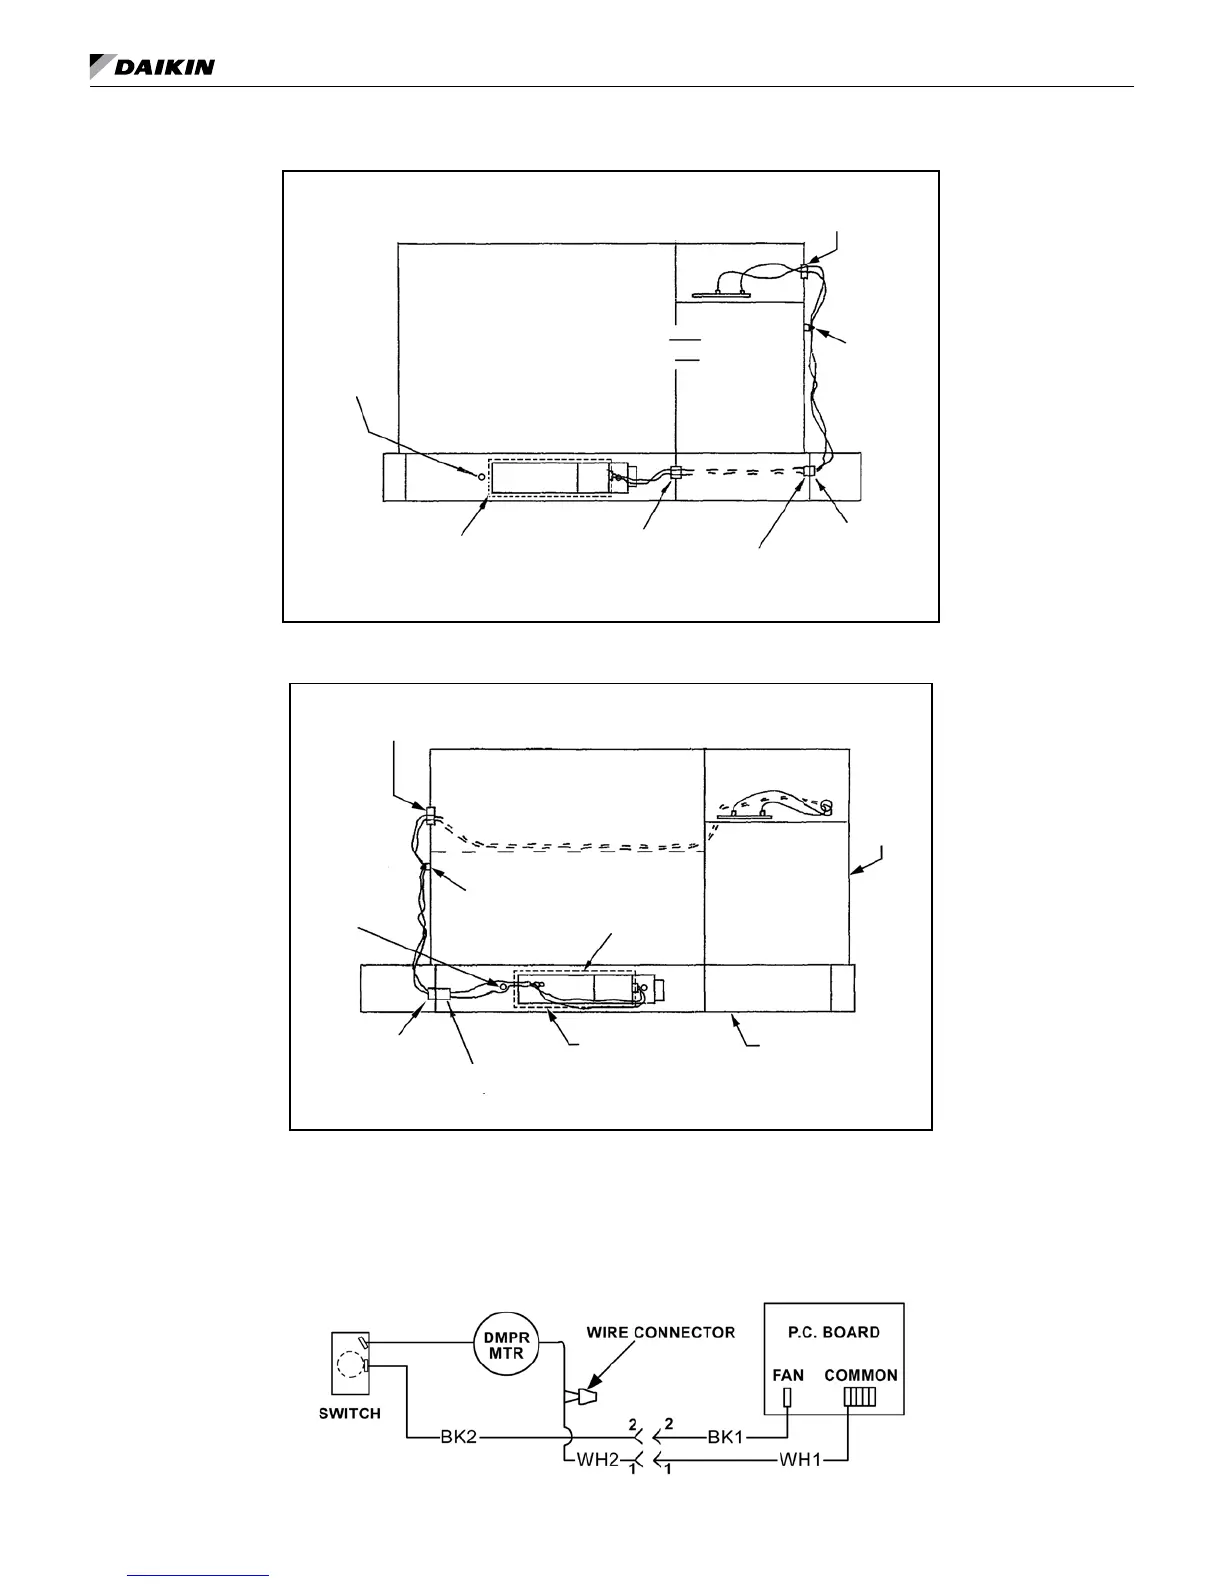
Figure 23: Mark IV Motorized Damper typical wiring diagram
IM 447-11 22 www.DaikinApplied.com