SL-Series rigging components
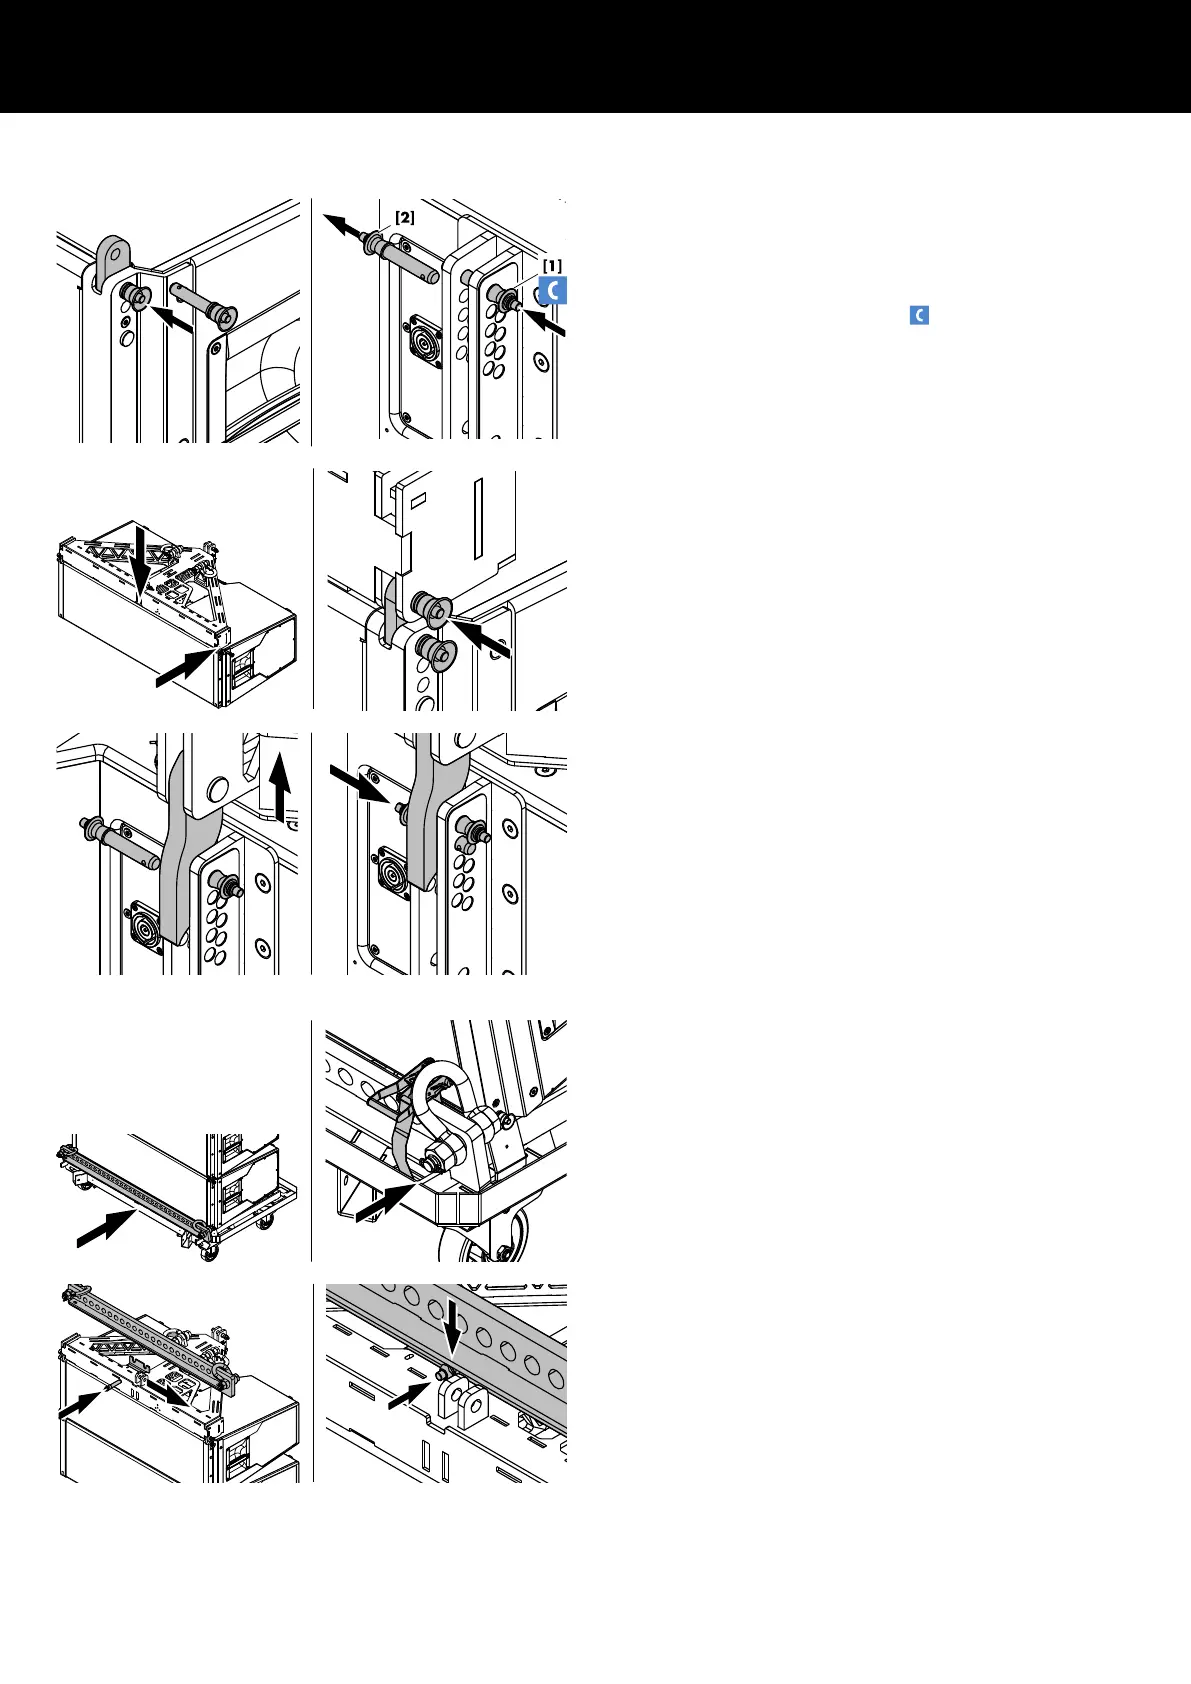
Attaching the flying frame
The touring cart is also intended to carry the flying frame during
transport. To attach the flying frame, proceed as follows:
1. Extend the Front links of the cabinet on both sides.
2. At the rear, release Locking pin [2] and ensure Locking pin
[1] is inserted in the 0° hole (Þ
) at the top of the rear
rigging strand.
3. Attach the flying frame to the Front links of the cabinet and
reinsert the Locking pins on both sides.
4. At the rear, insert the flying frame's Rear link into the rear
rigging strand of the cabinet.
5. Raise the back of the flying frame until the Rear link has
engaged.
6. Reinsert the Locking pin [2] (Safety pin).
Storing and fixing the load beam
The GSL Touring cart provides a storage tray for the Z5702 GSL
Load beam. Underneath this storage tray, additional slotted holes
are provided on each side to fix the load beam using an
appropriate ratchet strap.
In KSL Touring carts, the Z5723 KSL Load beam is stored and
fixed on top of the Z5722 KSL Flying frame. For this purpose, the
flying frame provides a dedicated slot to fix the load beam in
place.
To fix the load beam, use the Locking pin of the front fixing slot of
the flying frame, as shown in the graphic opposite.
d&b SL-Series Rigging manual 1.10 en38
 Loading...