Compression mode setup
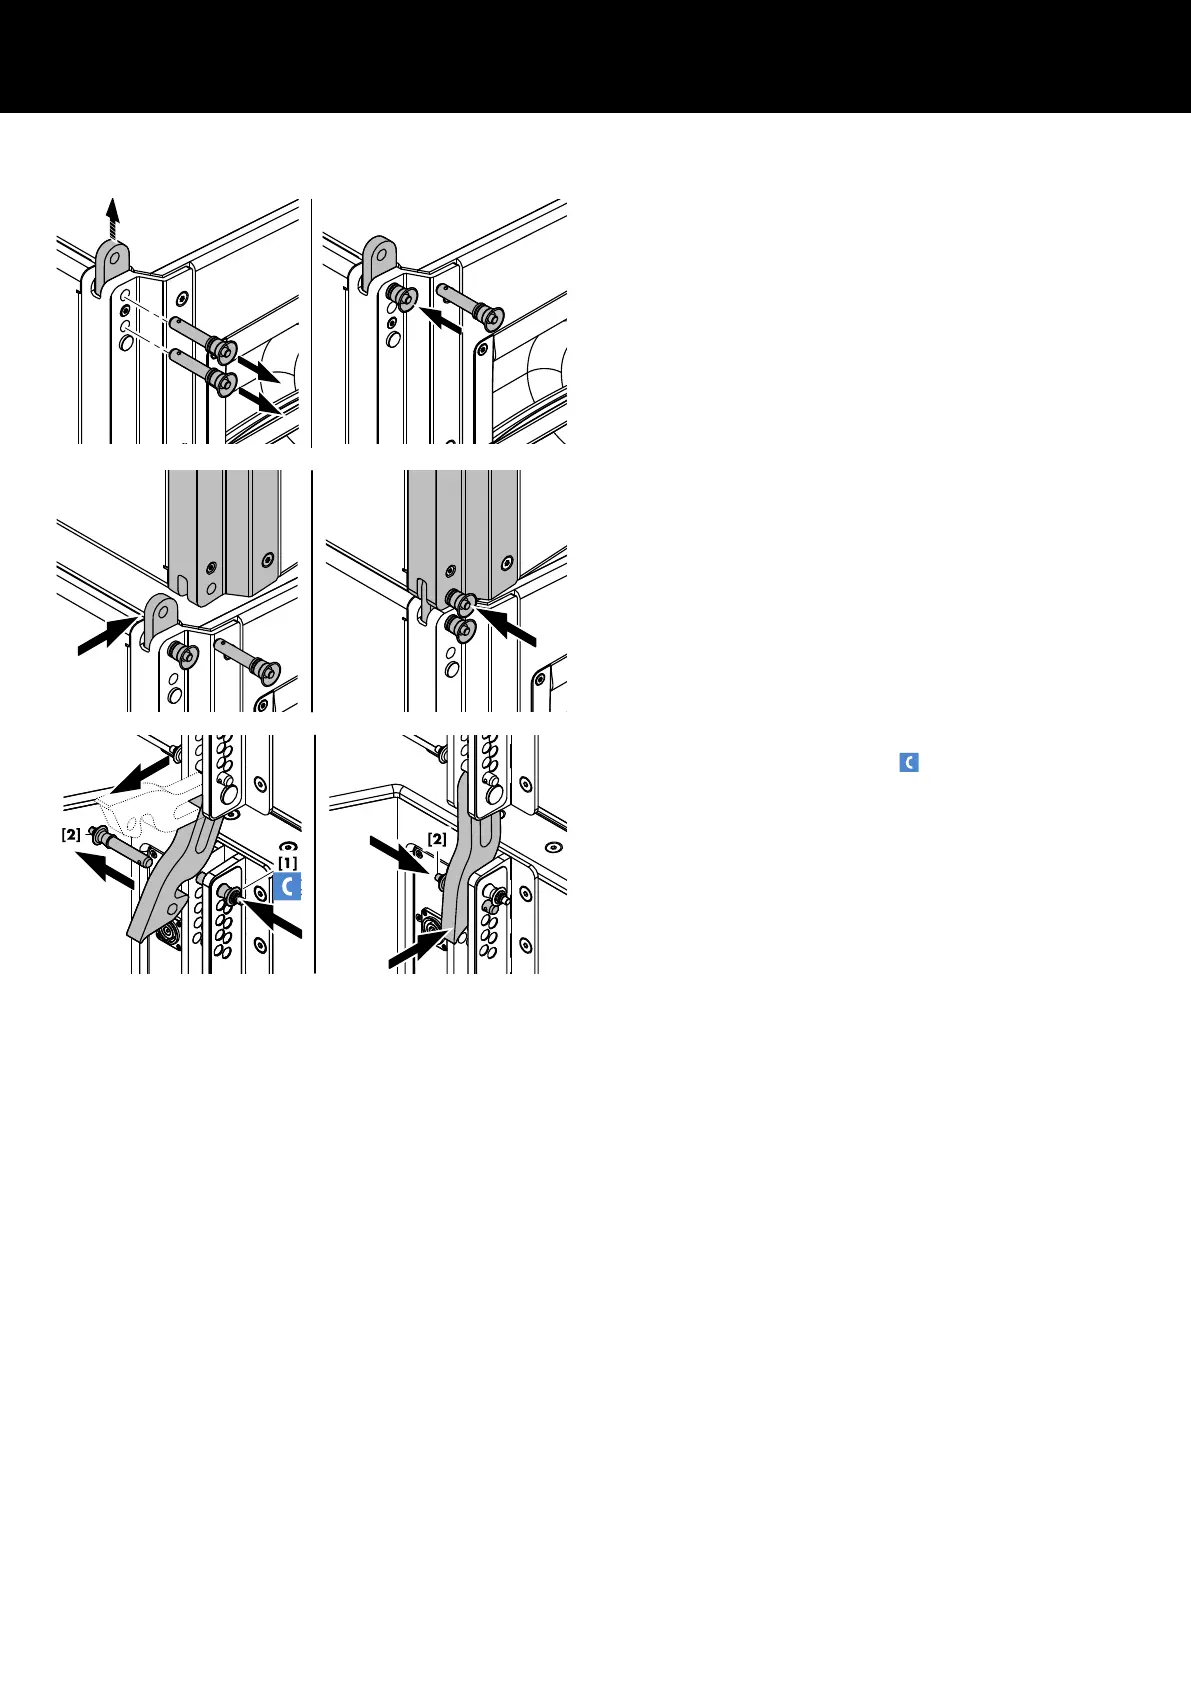
7. Attaching the next assembly
1. Lift the first assembly to allow the next assembly to be
positioned below.
2. Position the next assembly and extend the Front links of the
uppermost cabinet.
3. Lower the array until the Front links of the top cabinet in the
cart fit into the slots at the front of the bottom cabinet of the
array.
4. Insert and lock the second Locking pins of the cabinet's Front
links on both sides.
5. On the rear rigging strand, release Locking pin [2 ] and check
Locking pin [1] is set to 0° (Þ ).
6. Pull the Splay link of the upper cabinet out of its temporary
park position.
7. Slightly lower the array and fold the Splay link into the rigging
strand.
8. Slightly lift the array until the Splay link has engaged into the
preset Locking pin [1].
9. Insert and lock Locking pin [2] (Safety pin) to secure the Splay
link in place.
10. Lift the entire array approx. 30 cm (1 ft) above ground and
dismantle the Touring cart as described previously.
11. Preset the splay angles as described previously.
For the attachment of further touring cart assemblies, proceed in
the same manner.
d&b SL-Series Rigging manual 1.10 en50
 Loading...