4. Remove and discard O-ring (P02).
Multi-function valves are sold as complete units only. You may purchase O-rings separately.
5. The poppet seat section is pressed over a lip. Place the cartridge in a vise and pry the poppet seat
(P12) off with an appropriate tool. Maintain sufficient control to prevent the internal components
from flying loose. Do not damage parts during disassembly.
6. Remove internal parts (P07, P08, P17, P16, P15, P14, P09, and P11).
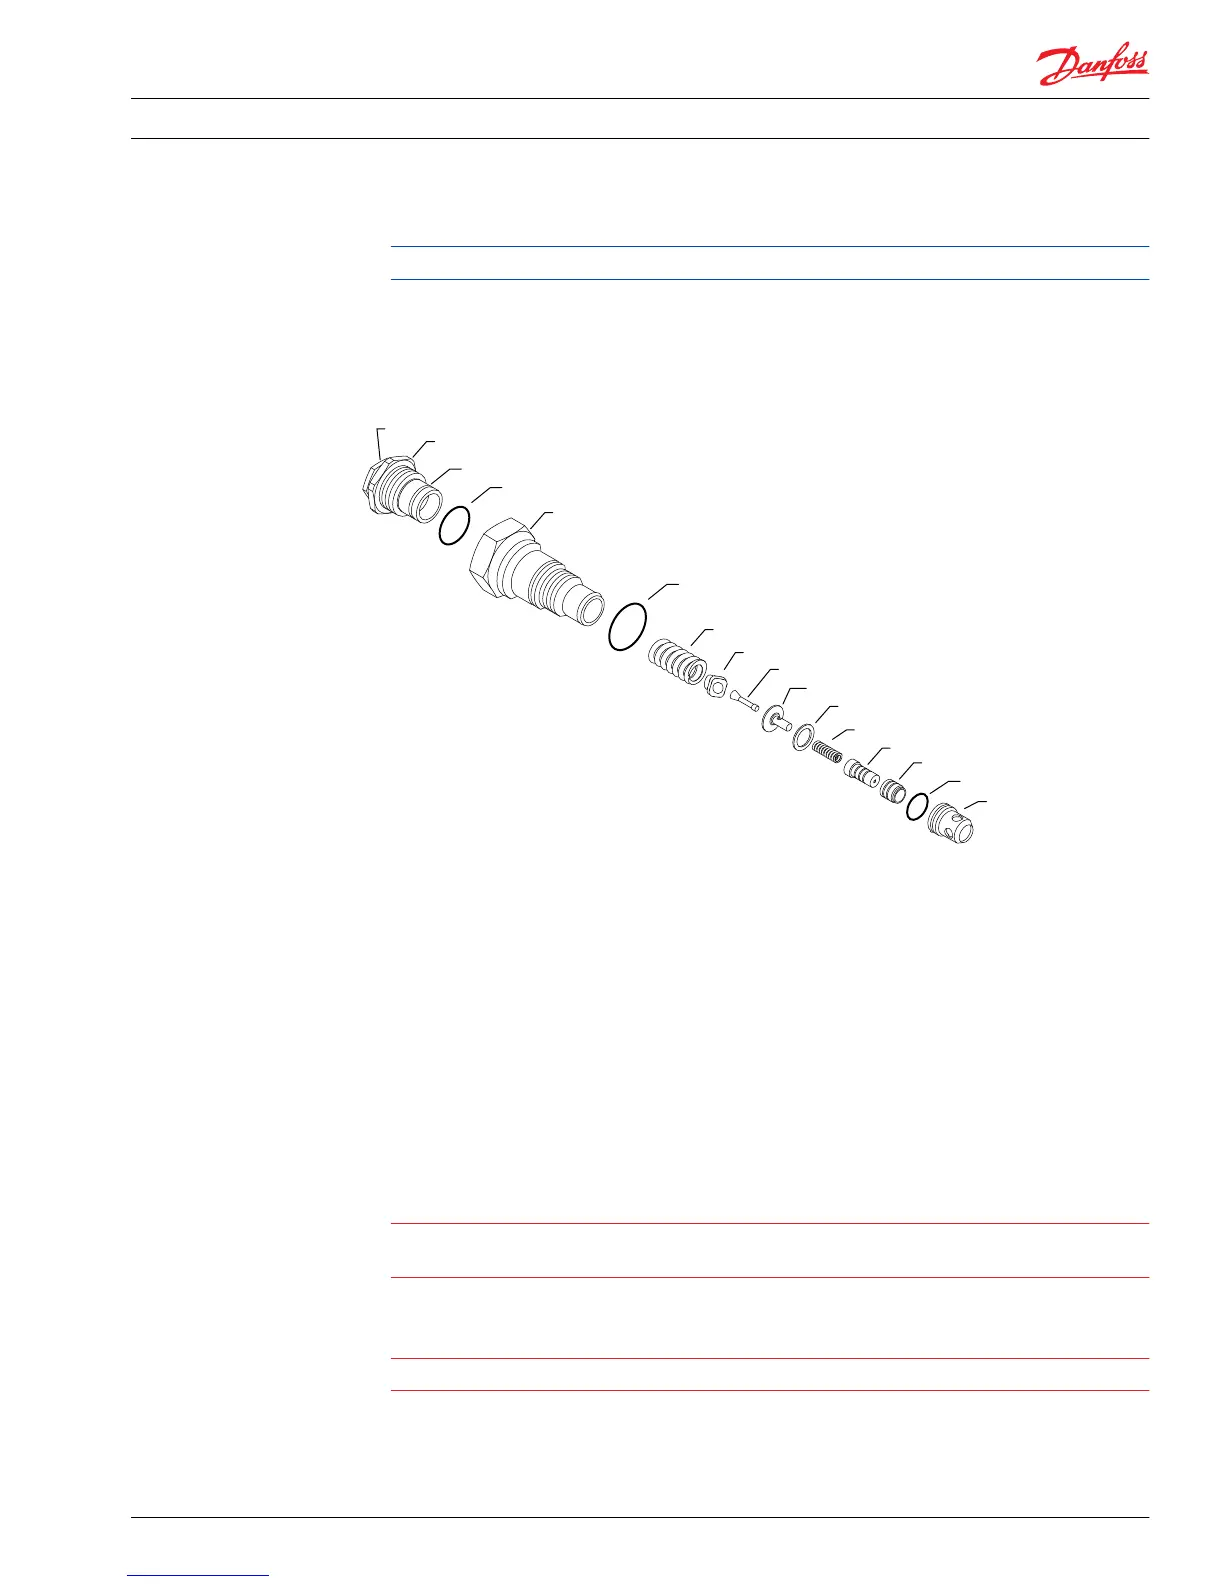
Multi-function valve
P12
E101 531E
P13
P14
P09
P11
P06
P05
P07
P15
P16
P17
P08
P03
P04
P02
P01
Inspection
Context for the current task
Clean and inspect all disassembled parts.
Reassembly
1. Lubricate and install internal components (P07, P08, P17, P16, P15, P14, P09, P11, and P12).
2. Place the cartridge in a vise and press on the poppet seat (P12).
3. Lubricate and install new O-rings (P02, P06, P13).
4. Install bypass actuator (P03) with pressure limiter valve (P01). Torque to 40 N•m [30 lbf•ft]
Caution
If pressure limiter (P01) was removed from bypass actuator (P03), adjust pressure limiter to model
code specifications.
5. Install cartridges and torque as shown in the table.
Caution
Do not overtorque the multi-function valve cartridges
Service Manual
Series 90 Pumps
Minor repair
520L0818 • Rev 0101 • August 2015 45