19
AME (-H) 110, 113
DEUTSCH
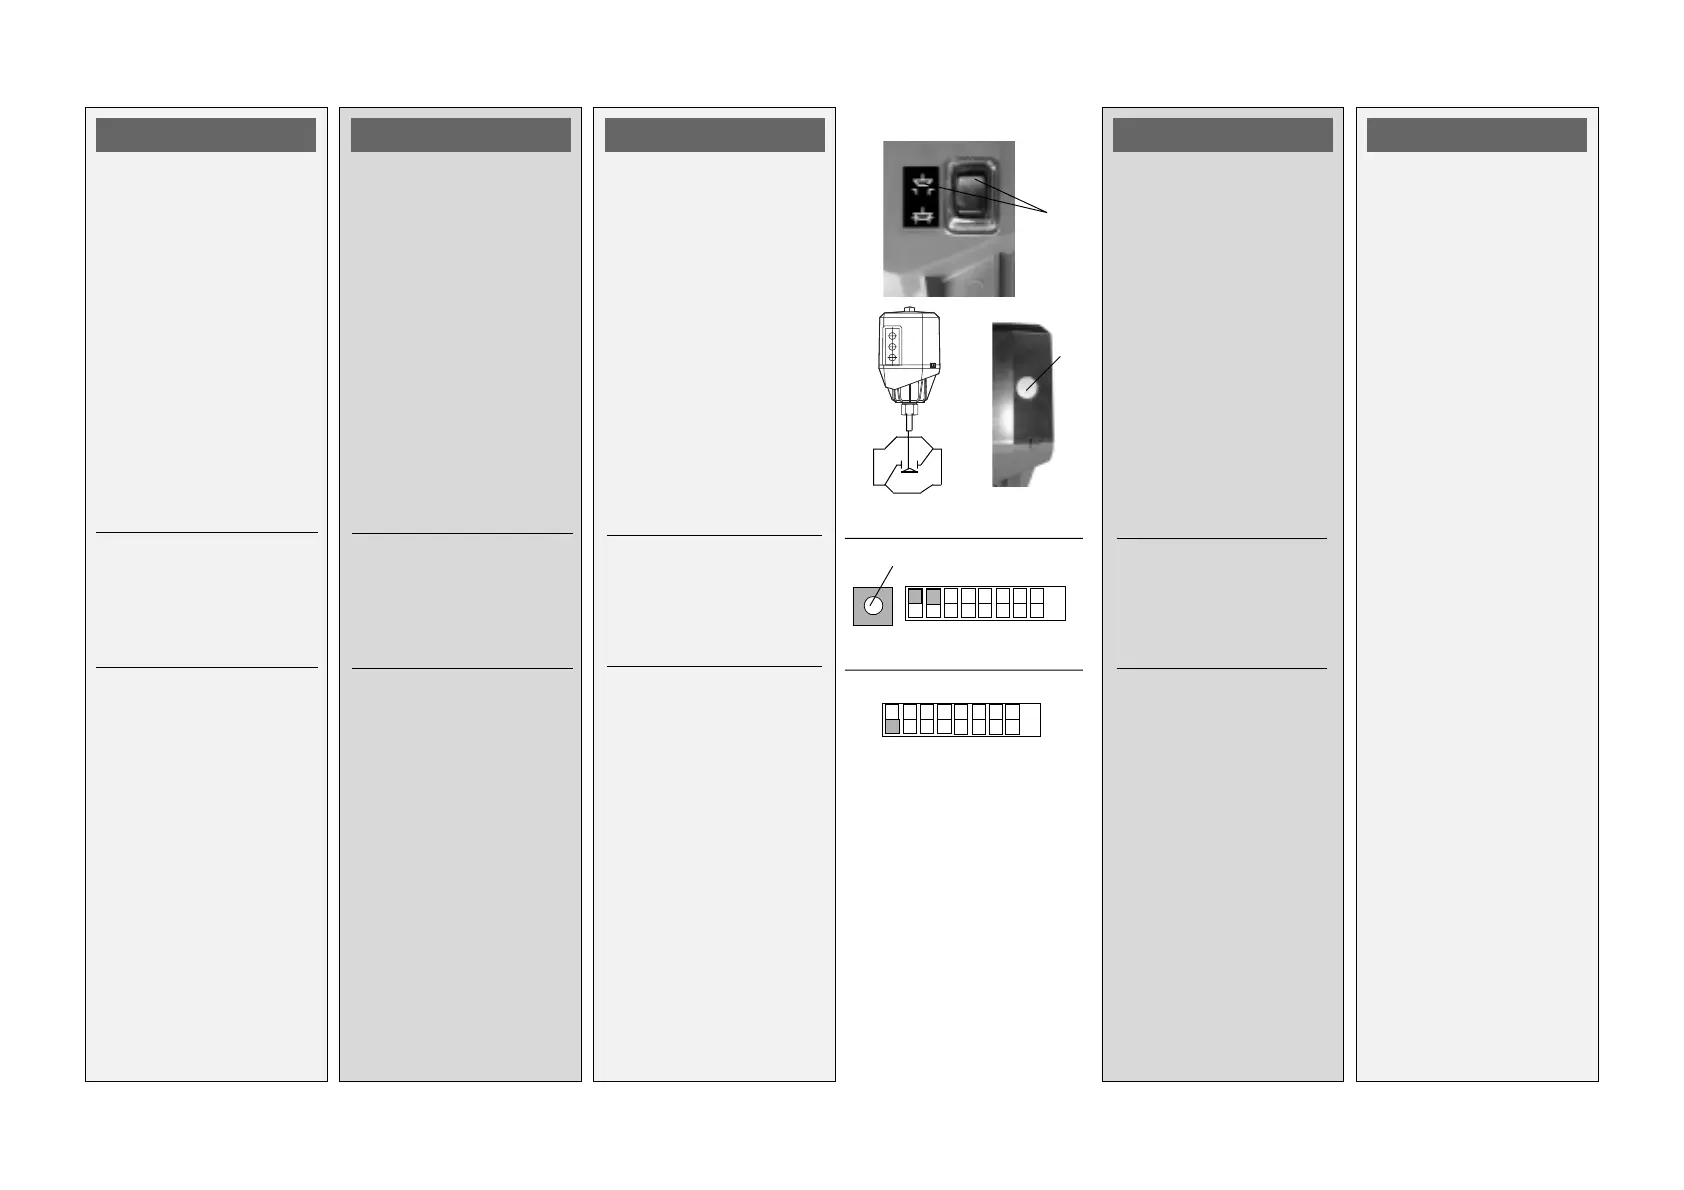
2.Taster ➀ drücken bis
das Ventil ➁ ganz
geschlossen ist
und die Lauf-
richtungsanzeige ➂
zum Stillstand kommt
3. Taster ➃ drücken
➻ Endlage “Ventil AUF” ist
eingestellt
4. Schalter 1 einstellen ➄
➻Einstellung der
Endlagen für Ventile
VFU 2 ist
abgeschlossen
5.Zuordnung der
Wirkrichtung zum Ein-,
Ausgangssignal
einstellen, siehe S. 20
➀
ON
OFF
1
2
➃
➂
ON
OFF
1
➄
➁ VIU 2
ENGLISH
2.Press pushbutton ➀
until the valve ➁ is
completely closed and
the direction indicator ➂
stops.
3. Press pushbutton ➃.
➻ The final position “Valve
OPEN” is set.
4. Set switch 1 ➄
➻ The setting of the final
positions for the valves
VFU 2 is completed.
6. Set the assignment of
the effective direction for
the input and output
signals, see p. 20
FRANCAIS
2. Presser la touche ➀
jusqu’à ce que la vanne
➁ soit totalement
fermée et l’indicateur
de sens de
fonctionnement ➂ soit
arrêté
3. Presser la touche ➃
➻ La position fin de
course «vanne fermée»
est réglée
4. Régler l’interrupteur 1
➄
➻Le réglage des
positions fins de course
pour vannes VIU2 est
terminé
5. Régler l’affectation du
sens de fonctionnement
au signal d’entrée/
sortie, voir page 20
POLSKI
2. Naciskaæ przycisk ➀
do ca³kowitego
zamkniêcia zaworu
➁
i zatrzymania
wskanika poziomu
➂
3. Nacisn¹æ przycisk ➃
Pozycja krañcowa
Zawór zamkniêty
zosta³a nastawiona.
4. Ustaw prze³¹cznik 1 ➄
➻ Nastawa pozycji
krañcowych dla
zaworów VFU2 zosta³a
zakoñczona.
5. Ustawiæ przypisanie
kierunku sygna³om
wejciowemu i
wyjciowemu patrz str.
20
 Loading...