18
Because of the weight of
some components, and
because some
components are difficult
to balance, two people
are required for safe
assembly and installation
of this equipment.
STEP 2:
STEP 3:
STEP 4:
STEP 5:
STEP 6:
STEP 7:
STEP 8:
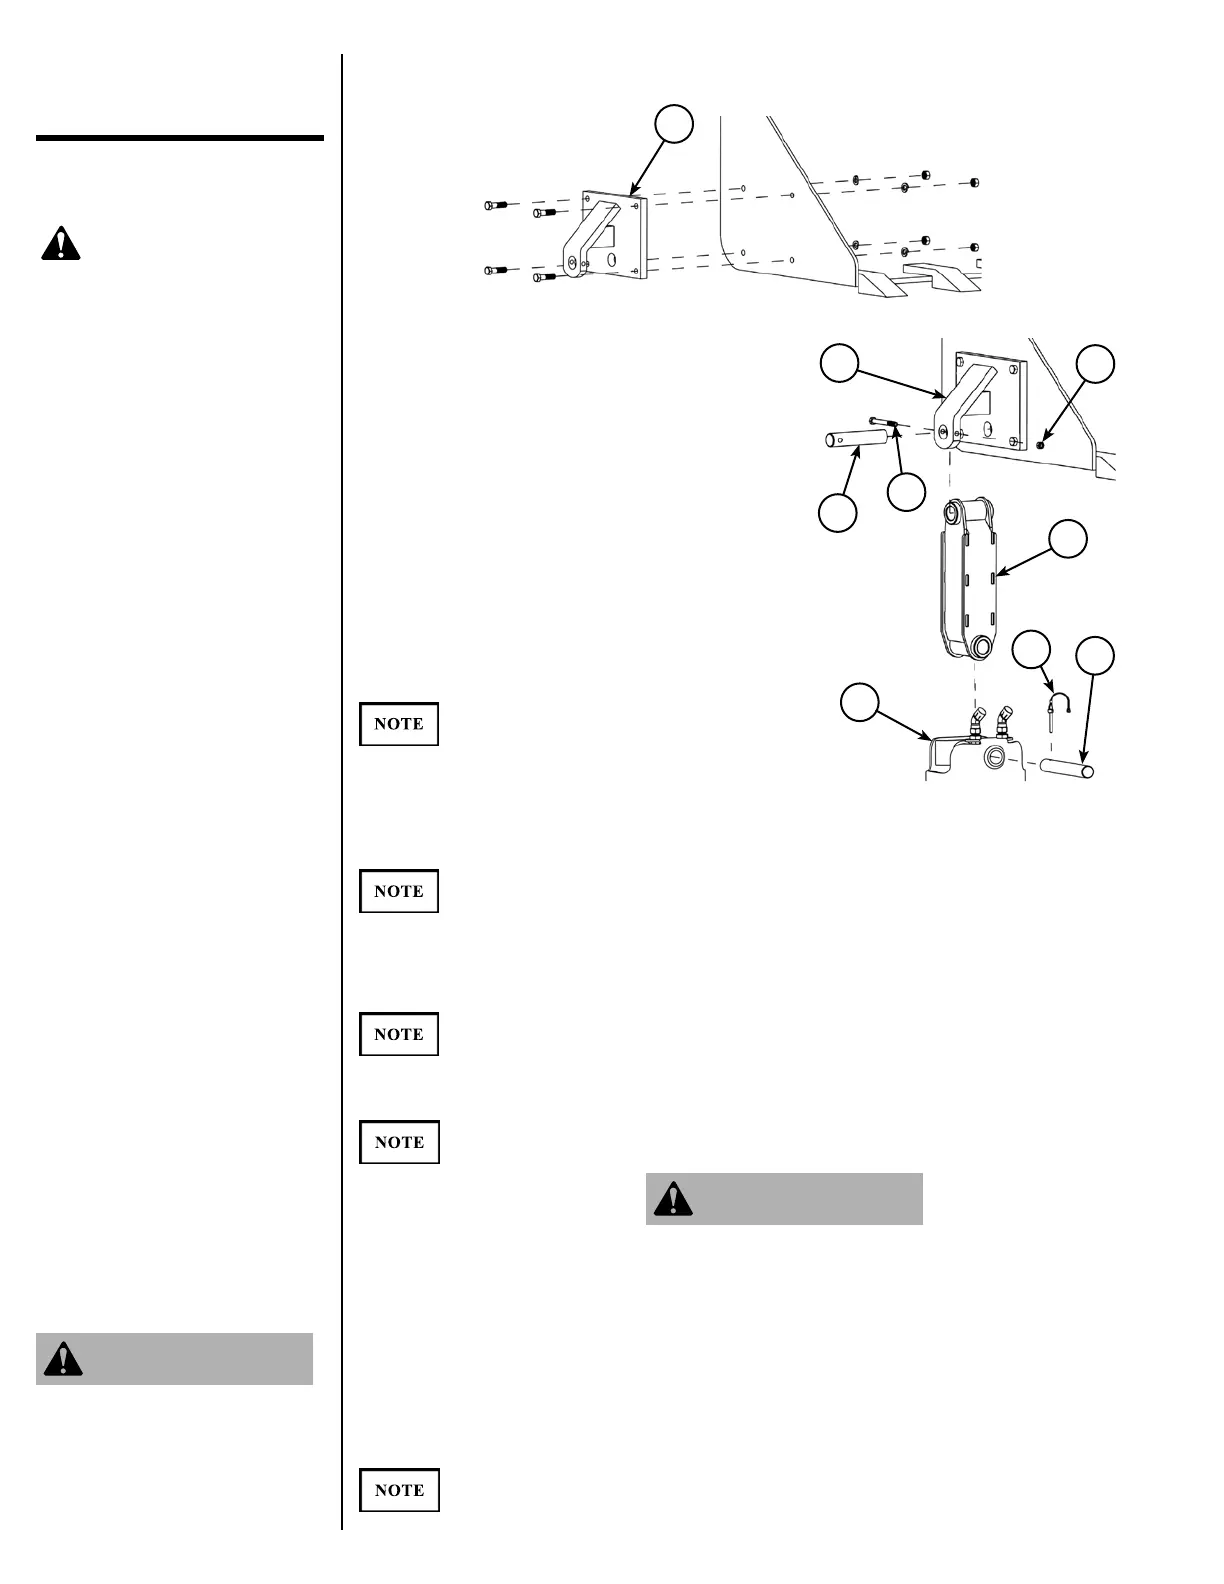
Attach knuckle assembly (2) to the drive
unit (3) using pin (4). Secure pin (4)
with lock pin (5).
Attach knuckle assembly/drive unit to
mount assembly (1) using pin (6). Using
a 9/16" wrench and torque wrench with
9/16" socket, secure pin (6) with bolt (7)
and nut (8).
If you purchased Danuser Hose Kits PN
196025 or 196027, install by using a
7/8" wrench and a 1" wrench to tighten
the hose connections onto the 45°
adapters on the drive unit.
All hoses and fittings used to connect the
earth auger should be thoroughly cleaned
before use. Care should be taken to see
that no thread sealer or metal chips are
forced to the inside of the joints when
connections are being tightened.
2
1
7
3
6
8
4
5
Assembly &
Installation
(continued)
Since the hydraulic motor is reversible, hose connections to motor fittings are
interchangeable.
Using a 1-7/16" wrench and a 1" wrench, tighten the hydraulic quick couplers onto
the hoses.
Danuser Hose Kit PN 196025 does not include hydraulic quick couplers. You
must obtain the proper hydraulic quick couplers for your particular vehicle.
Connect the quick couplers to the vehicle's auxiliary hydraulic outlets
Ensure quick couplers are clean prior to connection.
Test the vehicle to make sure you have adequate hose length throughout the full
operating range of the vehicle's loader arms. Adjust the position of the hoses as
necessary to avoid pinching, kinking, or stretching.
Hose routing is the responsibility of the operator. Pinched, kinked, and/or
stretched hoses are not covered under the warranty.
Before connecting or disconnecting hydraulic lines or
fittings, be sure to relieve all pressure by cycling all
hydraulic controls after shutdown. Remember hydraulic
systems are under pressure whenever the engine is
running and may hold pressure after shutdown.
Keep hands, feet, hair,
jewelry, and clothing
away from all moving
and/or rotating parts.
1
Using a 3/4" wrench and torque wrench with 3/4" socket, bolt bucket mount
assembly (1) to the bucket.