48
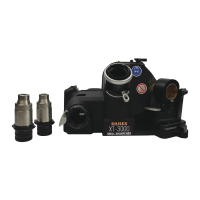
Congratulations on the purchase of the Darex XT-
3000 Brad point Attachment. (LEX200) This
attachment consists of 2 pieces, 1 Sharpening
Fixture, SA16900BA and 1 - 3mm – 12mm Chuck,
SA16916TA. (The 12mm – 21mm Chuck,
SA16918TA is available
as an optional accessory)
Both components are
laser marked with a Brad
Point icon to minimize
confusion with other XT-
3000 attachments.
SETTING UP:
To sharpen a
Brad Point, you
will have to
remove the
standard
sharpening fixture
and replace it
with the X-Y
Table (LEX100).
The Brad Point Attachment works in conjunction
with the X-Y Table. By now you are familiar with
the ‘quick’ disconnect feature or your XT-3000.
Begin by removing the
current sharpening
fixture and replacing it
with the X-Y Table.
Secure it in place by
rotating the Docking
Lever CW. In much
the same manner,
secure the Brad Point
Sharpening Fixture to
the X-Y Table.
ALIGNING THE DRILL:
The alignment of the drill
happens in the XT-300
0
Alignment Tube. Loosen the
Timing Tube Lock lever
and
position
the Tube
@ 118°.
Push the
lever down
to lock the
tube. Align
the drill as
you normally would.
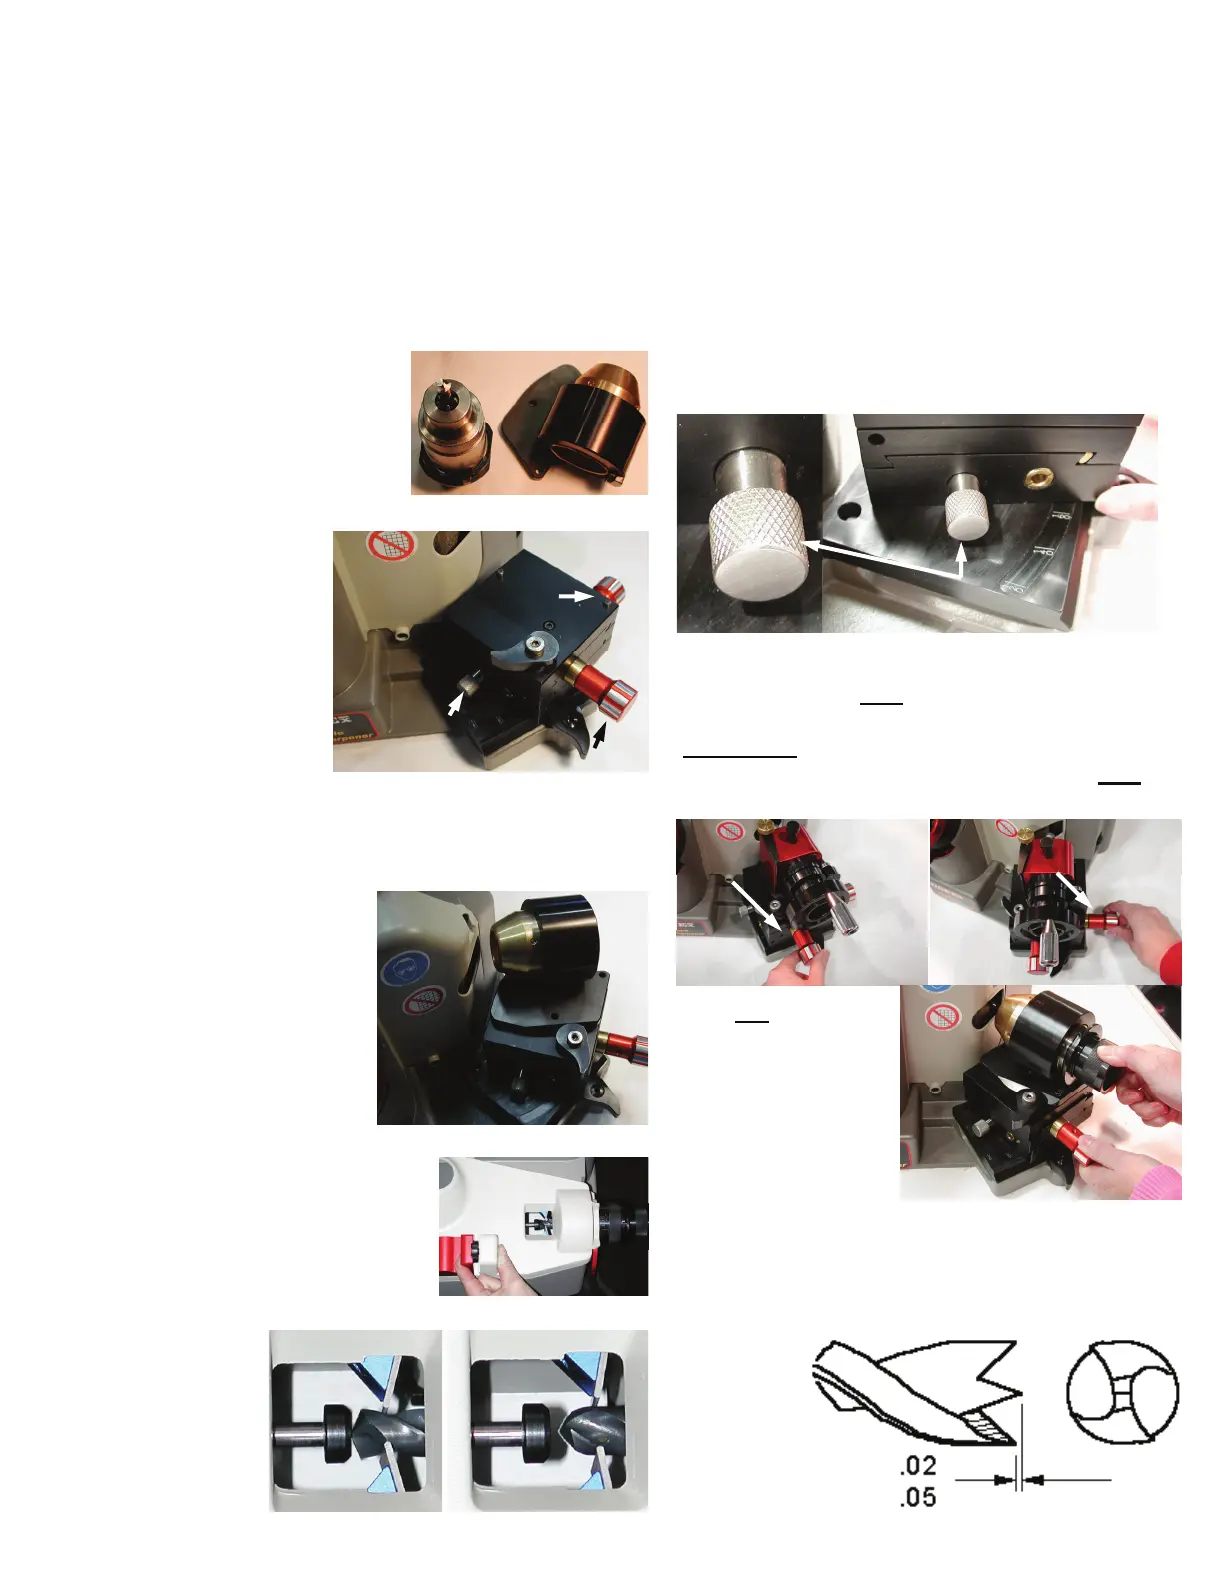
SETTING UP THE X-Y TABLE:
Brad point drills are ground with the X-Y Table
positioned at approx. the 160° mark. Loosen the
Pivot Lock Knob and rotate the X-Y Table to 160°.
Lock the Table.
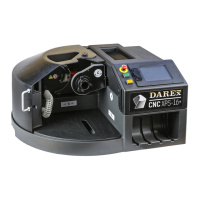
SHARPENING:
With the XT-3000
OFF
, place the Chuck in the
sharpening mechanism making sure the drill
DOES NOT
contact the grinding wheel. If it does,
use the X-Y axis knobs to position the drill
OFF
the wheel.
Turn
ON
your XT-
3000. Using the same
Axis Knobs, start to
move the drill into
the grinding wheel
while rotating the
Chuck. This fixture is
meant to re-sharpen
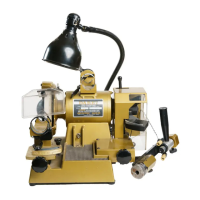
existing drills. During the sharpening process,
should you remove an
excessive amount of
material, due to damage, it will be necessary to
re-align the drill and sharpen again. Refer to the
diagram
below for
examples of
proper drill
geometry.
BRAD POINT ATTACHMENT
LEX200
CORRECT INCORRECT
Pivot Lock Knob
X-Axis Knob
Y-Axis Knob
Y-Axis Knob X-Axis Knob
Pivot Lock Knob