Getting Started
2 Allegro2
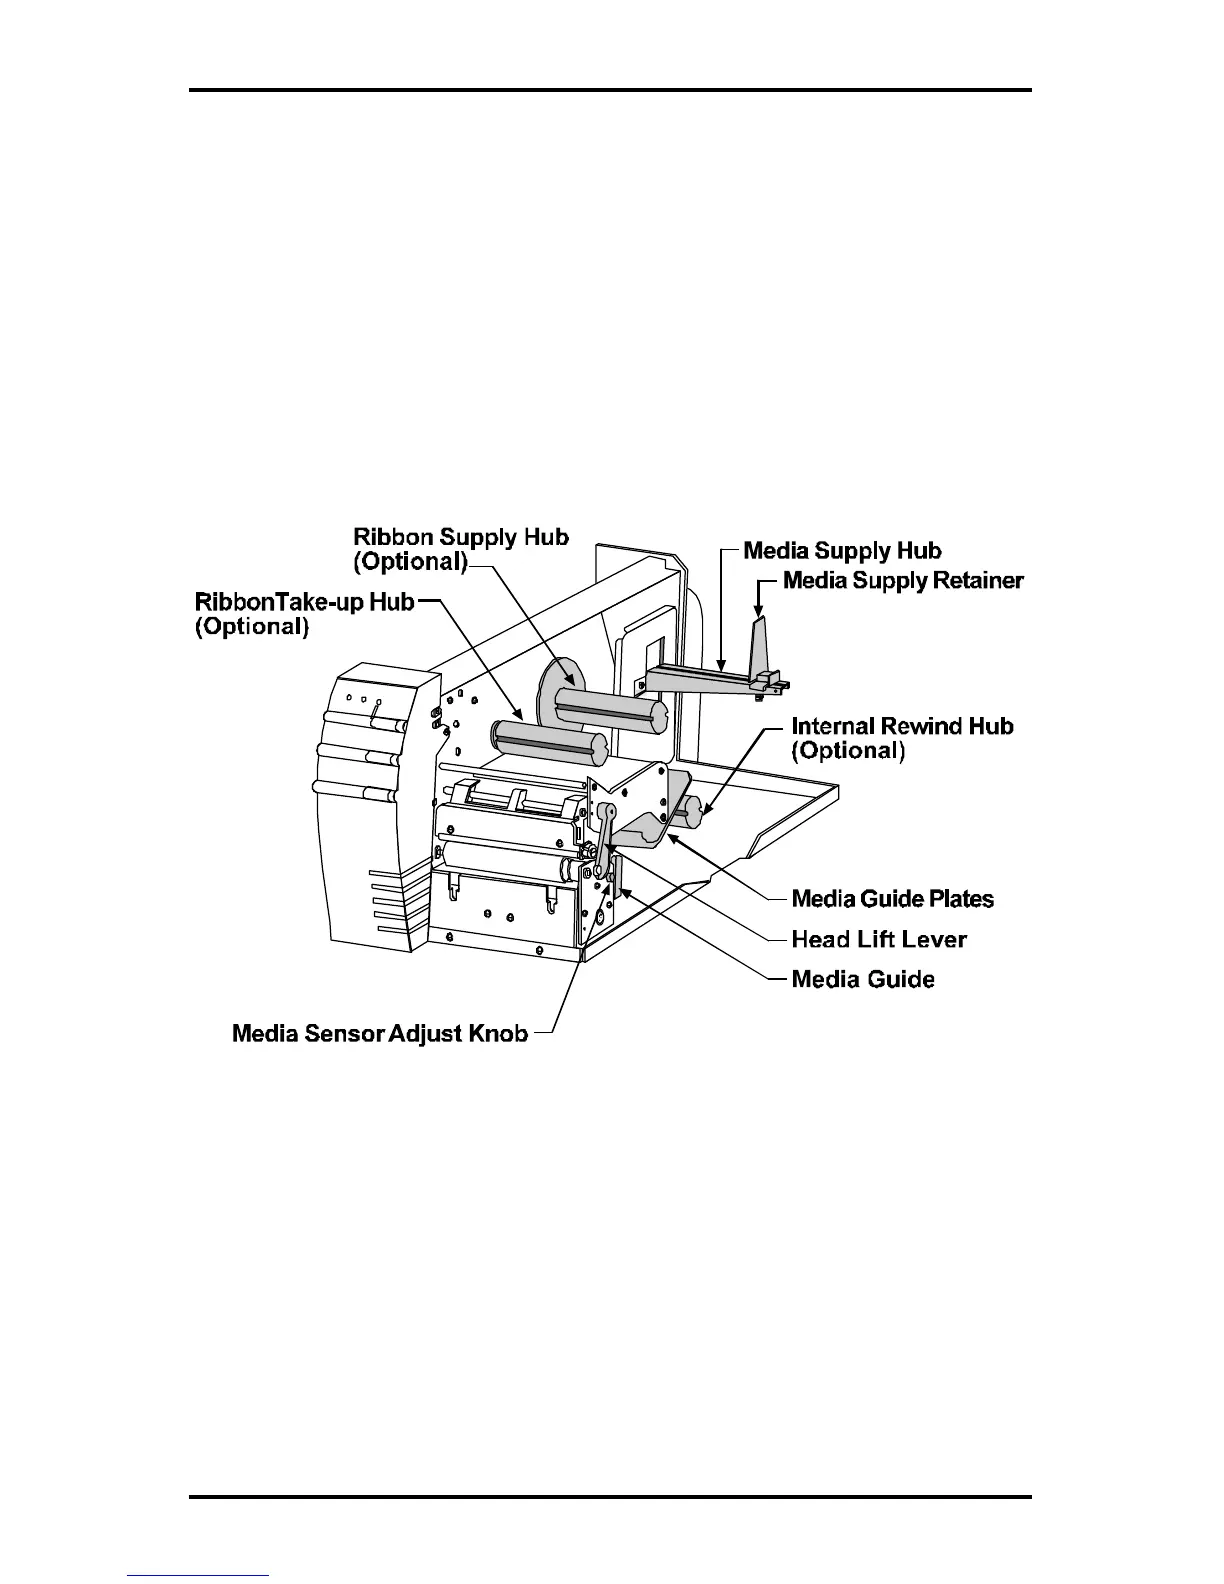
Location of Parts on Your Printer
The following illustrations show the major components of your
Printer. Figure 1-2 is a detailed view of the print mechanism from
the side. Figure 1-3 is a back view of the Printer. Figure 1-5 is a
view of Printer’s switches and indicators.
In this manual we will refer to the components and connectors
depicted in these illustrations. If you are not installing the optional
Cutter or Front Rewind, then you should proceed to install the Front
Tear Bar Assembly at this time (see Figure 1.4).
Figure 1-2 Mechanism Detail