EasyManua.ls Logo

DBPOWER RD-821 - User Manual

DBPOWER RD-821
32 pages
Print Icon
To Next Page IconTo Next Page
Loading...

USER MANUAL
Question and Answer IconNeed help?

Do you have a question about the DBPOWER RD-821 and is the answer not in the manual?

Overview

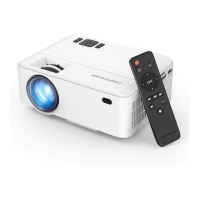
This document is the user manual for the DBPOWER Mini LCD Video Projector RD-821.

Function Description

The DBPOWER Mini LCD Video Projector RD-821 is a versatile device designed for displaying video, images, and text from various sources. It supports screen mirroring from Android and iOS devices, allowing for wireless and wired connections. The projector is suitable for home entertainment and presentations, though it is not recommended for professional use with PPTs, Word, or Excel documents. It features Bluetooth connectivity for audio output and supports a wide range of multimedia formats.

Important Technical Specifications

Basic Parameters

  • Imaging Technology: TFT LCD
  • Resolution: 1280x720 RGB
  • Highest Resolution: 1920x1080
  • Light: LED
  • Life Span: 50,000 hours
  • Lens: Multichip Coated
  • Lens (F=125): Manual
  • Operation Mode: Manual Operation
  • Throw Distance: 1-5M
  • Screen Size: 32-200 Inches
  • Aspect Ratio: 4:3/16:9
  • Projection Color Number: 16.7M color by 8 bit R.G.B. signal input
  • Keystone: Manual Correction ±15°
  • Power Voltage: 100V-240V 50/60Hz
  • Integrated Watt: 50W
  • Input: USB*1/SD/HDMI/VGA/AV
  • Output: Earphone*1/OUT 5V(5V-1.5A)
  • Speaker: 3W*1
  • System Support: Support multi-media
  • Language Support: Support 23 Language
  • Unit Size: 20414983mm
  • Projector Ratio: 1.4:1
  • New Weight: 1.05KG

Supported Multimedia Formats

  • Audio file: MP3 / AAC / WAV / FLAC / WMA / M4A
  • Picture file: JPG / PNG / BMP / JPEG
  • Video file: MP4 / MKV / MOV / WMV / RMVB / RM / AVI / FLV / TRP / VOB / 3GP / DIVX / TP / TS / MPG / M2TS / F4V / DAT
  • Text file: TXT

Video Format Resolution (HDMI)

  • 576P, 480P, 720P, 1080P

Usage Features

Getting Started

  1. Connecting to Power: Connect the power cable to the projector. An indicator light will display when connected.
  2. Power ON/OFF: Press the power button on the projector or remote control to turn it on.
  3. Multimedia Boot Screen: After 10-20 seconds, the multimedia screen will be displayed, offering options like Screen Mirroring, Memory Card, HDMI, VGA, Multimedia, and AV.

Connectivity

  • Bluetooth Setting:
    1. Select the "Setting" function menu or the Bluetooth shortcut key from the main interface.
    2. Choose "Sound Setting" and then "Bluetooth Setting."
    3. Select "Bluetooth Mode," turn on Bluetooth, and search for Bluetooth devices.
    4. Select the desired Bluetooth device to link.
  • Playing Media from USB/SD Card:
    1. Insert the USB/SD card into the slot.
    2. Choose "Memory Card" or "Multimedia" from the HOME screen.
    3. Select the content type (Video/music/photos/text).
    4. Choose the file to display and press "OK."
  • AV Video Connection: Use a 3-in-1 AV cable to connect to the projector. Select the AV signal source. Supports NTSC/PAL.
  • HDMI Connection: Use the HDMI slot to connect computers and HDMI-compatible devices. Select the HDMI signal source.
  • 3.5mm Audio Connection: Use the 3.5mm audio jack to connect headphones and speaker equipment. Note: This projector does not support Dolby sound.
  • Other Connection: USB output 5V for mobile table power supply.

Display Solutions

  • Focus & Keystone Correction:
    • Image Focusing: Adjust the focus by pressing button 2 on the projector.
    • Keystone Correction: The projector uses an optical keystone correction function. If the image is not vertically positioned, adjust the projector's position horizontally. The projector does not have a horizontal keystone correction function.
  • Screen Mirroring:
    1. Select "Screen Mirroring" in the HOME screen.
    2. Press the OK key to enter the interface.
    3. After entering the interface, select the function needed (Android Screen, iOS Screen, SyncScreen Setting).
    4. To return to the HOME screen from the Screen Mirroring interface, press the "Home" key on the remote control.
  • Android Screen (Wireless Connection - Recommended):
    1. Select "Android Screen" in the Syncscreen interface.
    2. Turn on WLAN on your Android device, choose the screen mirroring function, search for the projector's device name (SSID:DBPOWER_0B1F), and connect.
  • Android Screen (Wired Connection):
    1. Connect your Android device to the projector's OUT5V port with a USB cable.
    2. Your Android device will prompt to install "NeatCast-Screen-Mirror" app. Download and install it.
    3. Your Android device will prompt "NeatCast" window, select "OK."
    4. When your Android device prompts "Privacy notice" window, select "START NOW" to start screen mirroring.
  • iOS Screen (Wireless Connection without Wi-Fi Router):
    1. Projector does not need to connect to a Wi-Fi router.
    2. Turn on Wi-Fi on your iOS device and search for the projector's network name (e.g., DBPOWER_0B1F). Select it and enter the password "12345678."
    3. Turn on Screen Mirroring on your iOS device and select the projector's device name.
  • iOS Screen (Wireless Connection with Wi-Fi Router - Recommended):
    1. Connect the projector to a Wi-Fi router (refer to Wi-Fi connection method on page 24).
    2. Connect your iOS device to the same Wi-Fi router.
    3. Turn on Screen Mirroring on your iOS device and select the projector's device name.
  • iOS Screen (Wired Connection):
    1. Connect your iOS device to the projector's OUT5V port with a USB cable.
    2. Your iOS device will receive a trust prompt; confirm "trust" to start screen mirroring. Note: Use the original iOS device cable if a trust prompt is not received.
  • Setting Access: Press the "Menu" key or select "Setting" on the HOME screen. Use arrow keys to navigate and "OK" to confirm.
  • Sub-menu Functions:
    • PICTURE: Picture Mode, Color Temperature, Aspect Ratio, Noise Reduction, PC Adjust, Reduce Display Size, Projection Direction.
    • SOUND: Sound Mode, Balance, Surround Sound.
    • TIME: Clock, Sleep Timer.
    • OPTION: OSD Language, Restore Factory Default, Color Range, Sostware Upadate (USB).

SyncScreen Setting

  • Settings: WIFI (Search and Correct WiFi), System Upgrade (OTA upgrade / USB upgrade), More Setting (System Reset / Mirror Mode / Airplay Mode / Language).

WIFI Connection

  1. Select "WIFI" and press the OK key.
  2. Select the Wi-Fi network to connect to.
  3. Enter the correct password using the virtual keyboard.
  4. To disconnect, press the OK key and choose "Disconnect."
  5. To forget a password, press the OK key and choose "Forget."
  6. To exit the menu, choose "Cancel."

More Setting

  • System Reset: Confirm "Yes" to restore factory settings.
  • Mirror Mode:
    • Smooth: Requires higher network quality for optimal video playback and caching.
    • Standard: Reduces cache and mirroring delay.
    • Quick: No video caching; lower clarity in poor network environments for smooth playback and reduced delay.
  • Airplay Mode: Set channels for 1, 6, and 11 routers to avoid jams and delays in poor network conditions.
  • Language: Change the display language.

Projector Installation

  • Ceiling Mounting: Refer to the provided diagram for mounting the projector on a ceiling. Ensure suitable quality screws are used with sufficient depth to prevent falling.
  • Placement: Do not place the projector near heat sources to prevent overheating.

Maintenance Features

Safety Notice

  • Read the user manual carefully.
  • Use a standard power cord with ground wire.
  • Use the same power voltage as marked on the projector.
  • Do not disassemble the projector.
  • Do not look into the lens when the projector is operating.
  • Do not cover ventilation holes.
  • Keep the projector away from water or other liquids.
  • Do not put the projector in wet or moist conditions.
  • Turn off and unplug the projector when not in use for a long time.
  • Use original packing foam or other anti-shock material when relocating.
  • Contact customer support for any problems.
  • The mini projector comes with a full 12-month warranty.
  • Contact support for information about the warranty, including the frame, manual, packing, and subjective ideas about video, sound, or image aspects.

Remote Control Caution

  • Do not submerge the remote control in water.
  • Do not put the remote control near fire or in wet/hot places.
  • Do not use old and new batteries together.
  • Take out batteries if not using the remote control for a long time to avoid battery leakage.
  • Point the remote control at the IR receiver.

FCC Statement

  • The device complies with part 15 of the FCC rules. Operation is subject to two conditions: (1) this device may not cause harmful interference, and (2) this device must accept any interference received, including interference that may cause undesired operation.
  • Changes or modifications not expressly approved by the party responsible for compliance could void the user's authority to operate the equipment.
  • The equipment has been tested and found to comply with limits for a Class B digital device, pursuant to part 15 of the FCC Rules.
  • This equipment generates, uses, and can radiate radio frequency energy and, if not installed and used in accordance with the instructions, may cause harmful interference to radio communications.
  • If this equipment does cause harmful interference to radio or television reception, the user is encouraged to try to correct the interference by one or more of the following measures:
    • Reorient or relocate the receiving antenna.
    • Increase the separation between the equipment and receiver.
    • Connect the equipment into an outlet on a circuit different from that to which the receiver is connected.
    • Consult the dealer or an experienced radio/TV technician for help.

Radiation Exposure Statement

  • This equipment complies with FCC radiation exposure limits set forth for an uncontrolled environment.
  • This equipment should be installed and operated with a minimum distance of 20cm between the radiator and your body.
  • This transmitter must not be co-located or operating in conjunction with any other antenna or transmitter.

DBPOWER RD-821 Specifications

General IconGeneral
BrandDBPOWER
ModelRD-821
CategoryProjector
LanguageEnglish

Related product manuals