PSX-AR Manual Rev: P Software Rev: N
12
H. PSX-AR Accessory Addresses
Specific DCC Systems need to follow specific programming sequences to reliably
program a PSX-AR. See Section M for specific system instruction
Digitrax users: Install the Digitrax Loconet Configuration Jumper wire from Terminal
J7-3 to J7-4 [see Section A item 3]
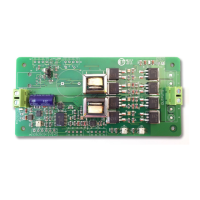
The easiest way to address a PSX-AR circuit breaker is at your work bench. The
PSX-AR’s addresses are SET by moving the program jumper as described below
and issuing an accessory command like operating an accessory by using your DCC
Throttle.
There are three [3] accessory addresses used by the PSX-AR. A command to the
first address turns the PSX-AR output ON (1) or OFF (0). A command to the second
address arms the photo cell detector. If no photo cell is connected, this command
will turn the PSX-AR OFF. A command to the third address will allow you to control
the position of the switch connected to the PSX-AR.
H.1 Setting the Three Accessory Addresses:
1. Turn off power to the PSX-AR
2. Place the J3 programming jumper on pins J3-1 & J3-2
3. Connect the DCC track power output of your DCC system to pins J1-1 and J1-2.
4. Turn power on to the PSX-AR.
5. The next accessory command issued by the DCC system will be stored as the first
address [track on/off].
6. Key in the first address you want to use and press either the ON or OFF accessory
command [or the appropriate key for your throttle – see the chart below]
7. By default, the PSX-AR will store the next two sequential addresses as the second and
third PSX-AR address.
8. If you don’t want to use these values, then key in an address that you want to use for the
second address and issue an ON or OFF command.
9. Repeat for the third address you want to use.
10. Each time you press the ON or OFF key with a new address, you should see D6 flash
indicating that the PSX-AR received the address and stored it.
11. When finished with the addresses you want to use, turn off DCC power to the PSX-AR.
12. Put the program jumper back to J3-2 and J3-3 unless you are going to program CV
settings.
13. Note the default addresses are 2042, 2043, and 2044 unless you followed the Digitrax
jumper directions in which case the defaults are 997, 998, and 999 (software Rev N or
higher). If these are acceptable, you do not need to program the address.
For all systems, whenever you enter an address or CV value, you should see D6 flash. This indicates
the PSX-AR has received the information, stored it, and verified the stored data match the data you sent.