PSX-AR Manual Rev: P Software Rev: N
22
M. System Sequential Programming Instructions for Setting Address and
Programming CV’s
Digitrax Using the DT400/402/500 Setting PSX Addresses:
1. Disconnect PSX from DCC power
2. Move PSX Jumper to Program Position Pins 1 & 2
3. Turn DCC power on “PWR”+ “ Y+”
4. After 30 seconds, reconnect DCC power
5. Press “SWCH” key to enter Switch Mode
6. Select the switch number to be set using the keypad or RH knob.
7. Press either the “OPTN” or “CLOC” key to set address.
8. Repeat steps 6 and 7 until all addresses set.
9. Press “EXIT” key to return to LOCO mode.
10. Turn DCC power off “PWR” “ N –“.
11. Move PSX J3 Jumper to Run Position
12. Turn track power on.
13. Test the switch address setting by using the “SWCH” key and switch addresses.
Digitrax Programming PSX CVs: Using DT400/402/500 Do Setting Addresses First
1. Disconnect PSX from DCC power.
2. Move PSX J3 Jumper to Program Position Pins 1 & 2
3. Turn DCC power on “PWR” “ Y+”
4. After 30 seconds, connect DCC power to the PSX
5. Select an unused locomotive number with the keypad or RH knob.
6. Press “PROG “ key until you get from Pg to Po
7. Use LH throttle dial to set the CV # and the RH throttle for the CV value.
8. Press ENTER
9. Repeat steps 7 & 8 until all the CV values are set.
10. Press EXIT
11. Turn DCC power off “PWR” “ N –“.
12. Move PSX J3 Jumper to Run Position
13. Turn track power on.
Lenz Setting PSX Addresses: Using the LH100
1. Turn DCC power off.
2. Move PSX J3 Jumper to Program Position Pins 1 & 2
3. Turn DCC power on
4. Press “F5" key to select “SW” mode.
5. Enter the switch number to be set using the keypad
6. Press ENTER.
7. Press either the “+” or “ – ” key to set the address. Let LED blink once.
8. Press the “CI” key to enter another address.
9. Repeat steps 5-7 until all addresses are set.
10. Press “ESC” key to return to normal.
11. Turn DCC power off.
12. Move PSX J3 Jumper to Run position Pins 2 & 3
13. Turn track power on.
14. Test the switch address setting using “SW” mode and the new switch address[es].
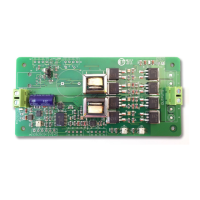
For all systems, whenever you enter an address or CV value, you should see D6 flash. This indicates
the PSX-AR has received the information, stored it, and verified the stored data match the data you sent.