PSX-AR Manual Rev: P Software Rev: N
9
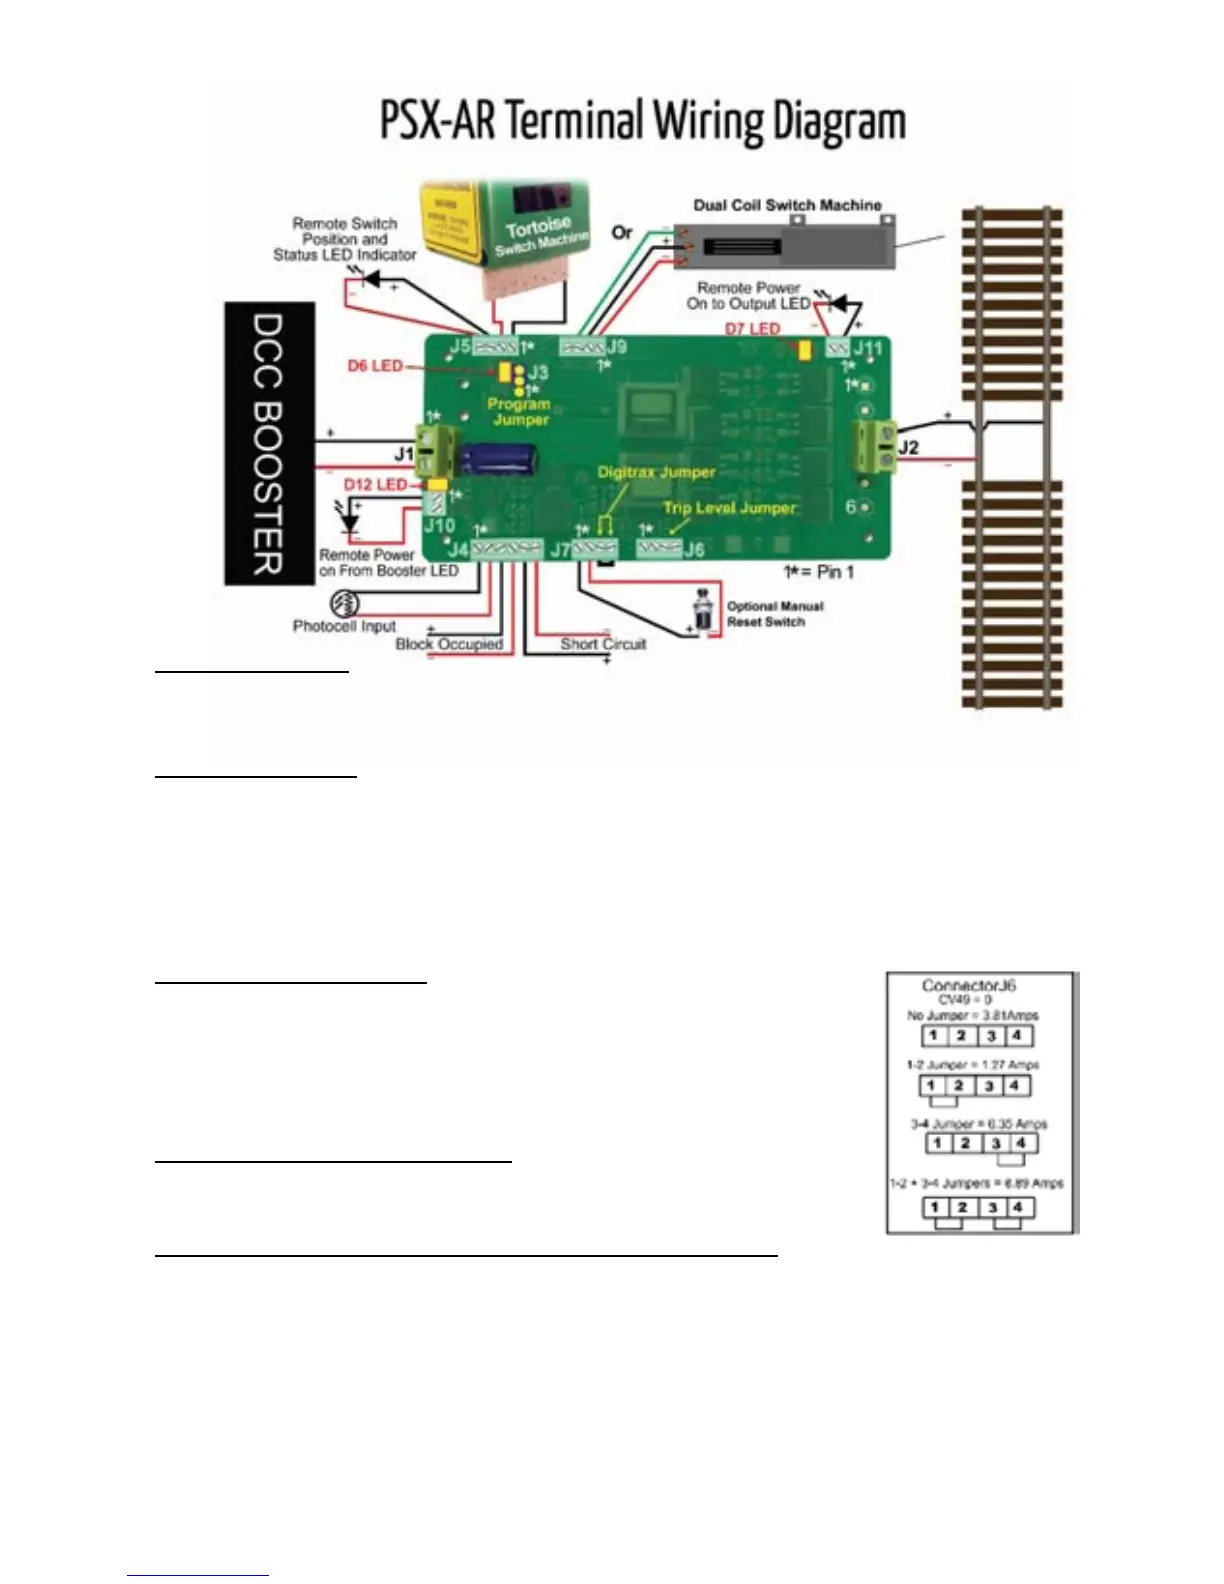
J3 Program Jumper
• J3-1 & J3-2 Place jumper on pins 1 & 2 for Programming
• J3-2 & J3-3 Place jumper on pins 2 & 3 for Operations
J4 Block Occupancy
• J4-1 Photo Sensor Input [active]
• J4-2 Photo Sensor Input [return]
• J4-3 + [collector] Block Occupied Output [Network Feedback]
• J4-4 - [emitter] Block Occupied Output [Network Feedback]
• J4-5 + [collector] Block Shorted Output [Network Feedback]
• J4-6 - [emitter] Block Shorted Output [Network Feedback]
J5 Status Outputs [Remote]
• J5-1 To Tortoise Pin 1 or 8 *
• J5-2 To Tortoise Pin 8 or 1 *
• J5-3 + [anode] Remote Status LED [copies D6]
• J5-4 - [cathode] Remote Status LED [copies D6]
*Select such that gaps closest to aligned point direction are in phase*
J6 Trip Current Settings by Jumpers
• See Table to the right and also CV 49
• Set trip current using either Jumpers or CV 49: NOT BOTH
J7 Auto/Manual Reset & Digitrax Loconet Special Configuration
• J7-1 to J7-2 with No Jumper: Auto Reset [default]
• J7-1 to J7-2 with Jumper: Manual Reset [open to reset] The user can install a normally
closed switch in series with the jumper. Open the switch to reset the PSX-AR or send an
accessory ON command to the PSX-AR on-off command address [see Section B item
12]
• J7-3 to J7-4 with Jumper: Digitrax Loconet Special Configuration [Section A item 3]
***PSX-AR LED Outputs do not require resistors***