20
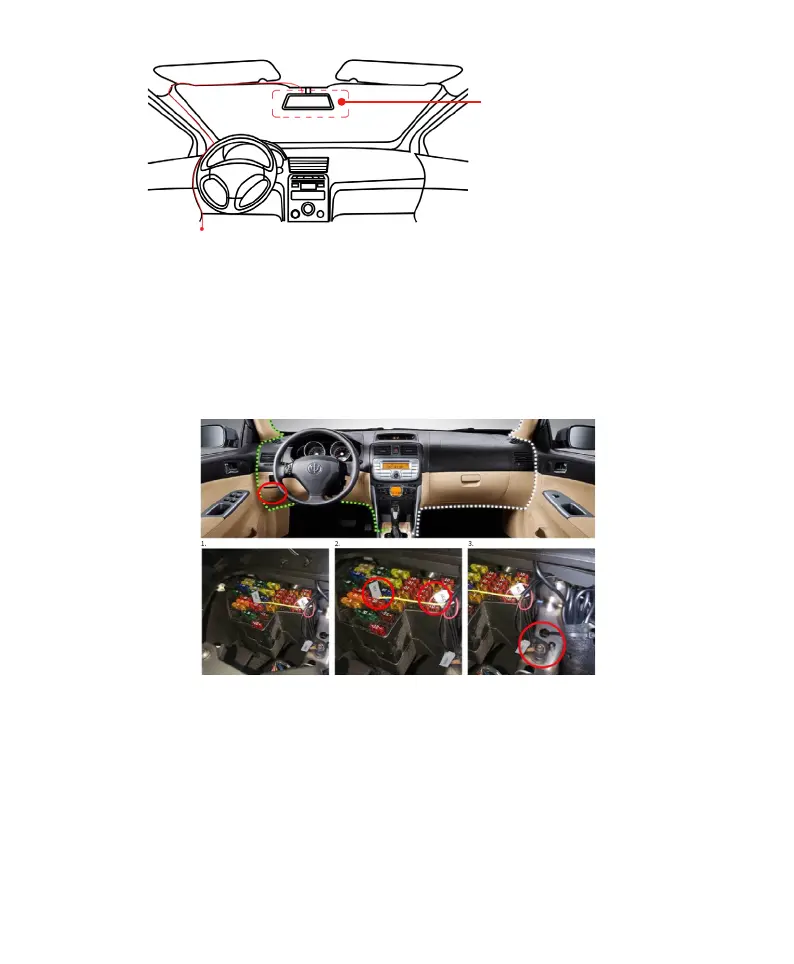
② Connect the terminal cables:
a. Connect the black wire (GND) to the ground wire inside the vehicle fuse box,
b. Connect the red wire (ACC) to the +12VDC power supply control of the fuse box,
c. Connect the yellow wire (VCC) to the 12VDC power supply of the fuse box (this power supply is always on and
not controlled by the ignition).
1. Open the fuse box (the location of it is varied from vehicles), test the continuous power, which means there will
be electricity even if the vehicle is not activated.
2. Connect the red wire to the ACC (ignition wire)
Connect the yellow wire to the VCC (constant electric current wire)
3. Connect the black wire to the metal (negative electrode)
3. Start the vehicle. After the Dash Cam is powered on, it will automatically start up and emit a startup prompt
tone.
4. Check if the Dash Cam is working properly.
The installation of the hardwire kit requires professional personnel from an auto service center. For detailed steps,
please see >Appendix: Installation of Hardwire Kit. Alternatively, scan the QR code below to watch the hardwire kit
installation video.
The optimal installation
position
Automotive fuse box:It is usually located on the left side of the driver's seat or near the steering wheel. For
details, please see the instruction manual