19
Appendix: Installing the Hardwire Kit
To avoid damage to the vehicle due to incorrect operation, please have the hardwire kit installed at a professional
auto service center.
If you have purchased a hardwire kit, you can directly connect it to the N3 Pro through the fuse box for power
supply.
Install the voltage reduction cable with a hidden deployment method, ensuring a tidy space. The method of power
supply installation through the hardwire kit can achieve parking monitoring function.
The detailed steps for installing the hardwire kit (connecting to the
fuse box for power supply) are as follows:
The installation of the hardwire kit requires connection to the vehicle's battery fuse box. Please ensure personal
safety and turn off the vehicle engine before proceeding with the installation.
Prerequisites: The mobile App has been verified to be able to connect to the N3 Pro after startup.
For details, please see Startup Check.
N3 Pro has been adjusted for shooting view and has been attached to the front windshield. For details, please see
Installing the N3 Pro onto Your Windshield.
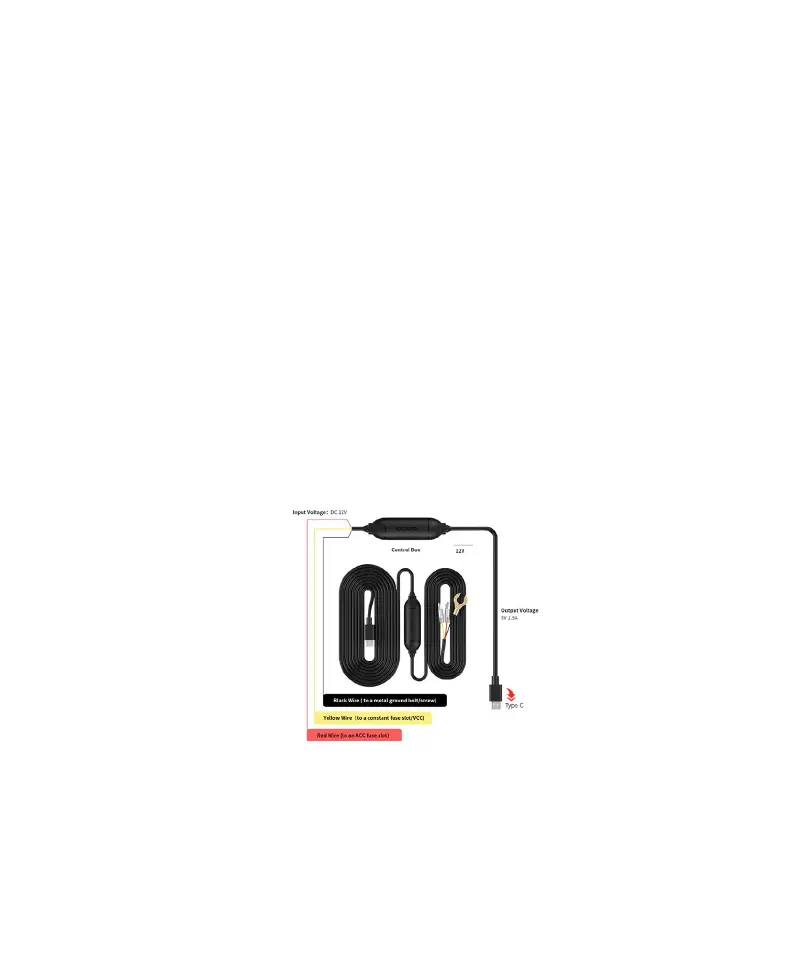
1. Take out the three types of wire terminals and the power connection wire as shown in the figure below.
The power connector Includes the following terminals:
(1) Red ACC wire terminal
(2) Yellow VCC wire terminal
(3) Black GND wire terminal
(4) The end of the power wire is a Type-C connector
2. Install the Dash Cam and power it on
① Insert the end of the power wire Type-C interface into the Dash Cam power interface, and route the power wire
along the front windshield, A-pillar, and driver's seat storage compartment to the fuse box. The power wire routing
method is shown in the figure below.