GHD
™
& Scout
™
User’s Manual
GHD
™
& Scout
™
User’s Manual
10
25/Aug/2010
3. Getting Started
3.1 Introduction
The GHD and SCOUT are stationary radars that give you the option
to track vehicles approaching, receding, or moving in both directions
simultaneously. Directionality dramatically enhances the target
selection process. For example, if the radar is set in toward (t) mode,
it will track only vehicles coming toward the radar and ignore all
vehicles moving away from it! In heavy trac situations, you can
choose to make trac moving in either direction invisible to the
radar.
3.2 Battery Charging - SCOUT
The SCOUT is designed to operate o of six (6) rechargeable Nickel-
Metal-Hydride batteries (or o the DC power cord). When you rst
receive your radar, the batteries will need to be charged for the rst
time before using. Once batteries have been charged if you do not
use the SCOUT for 3-4 weeks, you will want to recharge the batteries
before use in order to get the full run time. To charge batteries for the
rst time or to replace the batteries following steps 3.6 to 3.7.
3.3 Removing the Battery Holder - SCOUT
The battery holder is located inside the handle of the SCOUT and is
accessed by means of a sliding door. When rst received, the holder
should already have batteries installed, but if not then you will need
to remove the holder and loaded it with batteries. To remove the
battery holder slide the battery cover to the right until the battery
holder is released as shown in Figure 3.3. The door can be completely
removed from the slide.
Figure 3.3
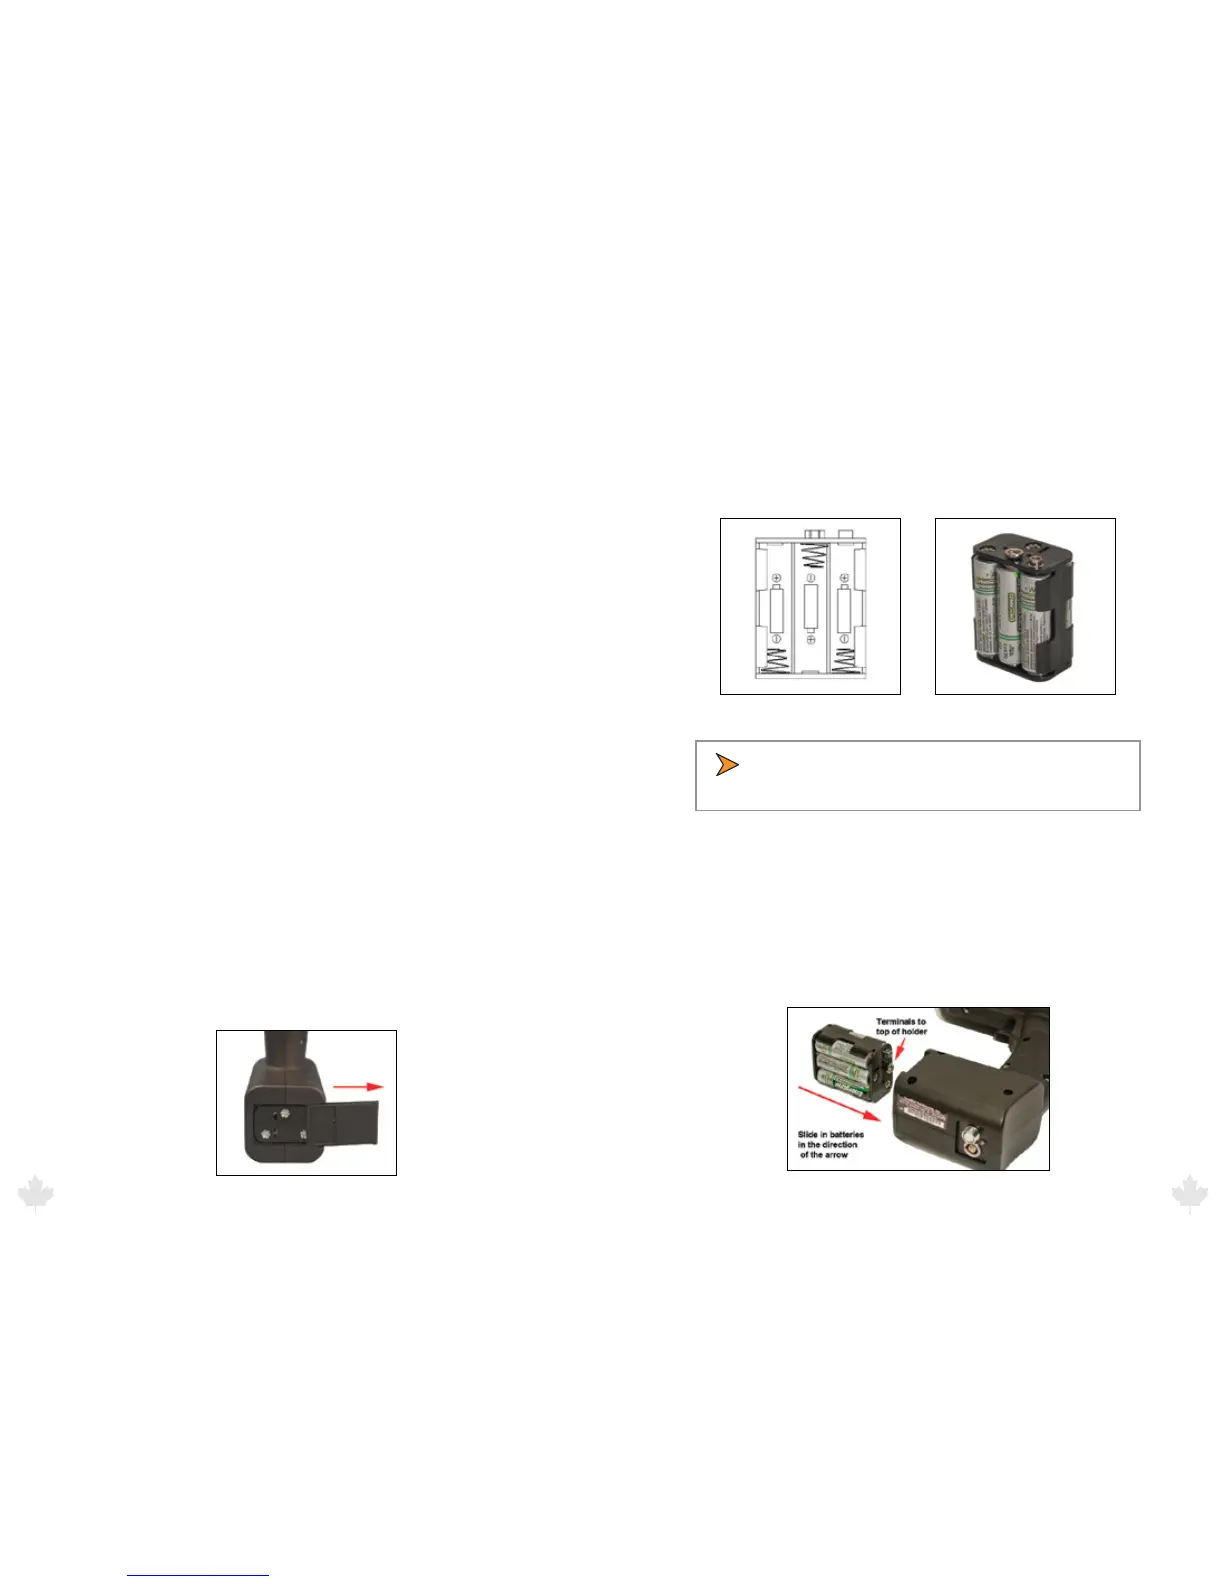
3.4 Battery Installation - SCOUT
Insert the batteries into the battery holder following the polarity
guide that is on the inside of the battery holder (Figure 3.4a.) Once
properly loaded the battery holder will look like the example in
Figure 3.4b
Figure 3.4a Figure 3.4b
• Note that the negative side of each battery goes to the
spring contacts of the battery holder.
3.5 Inser ting the Holder into the SCOUT
The battery holder is designed so that it can only make contact with
the power connections inside the gun if the holder is slid into the
gun in the correct way. If you look closely at the holder you will see
that there is a positive and negative terminal on it. These need to be
inserted into the gun with the terminals located at the top as shown
in the picture below.
Figure 3.5
25/Aug/2010
11