GHD
™
& Scout
™
User’s Manual
GHD
™
& Scout
™
User’s Manual
18
25/Aug/2010
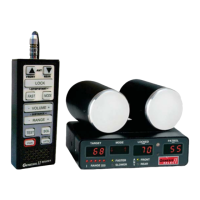
LOCK: Indicates that the speed previously displayed on the left
window is now locked and will appear in the right window.
FAST: Indicates that the radar is in Faster mode. When the device
is not in Faster mode, it is in Strongest Signal mode, which is the
default mode.
XMIT: Indicates that the radar is transmitting.
HOLD: Indicates the system is not transmitting.
ERROR: Indicates that the radar has detected an internal hardware
error which can aect the operation of the radar device. You should
turn the gun o and back on. If the problem persists, contact
Decatur Electronics at 800.428.4315 for assistance.
KM/H: The radar displays speeds in kilometers per hour, KPH
appears in the display.
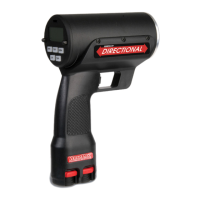
4.3 Trigger
The radar transmits and receives microwave energy when you pull
the trigger. To measure the speeds of target vehicles, pull and hold
the trigger. When you want to lock a speed, release the trigger then
quickly pull it again (within 1/2 second). The radar will take the speed
in the left display when the trigger is released, move it to the right
display, and lock it in. The right display will then ash alternately
between the locked speed and a directional indicator (t means the
target vehicle is moving toward you, and A means it is moving away
from you). As long as you continue to hold the trigger, the radar will
continue to track targets and display their speeds in the left display.
The locked speed clears when you pull the trigger again.
4.4 Mounting Congurations
The radar is designed for hand-held operation. Optionally, you can
mount it to a standard camera tripod.
5. Operating Modes
The MENU and SEL buttons on the GHD & SCOUT control panels let
you review and change programmable settings. The radar gun will
remember the settings you last set when it is turned o and will
power up with them.
5.1 Menu
You can use the factory default settings or you can select your own
settings. To select a setting, repeatedly press the MENU button until
the setting you want to change appears. Then press the select (SEL)
button to advance through the selections for that setting. When you
have made your selection, release the buttons and your new settings
will be in eect. If neither MENU or SEL is pressed after 2 seconds, the
radar gun will return to normal operating mode, capturing whatever
settings you have selected to that point. Figures 5.1 and 5.2 show the
menu setting choices.
Figure 5.1a
Menu Settings
25/Aug/2010
19