GHD
™
& Scout
™
User’s Manual
GHD
™
& Scout
™
User’s Manual
12
25/Aug/2010
Once the batteries have been properly loaded into the holder and
the holder has been inserted into the handle of the gun then the
door can be put back in place and slid closed. If you have not already
charged the batteries using an optional NiMH charger, you are now
ready to charge the batteries using the power cable.
• If the holder has been placed incorrectly into the
handle the door can not be put back in place and
closed..
3.6 Charging the Batteries - SCOUT
The power cable that comes with the SCOUT can be used to either
power the SCOUT directly from your vehicle receptacle or to charge
the SCOUT’s batteries. Once the batteries have been properly
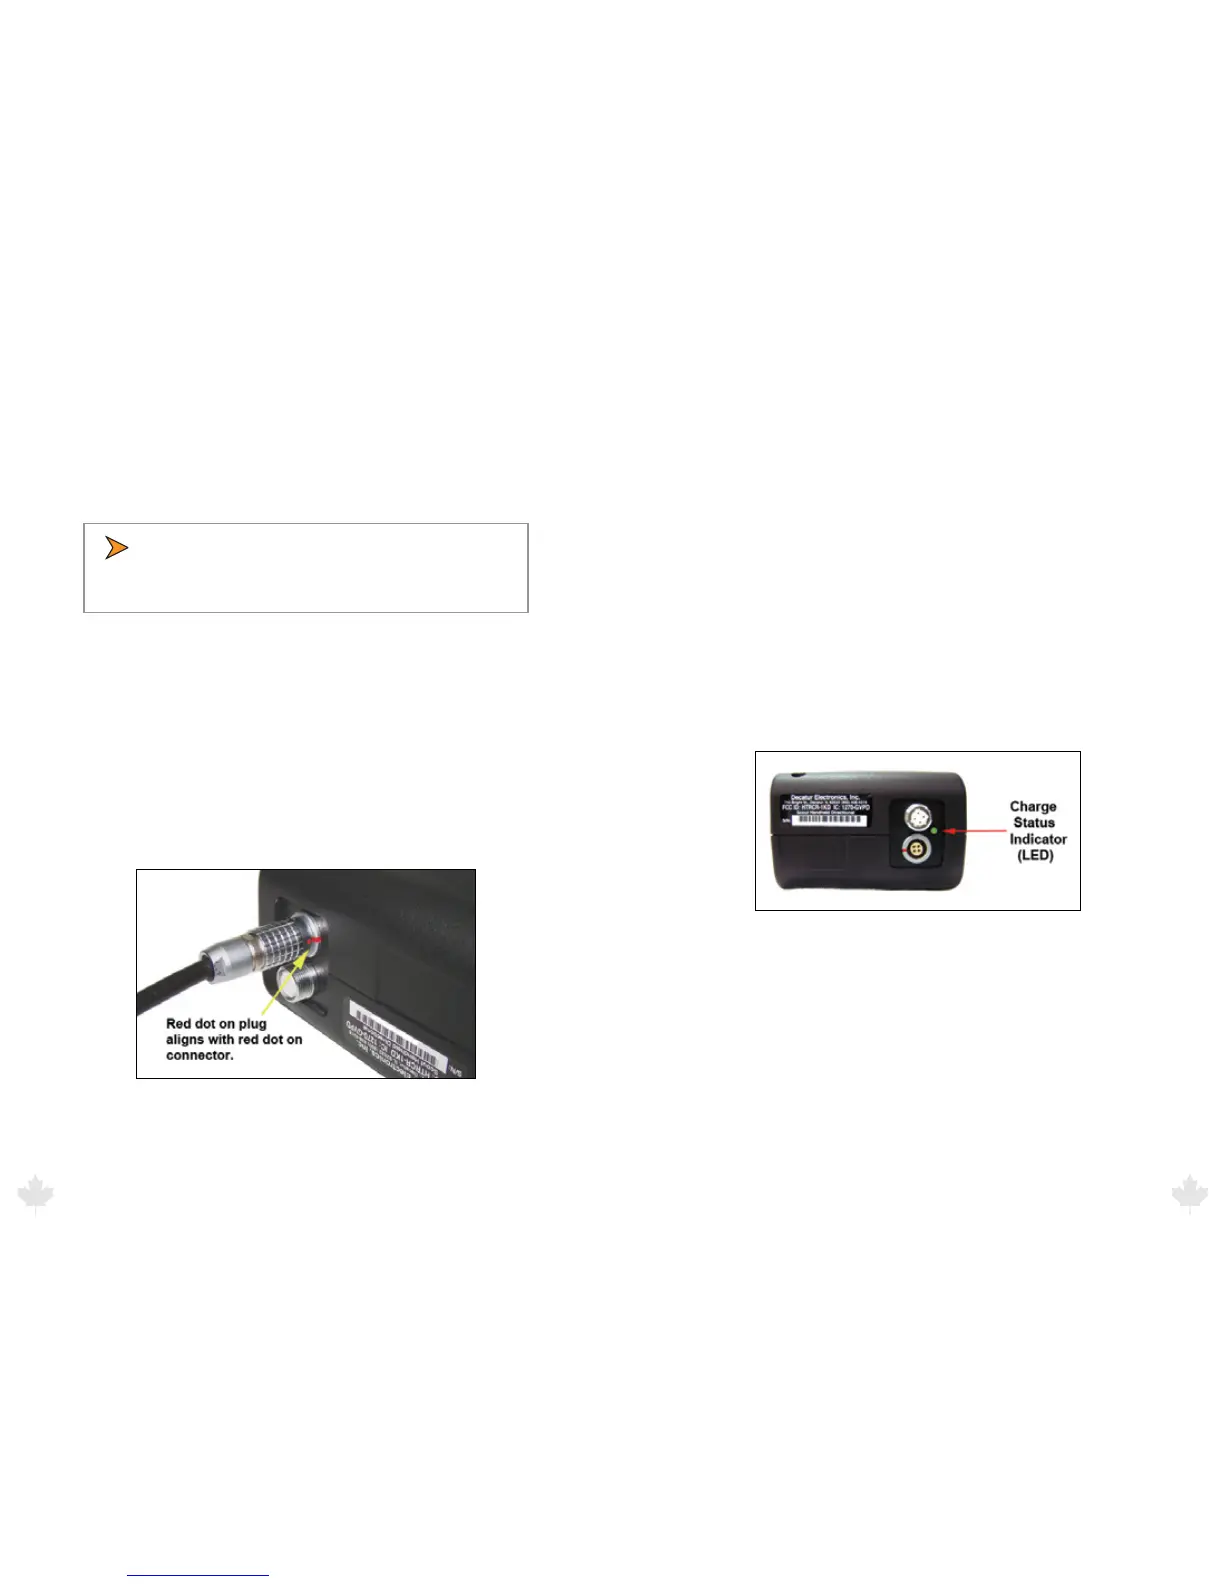
installed into the holder and inserted into the handle plug the
power cord into the power connector at the base of the handle by
aligning the red dot on the power cord’s plug with the red dot on
the connector (See Figure 3.6). Failure to align the plug with the
connector properly will result in damage to the pins of the jack.
Figure 3.6
Next, plug the lighter plug into an active cigarette lighter receptacle
in the vehicle. The red led on the lighter plug should come on
showing that power is being applied to the SCOUT. With the SCOUT
turned o, it will take approximately 2 hours to fully charge the
batteries. Turning the SCOUT on with the cord plugged in will stop
the charge cycle allowing the gun to be operated from the power
cord. Batteries do not charge when the gun is turned on.
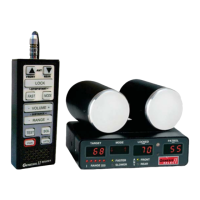
3.7 Charge Status Indicator (LED) - SCOUT
The status of the charge can be determined by the Charge Status
Indicator LED located on the bottom of the handle (See gure 3.7).
The table below denes the status.
• Fast blinking green light = checking battery condition
• Medium blinking green light = charging battery
• Solid green light = charged
• Solid red light = charging error
Figure 3.7
The normal charging sequence is fast blink for 60 seconds, medium
blink until batteries are fully charged (approximately 2 hours for fully
discharged batteries) and solid green once batteries are charged.
The gun can be left to charge indenitely. The charging circuit will
automatically shut o once charging is complete.
25/Aug/2010
13