IM-Inst-RF360en v0.4
Dedrone
15
Integrate the RF-360 in your DroneTracker
7 Integrate the RF-360 in your DroneTracker
The integration procedure of the RF-360 in your DroneTracker depends on the system type:
• On premises installations using your local DroneTracker Server (see chapter 7.1 Integrate the
RF-360 in your on prem DroneTracker Server, page 15).
• Dedrone Cloud installations do not require any additional infrastructur and are connected to
the Dedrone Cloud (see chapter 7.2 Integrate the RF-360 via Dedrone Cloud, page 17).
7.1 Integrate the RF-360 in your on prem DroneTracker Server
To connect to the RF-360 DHCP-Services are required that automatically assign an IP address to
the RF-360. If the RF-360 and the DroneTracker Server are in the same Layer2 network they can be
connected directly. If the RF-360 and the DroneTracker Server are in different networks refer to the
Dedrone Planning Manual or consult your network administrator.
12
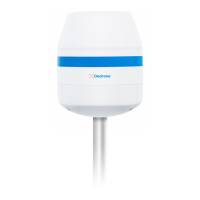
To operate the RF-360 via the supplied AC
cable, connect the AC cable to the AC socket:
• Remove the protective cap from the AC
plug.
• Plug the AC cable into the plug (1).
The plug clicks into place and the
arrow
on the plug points to the lock
symbol on the socket.
• Lay the cable in the cable guide (2).
• Plug the AC plug into the socket.
If the AC cable carry current, the RF-360
boots automatically and after approxi-
mately 1 second the blue button at the
RF-360 illuminates, indicating that the
hardware is ready.
The AC cable is connected to the socket
and the RF-360 does not boot automati-
cally after approximately 1 second?
E Push the blue button and wait for it
to illuminate.
E Make sure that the power connection
carry current.
1
2
13
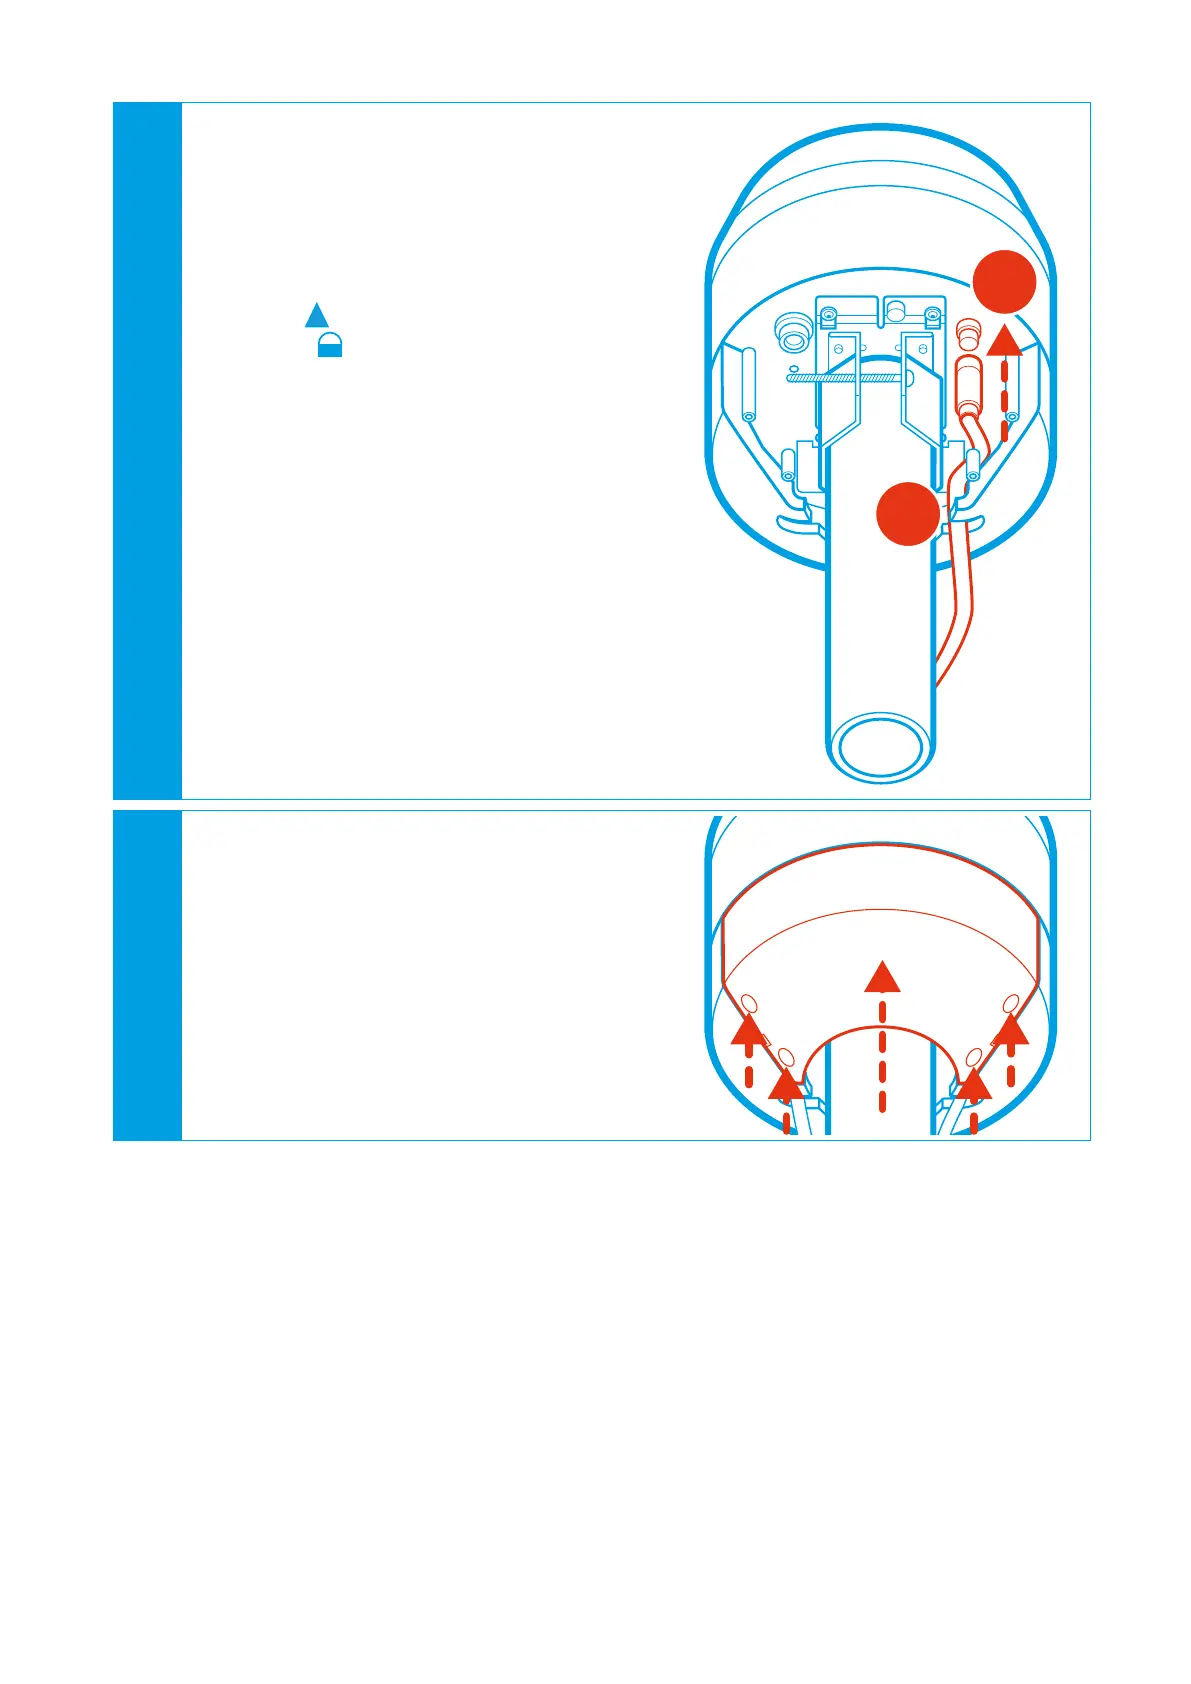
Close the RF-360 cover:
• Put the cover on the RF-360.
The cover locks in place.
• Screw down all cover screws.