Do you have a question about the DeFelsko PosiTector 6000 and is the answer not in the manual?
Explains the significance of Dry Film Thickness (DFT) in coating application and performance.
Emphasizes measuring the uncoated part first as a crucial step in calibration.
Guides on powering up the SmartLink and connecting it to the app for measurement.
Details placing the probe, taking readings, and handling continuous measurements.
Describes the PosiTector App's role in connecting probes wirelessly to smart devices.
Outlines the steps to wirelessly connect the PosiTector SmartLink and probe to the app.
Explains the Main Navigation Bar and SmartLink Status Bar components of the app interface.
Details the Measurement Area, Modes Icons, Units, and the Carousel for app navigation.
Describes the actions in the Tool Bar for managing data like photos and notes.
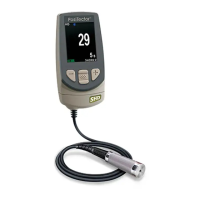
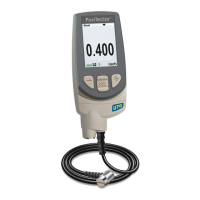
Explains the SmartLink's function as a wireless relay between probes and smart devices.
Provides instructions on how to connect and detach PosiTector probes from the SmartLink.
Details the feature allowing probes to be interchanged without restarting the connection.
Explains how to power the SmartLink on/off and interpret the LED color status.
Explains the principles behind Magnetic and Eddy Current measurement methods used by the probes.
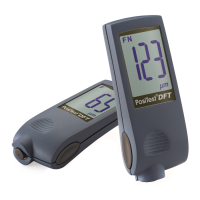
Differentiates between F, N, and FN probes based on their measurement principles and applications.
Instructs on the proper use and replacement of the probe's protective cap.
Outlines user-adjustable calibration settings like Zero, 1-Point, and 2-Point adjustments.
Explains the inclusion of a Certificate of Calibration and recommendations for re-certification intervals.
Describes how to verify probe accuracy using known reference standards.
Details the process of adjusting the probe's readings to match known thickness samples.
Explains how to navigate the app's menu structure to access different functions.
Lists the main sub-menus available, including Memory, Statistics, Cal Settings, and Setup.
Explains how the app uses smart device storage for measurements and data sharing options.
Guides on creating new batches for organizing measurements and the shortcut for this action.
Describes the information presented in the batch summary, including mean, min/max readings, and calibration status.
Explains the tool bar icons for managing batches, adding notes, photos, or creating new batches.
Details how to delete or ignore specific readings from the current batch and their impact on reports.
Repeats the shortcut for creating a new batch, closing the current one.
Explains how to add photos to readings and manage them within reports.
Guides on adding text notes to readings or batches and how they appear in reports.
Describes how to share batch reports (PDF, CSV) via email, Dropbox, or other apps.
Explains how to generate and customize batch reports, including configuration options.
Details the process of exporting data in CSV or JSON formats for analysis in other applications.
Shows all readings in the current batch, with options to add notes or photos to individual readings.
Displays readings graphically, allowing users to pinch and zoom for detailed chart analysis.
Lists available stored batches and guides on selecting one to open.
Explains how closing a batch turns off Memory and retains data.
Details permanent removal of batches from the app and device storage.
Allows customization of reports, including notes, images, logo, and company name.
Summarizes how to generate reports for individual or multiple batches.
Explains the statistics display, including mean, standard deviation, and min/max readings.
Describes how the visible alert system functions when measurements exceed defined limits.
Guides on defining upper and lower measurement limits for audible or visual alarms.
Explains how to clear existing HiLo tabulations from the display.
Defines calibration adjustment as aligning probe readings to a known thickness sample.
Discusses factory calibration and when user adjustments like Zero, 1-point, or 2-point are needed.
Provides step-by-step instructions for measuring and averaging uncoated surfaces for zero calibration.
Details the process of adjusting the probe to a known thickness sample using a single point.
Explains the preferred method for unusual substrates, involving adjustments at two different thickness points.
Describes how to save and recall specific calibration adjustments for future use.
Outlines the functions for managing calibration settings: new, open, and delete.
Explains the N Lock feature for non-ferrous substrates, using eddy current principle.
Details how to lock calibration settings to prevent accidental changes.
Describes how to view the current calibration and restore factory defaults.
Shows how to access and view information about the connected SmartLink, probe, and app version.
Explains how to convert between imperial and metric units, noting impact on other settings.
Describes how to lock the SmartLink to a specific device to prevent unauthorized connections.
Details how Scan mode takes faster readings and records all measurements, suitable for smooth surfaces.
Explains Fast mode for quick inspection of large areas with thick coatings where positioning is less critical.
Outlines the steps for performing a menu reset via the app, including data loss implications.
Explains how to reset the PosiTector SmartLink using the LED button to restore factory defaults.
Describes how probes compensate for temperature and the need to discard initial readings.
Addresses common problems like inconsistent readings, no readings, and connectivity issues.
| Type | Coating Thickness Gauge |
|---|---|
| Technology | Magnetic Induction, Eddy Current |
| Substrates | Ferrous and non-ferrous metals |
| Measurement Range | 0 to 60 mils (0 to 1500 µm) |
| Resolution | 0.1 μm (0.01 mils) |
| Display | LCD |
| Power Source | 2 x AAA batteries |
| Connectivity | USB, Bluetooth |
| Units | Mils, Microns |
| Weight | 140 g (without batteries) |
| Probe Type | Integral or separate |
| Standards Compliance | ISO 2178, ISO 2360 |