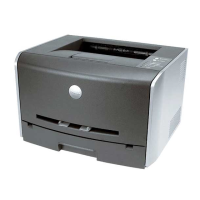
Setting Up for Network Printing
Direct Attachment With a Network Cable (Using a Print Server)
Direct Attachment With a Network Cable (No Print Server)
Local Attachment With a USB or Parallel Cable (Using a Print Server)
Shared Printing
Direct Attachment With a Network Cable (Using a Print
Server)
A print server is any designated computer that centrally manages all client print jobs. If you are sharing your
printer in a small workgroup environment and want to control all print jobs on the network, follow these
instructions to attach the printer to a print server.
Print and Check the Network Setup Page
When the Ready/Data light is on solid, press and release Continue to print a menu settings
page and a network setup page.
1.
Under the Standard Network Card heading on the network setup page, make sure Status is Connected.2.
If Status is Not Connected:
Make sure the Ethernet cable is firmly plugged into the back of the printer.
Plug the Ethernet cable into another wall outlet.
Under the "TCP/IP" heading on the network setup page, make sure the IP address, netmask, and
gateway are what you expected.
3.
Ping the printer and verify that it responds. For example, at a command prompt on a network
computer, type ping followed by the new printer IP address (for example, 192.168.0.11):
4.
ping xxx.xxx.xxx.xxx
If the printer is active on the network, you will receive a reply.
If your printer doesn't respond, or if the IP address is not what you expected:
Insert the Drivers and Utilities CD into your computer.a.
The Drivers and Utilities CD should launch the installation software automatically.b.
5.