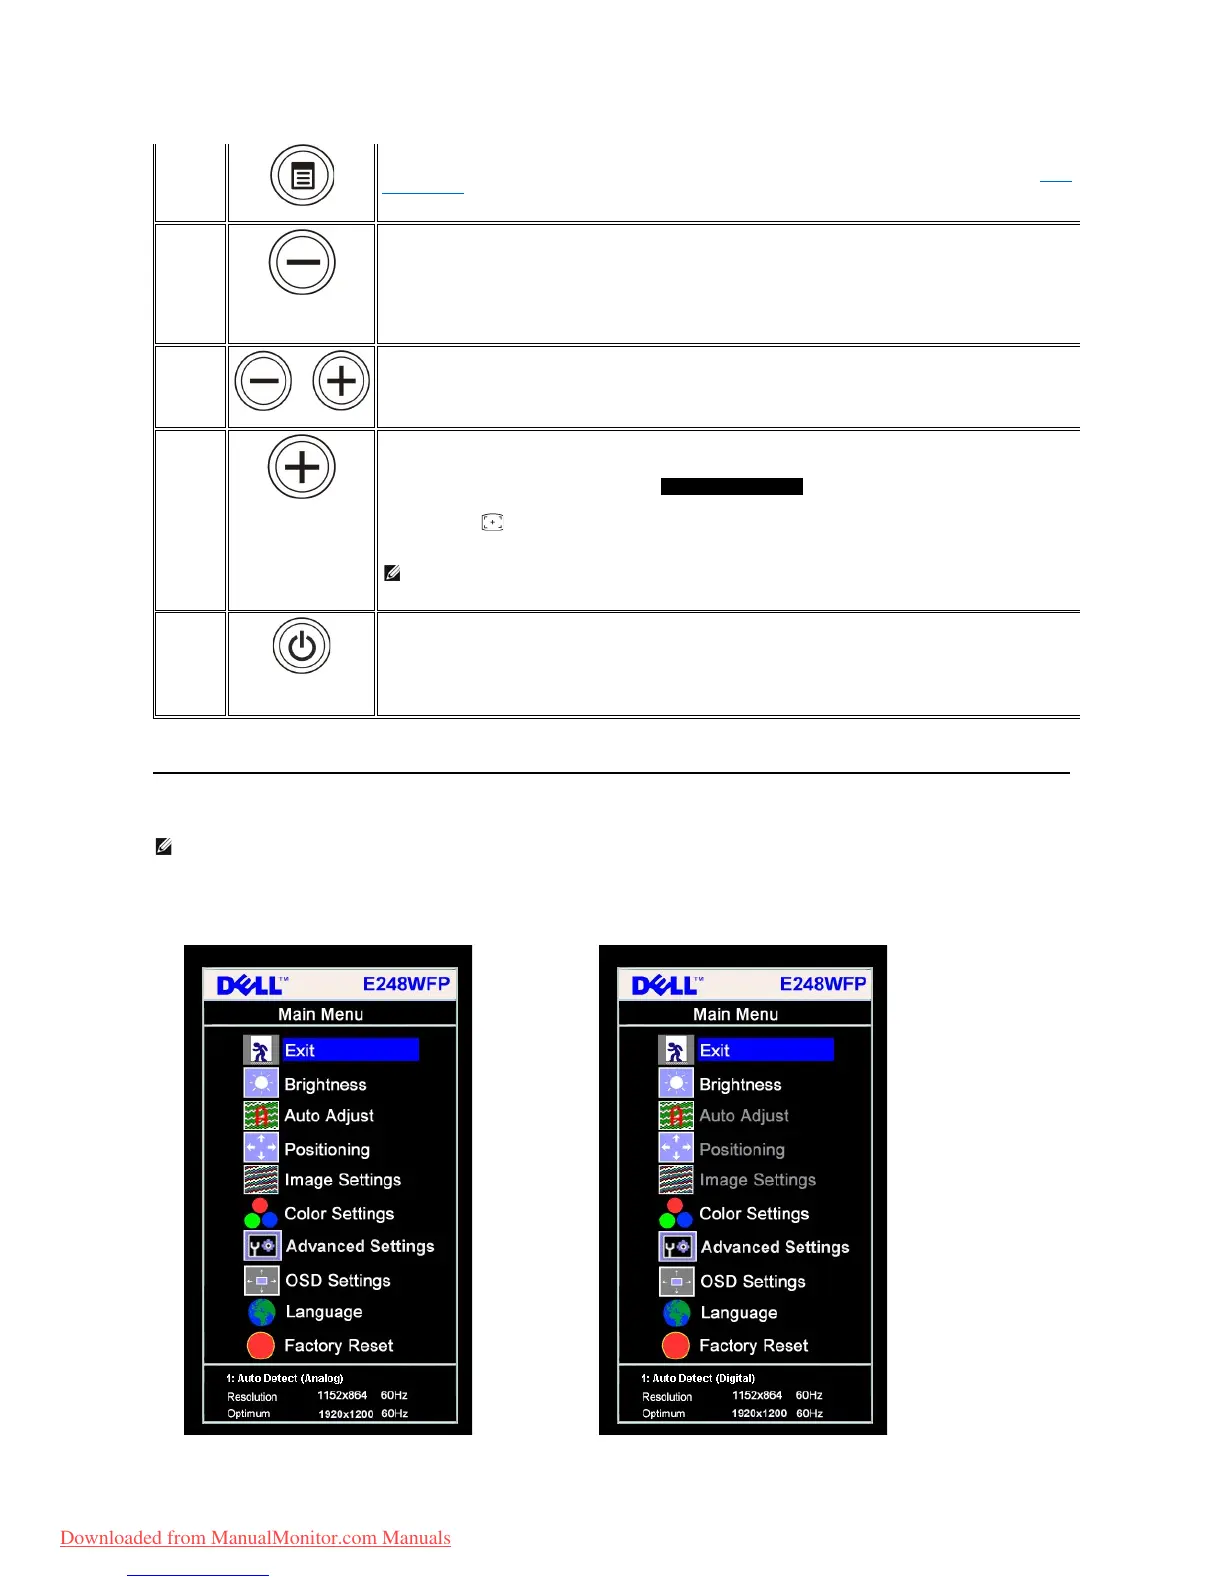
Using the OSD Menu
1. Push the MENU button to open the OSD menu and display the main menu.
The Menu button is used to open and exit the on-screen display (OSD), and exit from menus and sub-menus. See Using
the OSD Menu.
Brightness /Contrast
Hot Key
Use this button for direct access to the "Brightness" and "Contrast" control menu.
Use these buttons to adjust (decrease/increase ranges) items in the OSD menu.
Use this button to activate automatic setup and adjustment. The following dialog appears on a black screen as the
monitor self-adjusts to the current input:
Auto Adjustment button allows the monitor to self-adjust to the incoming video signal. After using Auto Adjustment,
you can further tune your monitor by using the Pixel Clock (Coarse), Phase (Fine) controls in the OSD.
NOTE: Auto Adjust does not occur if you press the button while there are no active video input signals or attached
cables.
Power button
(withpowerlight
indicator)
Usethepowerbuttontoturnthemonitoronandoff.
Thegreenlightindicatesthemonitorisonandfullyfunctional.Anamberlightindicatespowersavemode.
NOTE: Ifyouchangethesettingsandtheneitherproceedtoanothermenu,orexittheOSDmenu,themonitorautomaticallysavesthose
changes.ThechangesarealsosavedifyouchangethesettingsandthenwaitfortheOSDmenutodisappear.
Main Menu for Auto Detect Analog (VGA) Input
Main Menu for Auto Detect Digital (DVI) Input
Downloaded from ManualMonitor.com Manuals