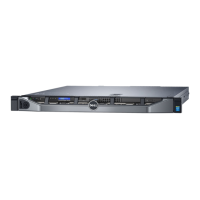
Table 2 Front panel features of the 4 x 3.5-inch cabled hard drive system (continued)
Item Indicator, Button, or
Connector
Icon Description
2 NMI button Press the NMI button to troubleshoot
software and device driver errors when
running certain operating systems. Use the
end of a paper clip to press the NMI button.
Note: Use the NMI button only if directed
to do so by qualified support personnel or
by the operating system documentation.
3 System identification
button
Press the system ID button:
l
To locate a particular system within a
rack.
l
To turn the system ID on or off.
To reset iDRAC, press and hold the button for
more than 15 seconds.
Note: To reset iDRAC using system ID,
ensure that the system ID button is
enabled in the iDRAC setup.
Note: If the system stops responding
during POST, press and hold the system
ID button (for more than five seconds) to
enter the BIOS progress mode.
4 Video connector Use the video/VGA port to connect a display
to the system. For more information about the
supported video/VGA port, see the Technical
specifications section.
5 Diagnostic indicators The diagnostic indicators light up to display
error status.
6 USB port (2) Use the USB 2.0 port to connect USB devices
to the system. This port is 4-pin, USB 2.0
compliant.
7 Information tag Displays system information such as service
tag, NIC, and MAC address.
Note: The information tag is a slide-out
label panel.
8 Hard drives Up to 4 x 3.5 inch cabled hard drives.
For information about the supported hard
drives, see the Technical specifications
section.
9 Optical drive
(optional)
One optional slim SATA DVD-ROM drive or
DVD+/-RW drive.
For information about the supported optical
drive, see the Technical specifications
section.
Dell PowerEdge R430 system overview
14 Dell PowerEdge R430 Owner's Manual

 Loading...