2. Align the screw holes on the base cover with the screw holes on the palm-rest and keyboard assembly, and then snap the
base cover into place.
3. Replace the four screws (M2x6) that secure the base cover to the palm-rest and keyboard assembly.
4. Tighten the four captive screws that secure the base cover to the palm-rest and keyboard assembly.
Next steps
1. Follow the procedure in After working inside your computer.
Solid-state drives
Removing the solid-state drive in SSD slot one
Prerequisites
1. Follow the procedure in Before working inside your computer.
2. Remove the base cover.
About this task
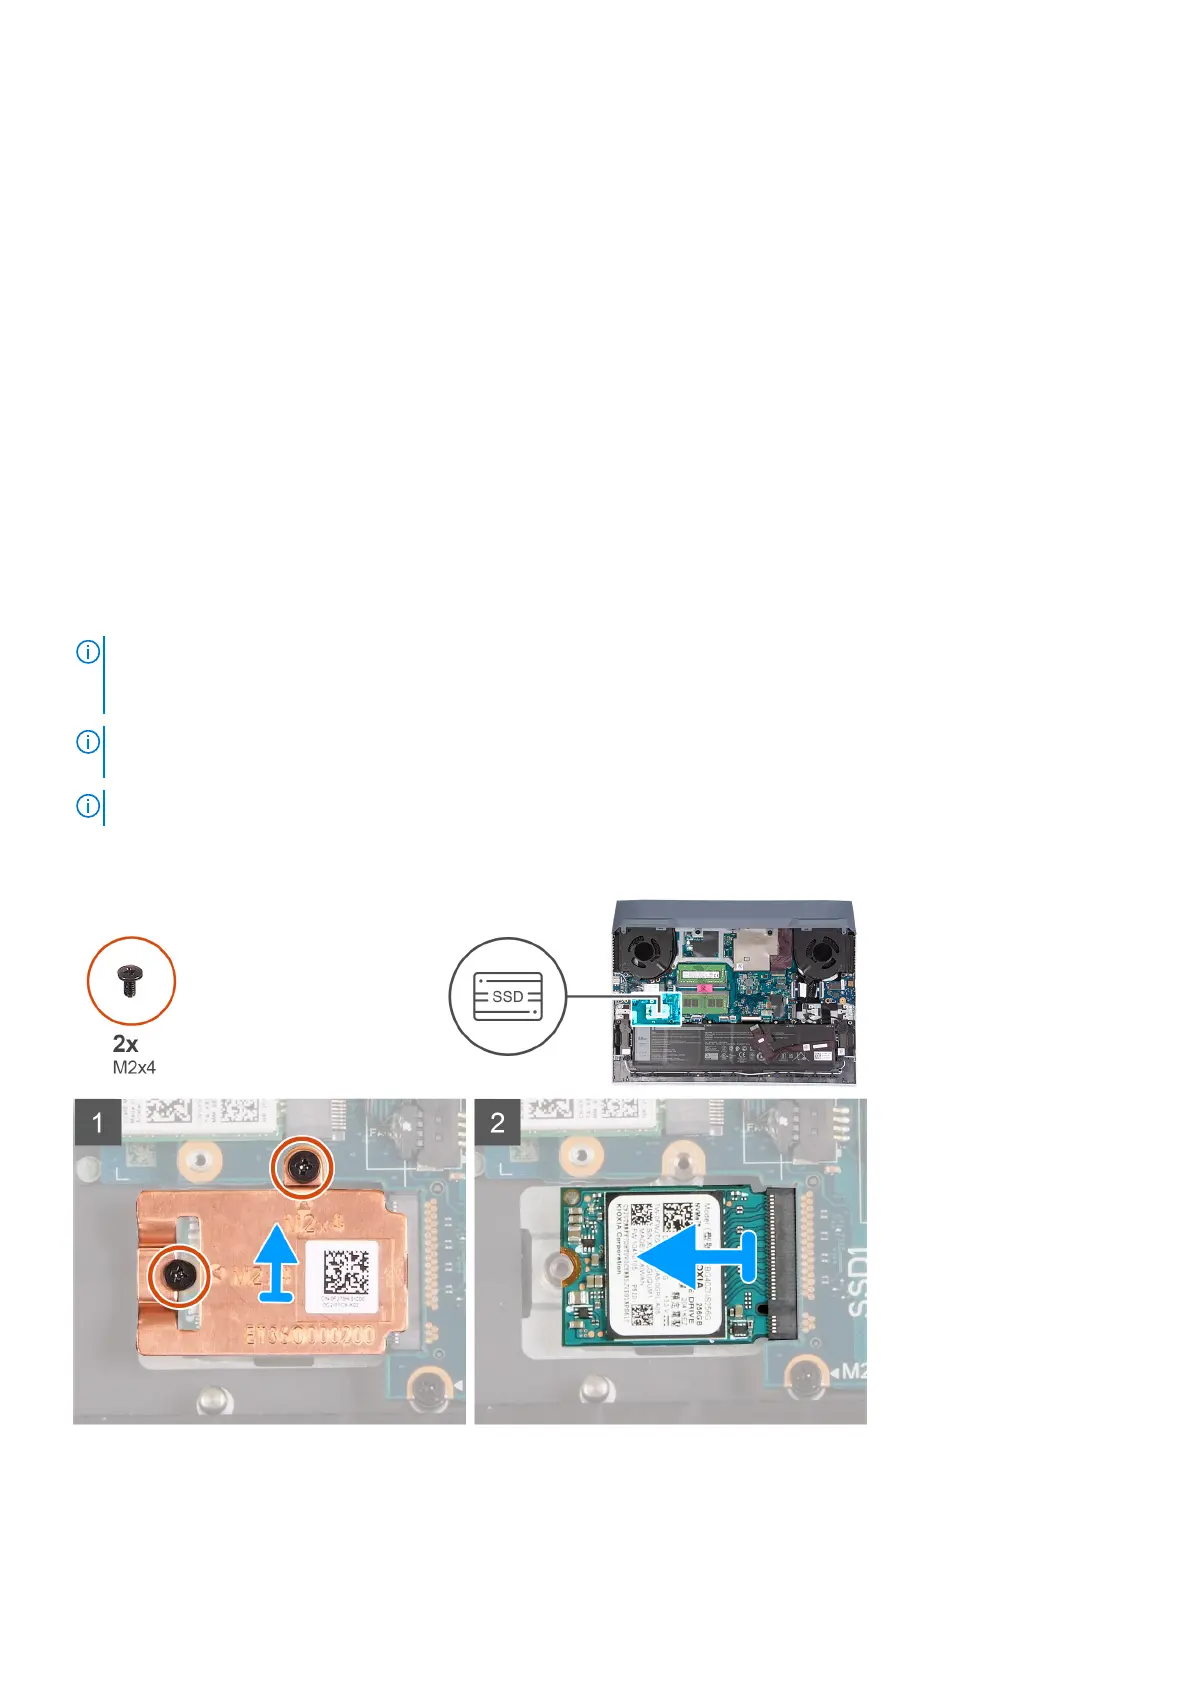
NOTE: Your computer has two solid-state drive slots. The solid-state drive 1 slot is located at the bottom left corner of the
system board and the solid-state drive 2 slot is located at the bottom right corner of the system board. Both slots support
M.2 2230 and M.2 2280 SSDs.
NOTE: For more information about Dell qualified solid-state drives supported by your computer, see Parts & Accessories at
https://www.dell.com/support..
NOTE: Flash (update) the BIOS before upgrading to a Gen4 solid-state drive.
The following image indicates the location of the solid-state drive that is installed in SSD slot one and provides a visual
representation of the removal procedure.
Removing and installing components
15
 Loading...