EasyManuals Logo

Dell Inspiron N7110 User Manual

Dell Inspiron N7110
116 pages
To Next Page IconTo Next Page
To Previous Page IconTo Previous Page
Page #24 background imageLoading...
Page #24 background image
24 Memory
Replacing the Memory Module(s)
CAUTION: If you need to install memory modules in two connectors, install a
memory module in the connector labeled “DIMM A” before you install a memory
module in the connector labeled “DIMM B.”
1
Follow the instructions in "Before You Begin" on page 9.
2
Align the notch in the memory module with the tab in the
memory-module connector.
3
Slide the memory module firmly into the slot at a 45-degree angle, and
press the memory module down until it clicks into place. If you do not hear
the click, remove the memory module and reinstall it.
NOTE: If the memory module is not installed properly, the computer may not boot.
1 memory-module connector 2 securing clips (2)
3 memory module
1
2
3
book.book Page 24 Friday, April 13, 2012 2:02 PM
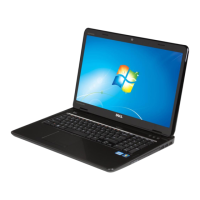
Table of Contents

Other manuals for Dell Inspiron N7110

Questions and Answers:

Question and Answer IconNeed help?

Do you have a question about the Dell Inspiron N7110 and is the answer not in the manual?

Dell Inspiron N7110 Specifications

General IconGeneral
RAMUp to 8GB DDR3
Operating SystemWindows 7 Home Premium
Optical DriveDVD+/-RW
Networking10/100 Ethernet
Card Reader8-in-1 Media Card Reader
Webcam1.0 MP integrated webcam
ProcessorIntel Core i3/i5/i7
Display17.3-inch HD+ (1600x900)
StorageUp to 1TB HDD
GraphicsIntel HD Graphics 3000 / NVIDIA GeForce GT 525M
Battery6-cell
ChipsetIntel HM67 Express
AudioStereo speakers
PortsUSB 2.0, USB 3.0, HDMI, VGA, RJ-45
WirelessWi-Fi 802.11b/g/n

Related product manuals