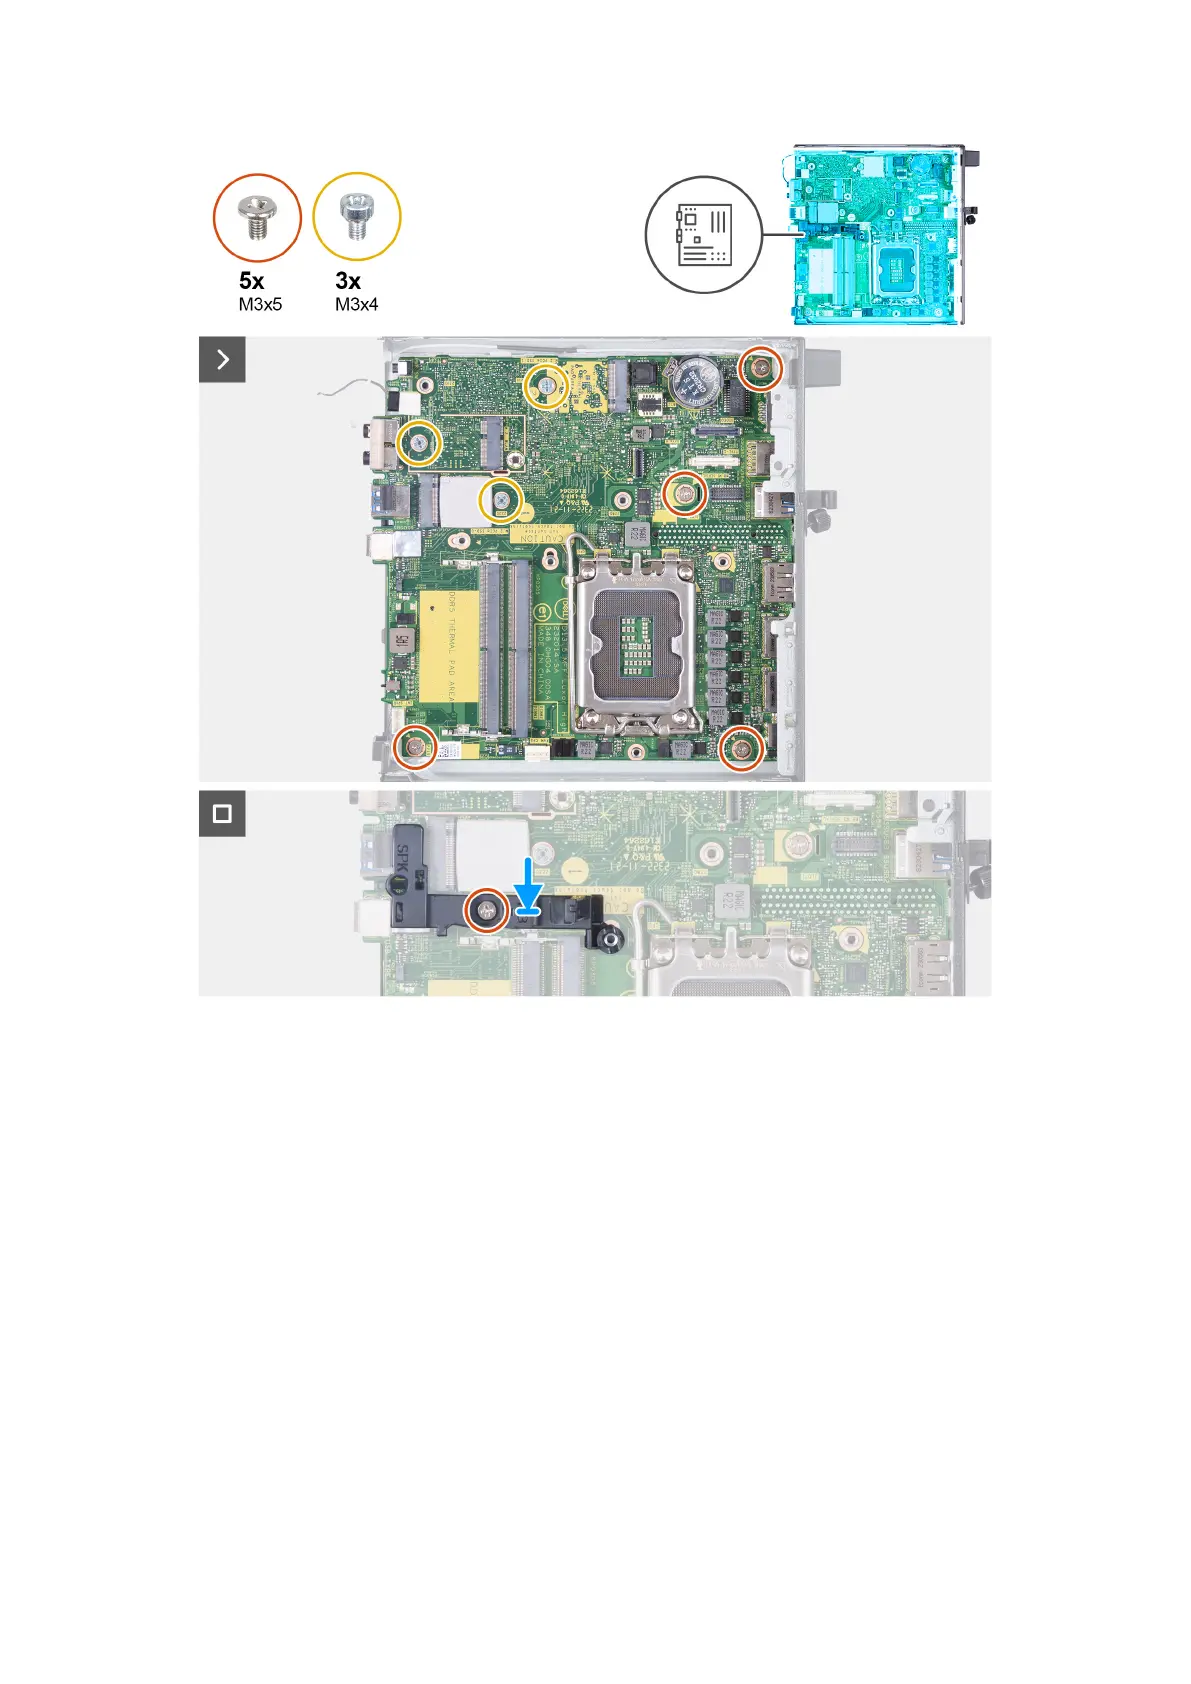
Figure 49. Installing the system board
Steps
1. At an angle, insert the front of the system board through the front of the chassis.
2. Place the system board on the chassis.
3. Align the screw holes on the system board to the screw holes on the chassis.
4. Replace the four screws (M3x5) that secure the system board to the chassis.
5. Replace the three screws (M3x4) that secure the system board to the chassis.
6. Place the speaker-support bracket on the system board.
7. Align the screw hole on the speaker-support bracket to the screw hole on the system board.
8. Replace the screw (M3x5) that secures the speaker-support bracket to the system board.
Next steps
1. Install the optional I/O module (HDMI/VGA/DP/Serial/PS2) or the optional Type-C module, whichever is applicable.
2. Install the processor.
3. Install the heat sink.
4. Install the memory.
5. Install the fan.
6. Install the wireless card.
74
Removing and installing Field Replaceable Units (FRUs)