82 Installing System Components
Removing a Hard Drive From a Hard-Drive Carrier
Remove the screws from the slide rails on the hard-drive carrier and separate
the hard drive from the carrier. See
Figure 3-6
.
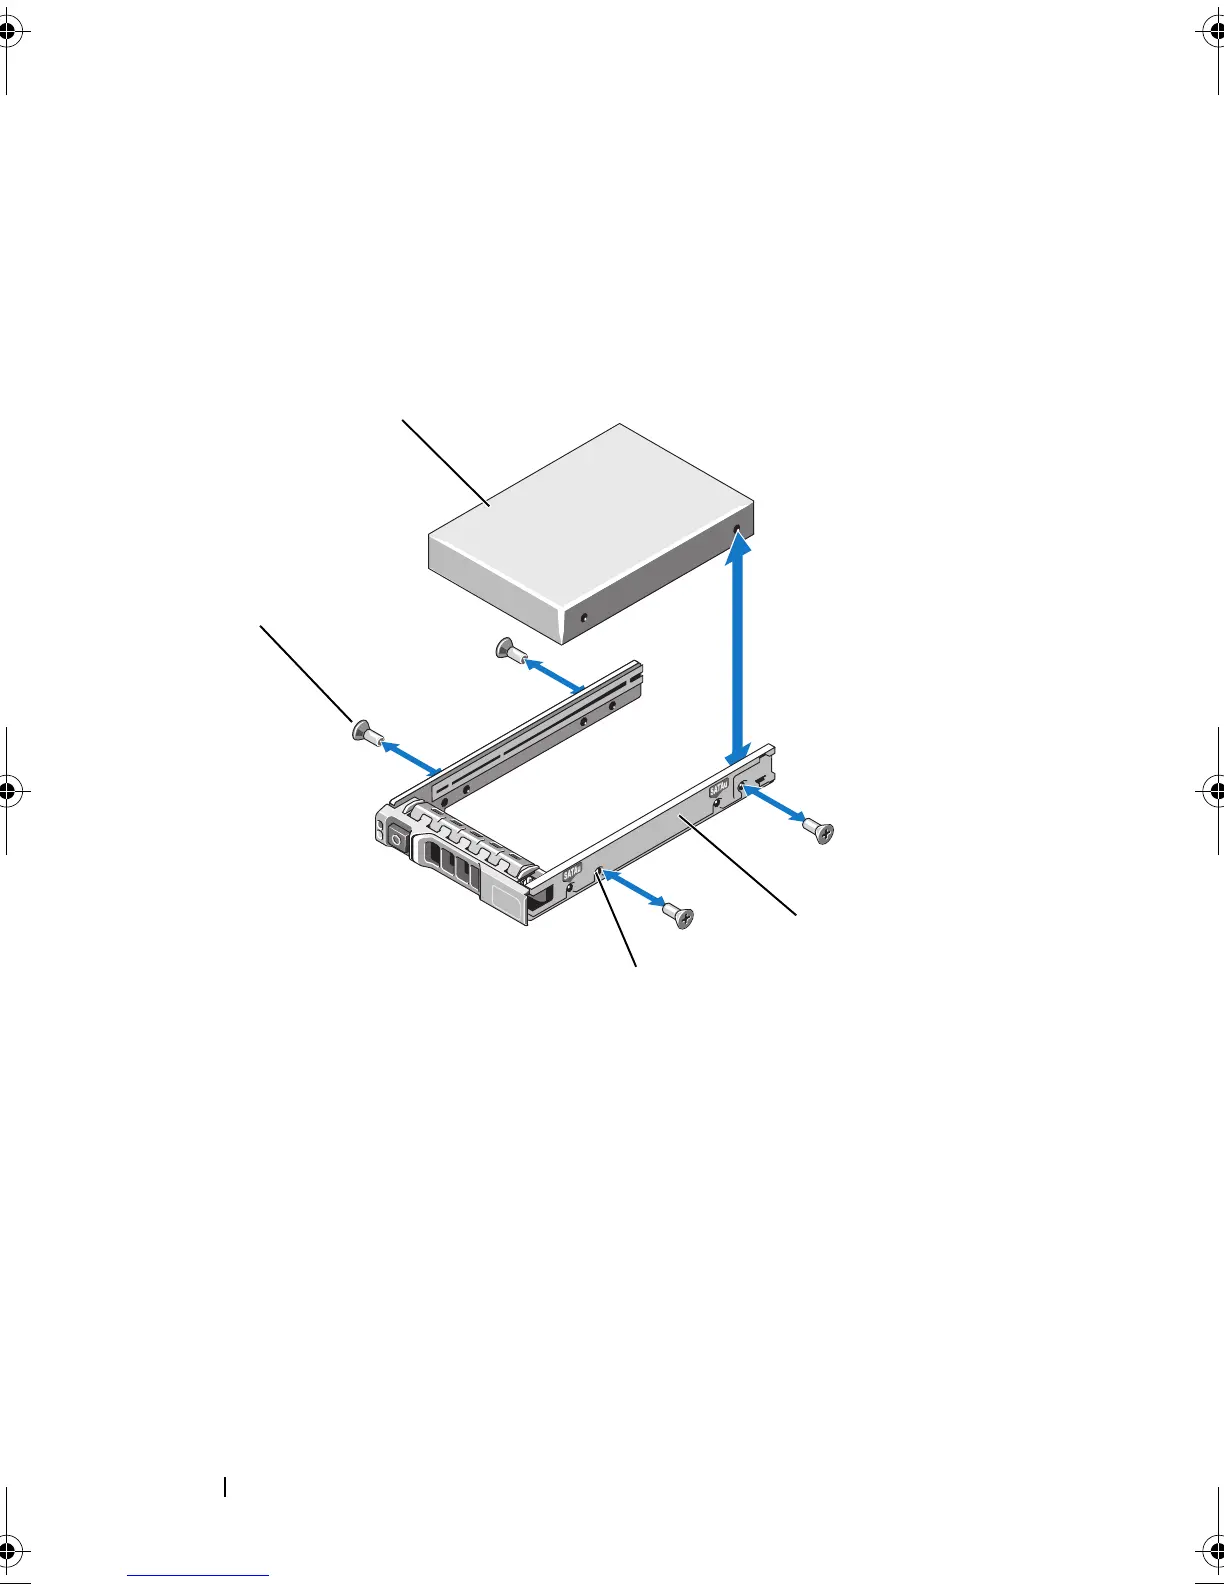
Figure 3-6. Removing and Installing a Hot-Swap Hard Drive Into a Hard-Drive Carrier
Installing a Hard Drive Into a Hard-Drive Carrier
1 Insert the hard drive into the hard-drive carrier with the connector end
of the drive at the rear. See
Figure 3-6
.
2 Align the screw holes on the hard drive with the back set of holes on the
hard-drive carrier.
3 Attach the four screws to secure the hard drive to the hard-drive carrier.
1 hard drive 2 hard-drive carrier
3 SAS/SATA screw hole 4 screws (4)
book.book Page 82 Wednesday, February 17, 2010 6:17 PM