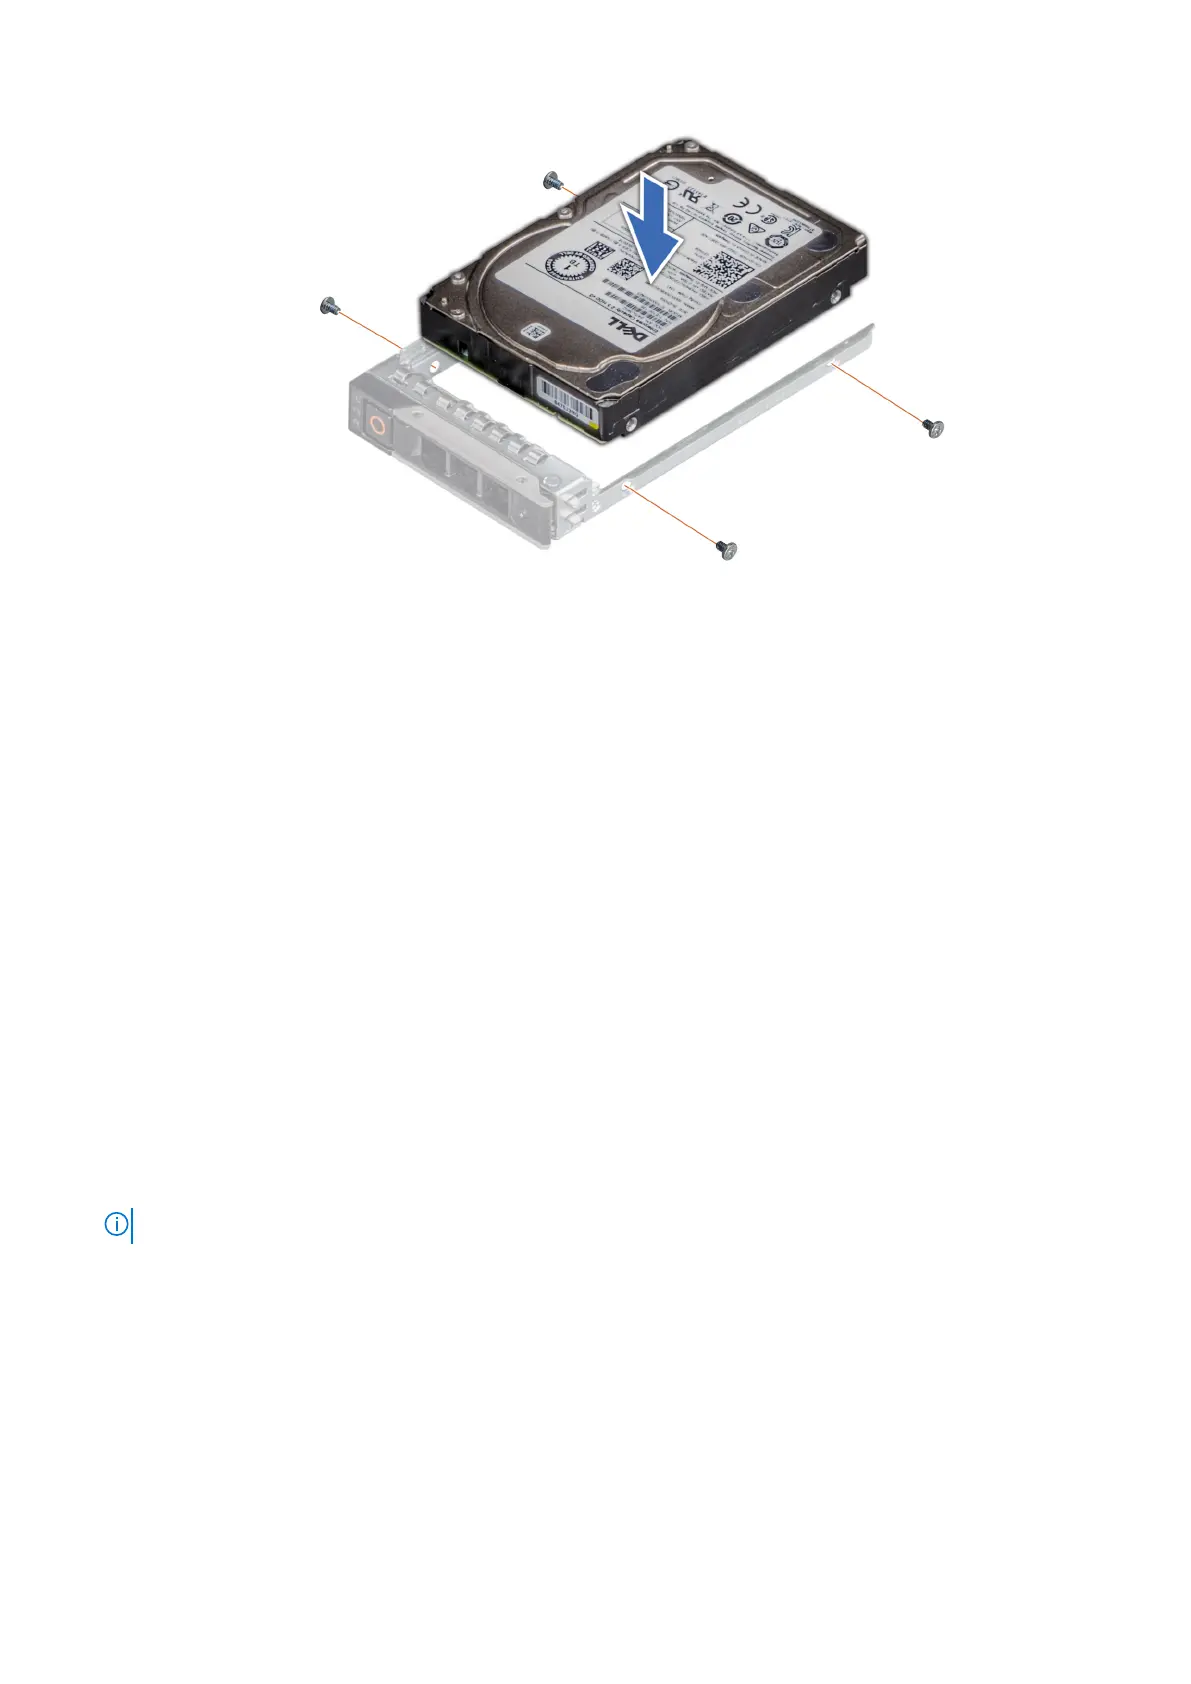
Figure 29. Installing a drive into the drive carrier
Next steps
Install the drive carrier.
Optional optical drive
This is a service technician replaceable part only.
Removing the optical drive
The procedure for removing an optical drive and optical drive blank is the same.
Prerequisites
1. Follow the safety guidelines listed in the Safety instructions.
2. Follow the procedure listed in the Before working inside your system.
3. If installed, remove the front bezel.
4. Remove the drive backplane cover.
Steps
1. Disconnect the power and data cables from the connectors on the optical drive.
NOTE: Observe the routing of the cable as you remove it from the system.
2. To release the optical drive, press the release tab and push the drive towards the front of the system.
3. Slide the optical drive out of the system.
44
Installing and removing system components
 Loading...


