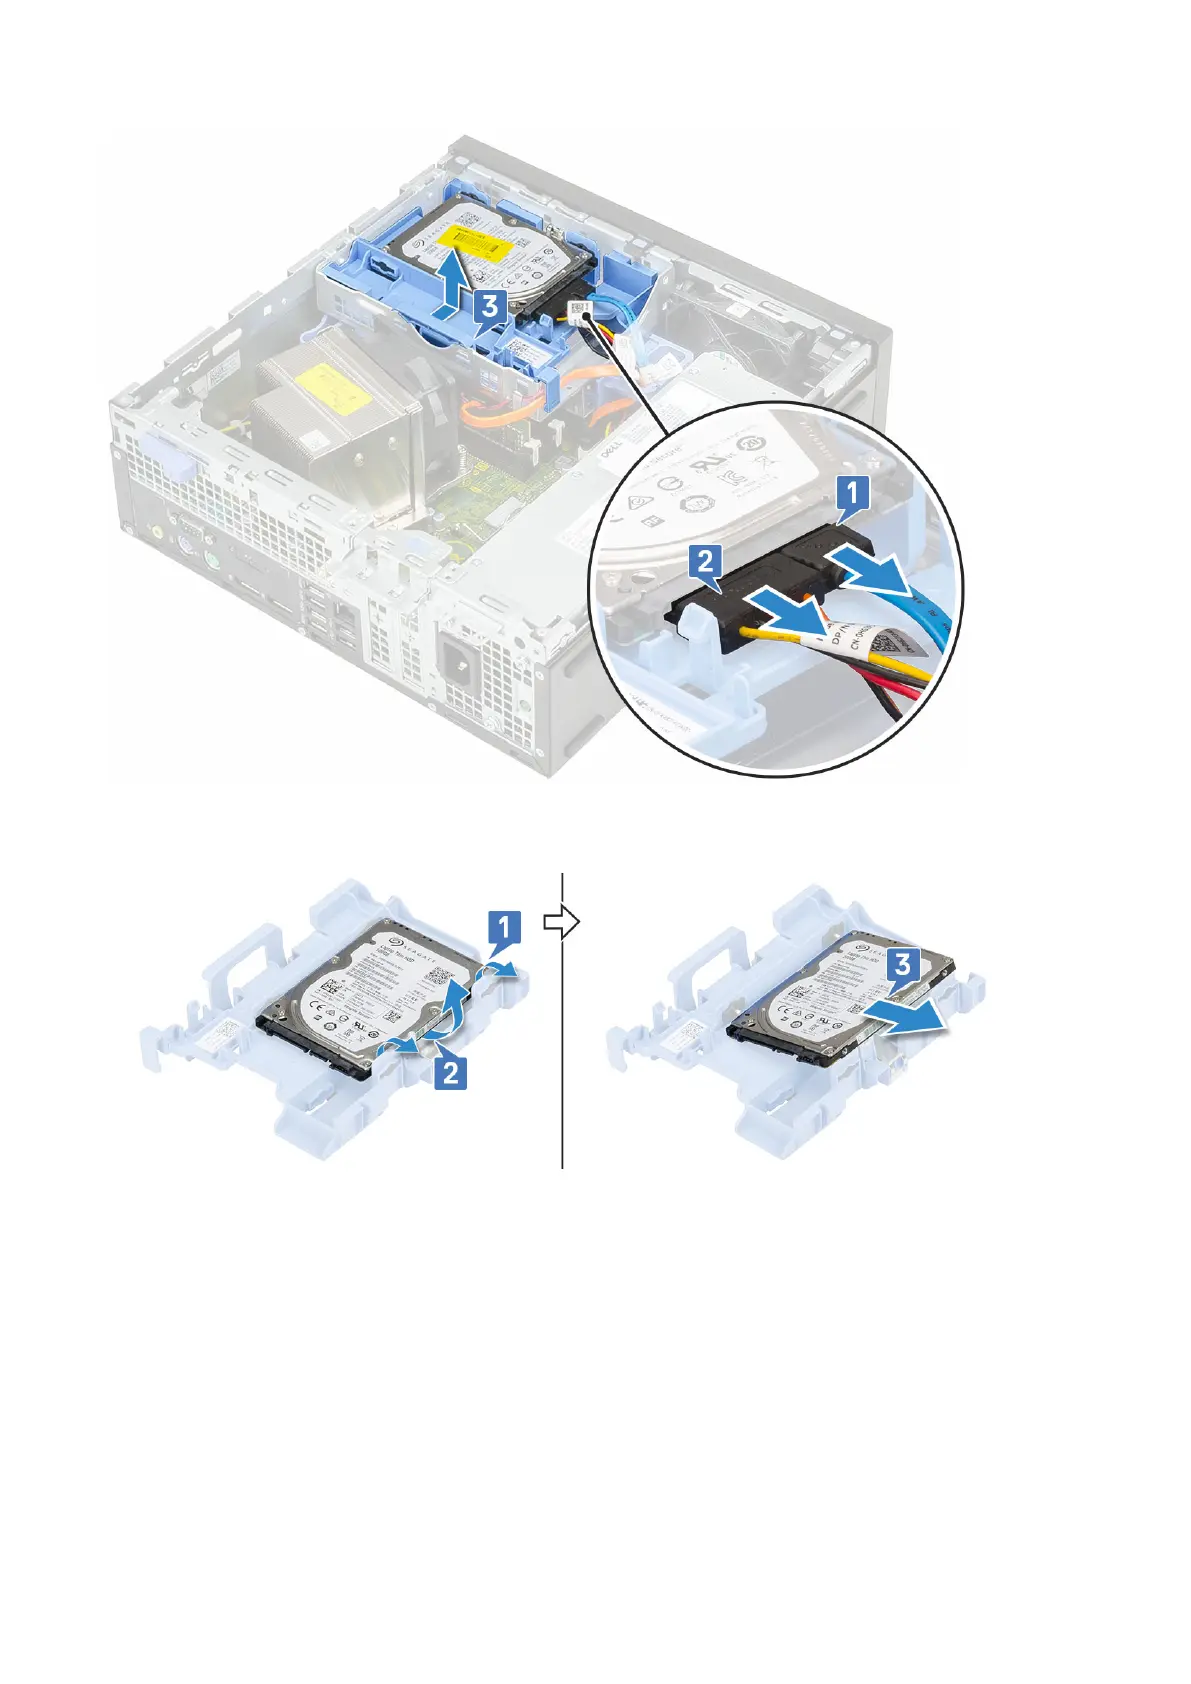
EasyManuals Logo

Dell Precision 3431 Small Form Factor User Manual

Dell Precision 3431 Small Form Factor
85 pages
To Next Page IconTo Next Page
To Previous Page IconTo Previous Page
Page #26 background imageLoading...
Page #26 background image
Installing 3.5–inch hard drive into the hard drive bracket
1. Flex the side of the hard drive bracket, to align and insert the pins on the bracket into the hard drive.
2. Insert the hard drive into the hard drive bracket until it clicks into place.
3. Install the:
a. Hard drive assembly
b. Front bezel
c. Side Cover
4. Follow the procedure in After working inside your computer.
Installing 3.5–inch hard drive assembly
1. Insert the hard drive assembly into the slot on the computer until it clicks into place.
2. Place the HDD filler brcaket.
3. Connect the SATA cable and the power cable to the connectors on the hard drive and re-route the cables along the caddy.
4. Install the:
a. Front bezel
b. Side Cover
5. Follow the procedure in After working inside your computer.
Removing 2.5–inch hard drive assembly
1. Follow the procedure in Before working inside your computer.
2. Remove the:
a. Side Cover
b. Front bezel
3. Open the Front panel door.
4. To remove hard drive assembly:
a. Disconnect the hard drive's data and power cables from their respective connectors on the hard drive [1].
b. Press the blue tabs on both sides [2] and pull the drive assembly out of the computer [3].
26
Field service information

Table of Contents

Other manuals for Dell Precision 3431 Small Form Factor

Questions and Answers:

Question and Answer IconNeed help?

Do you have a question about the Dell Precision 3431 Small Form Factor and is the answer not in the manual?

Dell Precision 3431 Small Form Factor Specifications

General IconGeneral
BrandDell
ModelPrecision 3431 Small Form Factor
CategoryDesktop
LanguageEnglish

Related product manuals