Adding and Replacing Parts 105
2
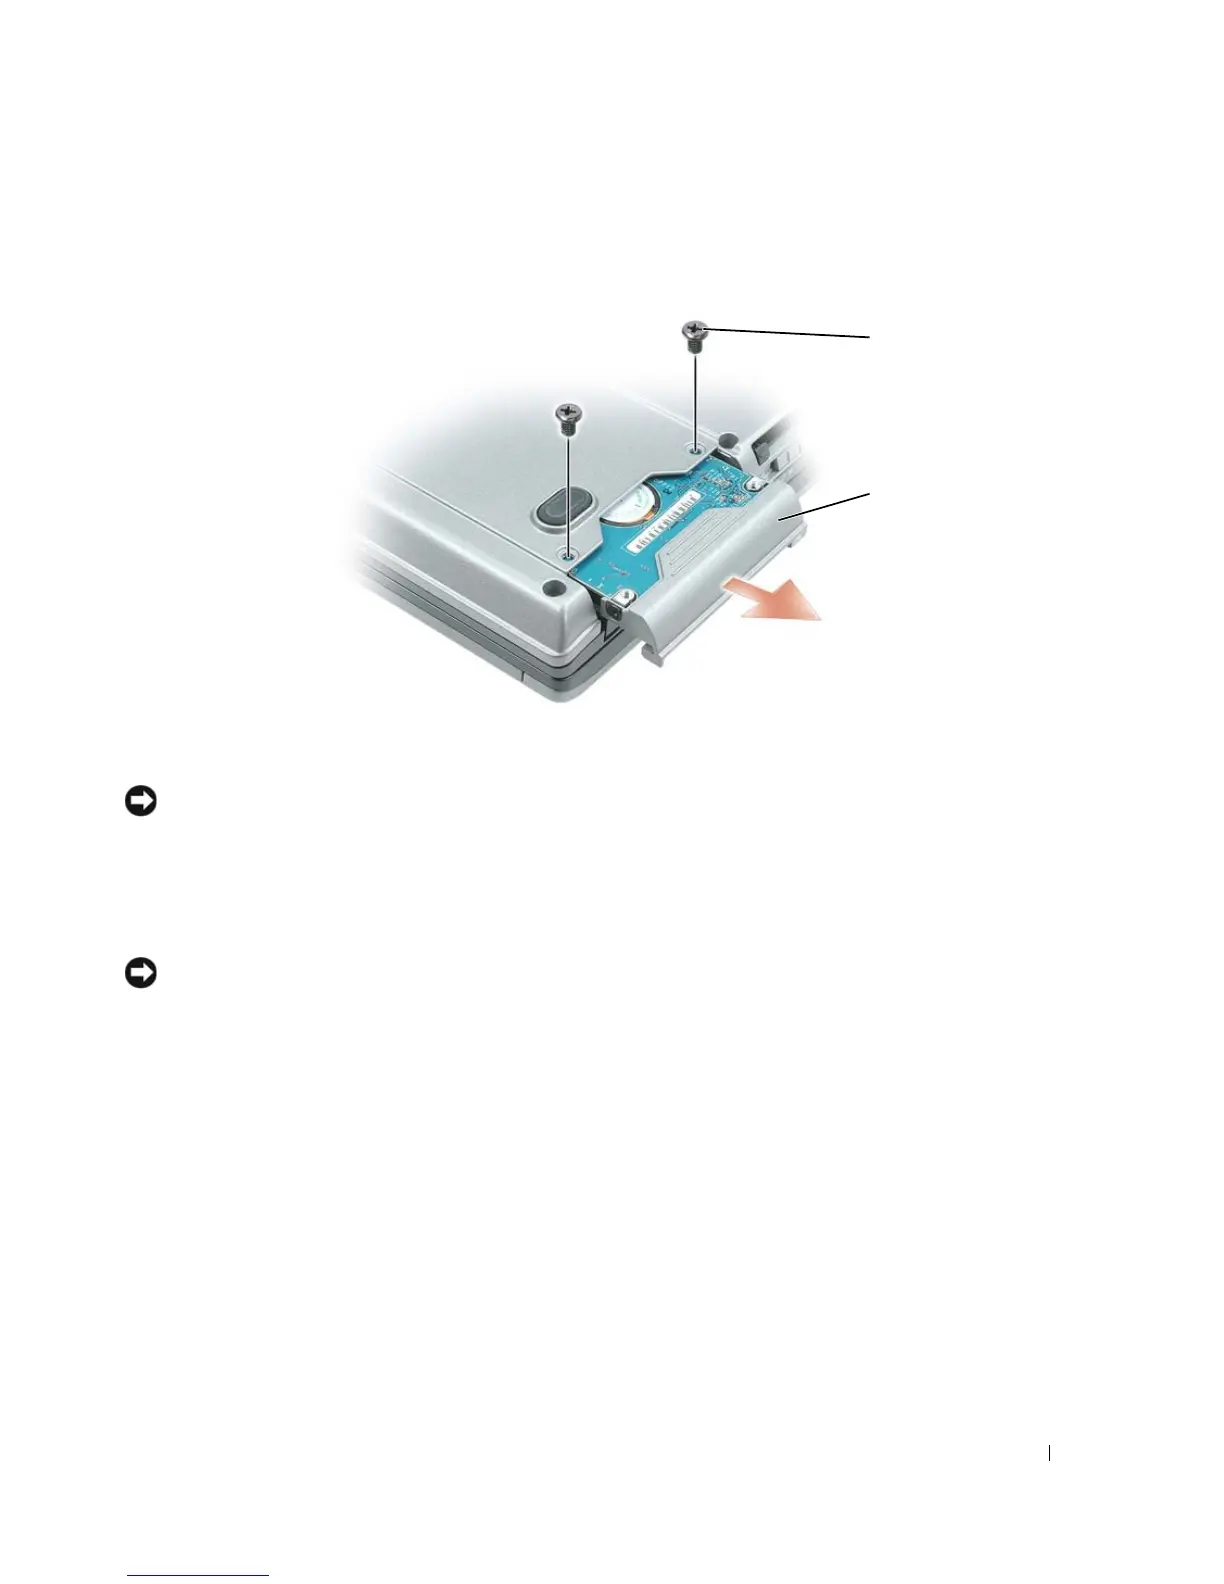
Turn the computer upside-down, and remove the two screws that secure the hard drive carrier to the
chassis.
NOTICE: When the hard drive is not in the computer, store it in protective antistatic packaging. See "Protecting
Against Electrostatic Discharge" in the Product Information Guide.
3
Slide the hard drive carrier out of the computer.
4
Remove the new drive from its packaging.
Save the original packaging for storing or shipping the hard drive.
NOTICE: Use firm and even pressure to slide the drive into place. If you use excessive force, you may damage the
connector.
5
Slide the new hard drive into the bay and into the connector until it is fully seated.
6
Replace the screws.
7
Install the operating system for your computer (see "Restoring Your Operating System" on page 98).
8
Install the drivers and utilities for your computer (see "Reinstalling Drivers and Utilities" on page 96).
1 screws (2) 2 hard drive
2
1