c) optical drive
d) keyboard
e) keyboard trim
f) base cover
g) battery
h) ExpressCard
5. Follow the procedures in
After Working Inside Your Computer
.
Removing the Processor Heat-Sink
1. Follow the procedures in
Before Working Inside Your Computer
.
2. Remove the:
a) battery
b) bottom door
c) keyboard trim
d) keyboard
e) optical drive
f) hard drive
g) palm rest
h) processor fan
i) heatsink
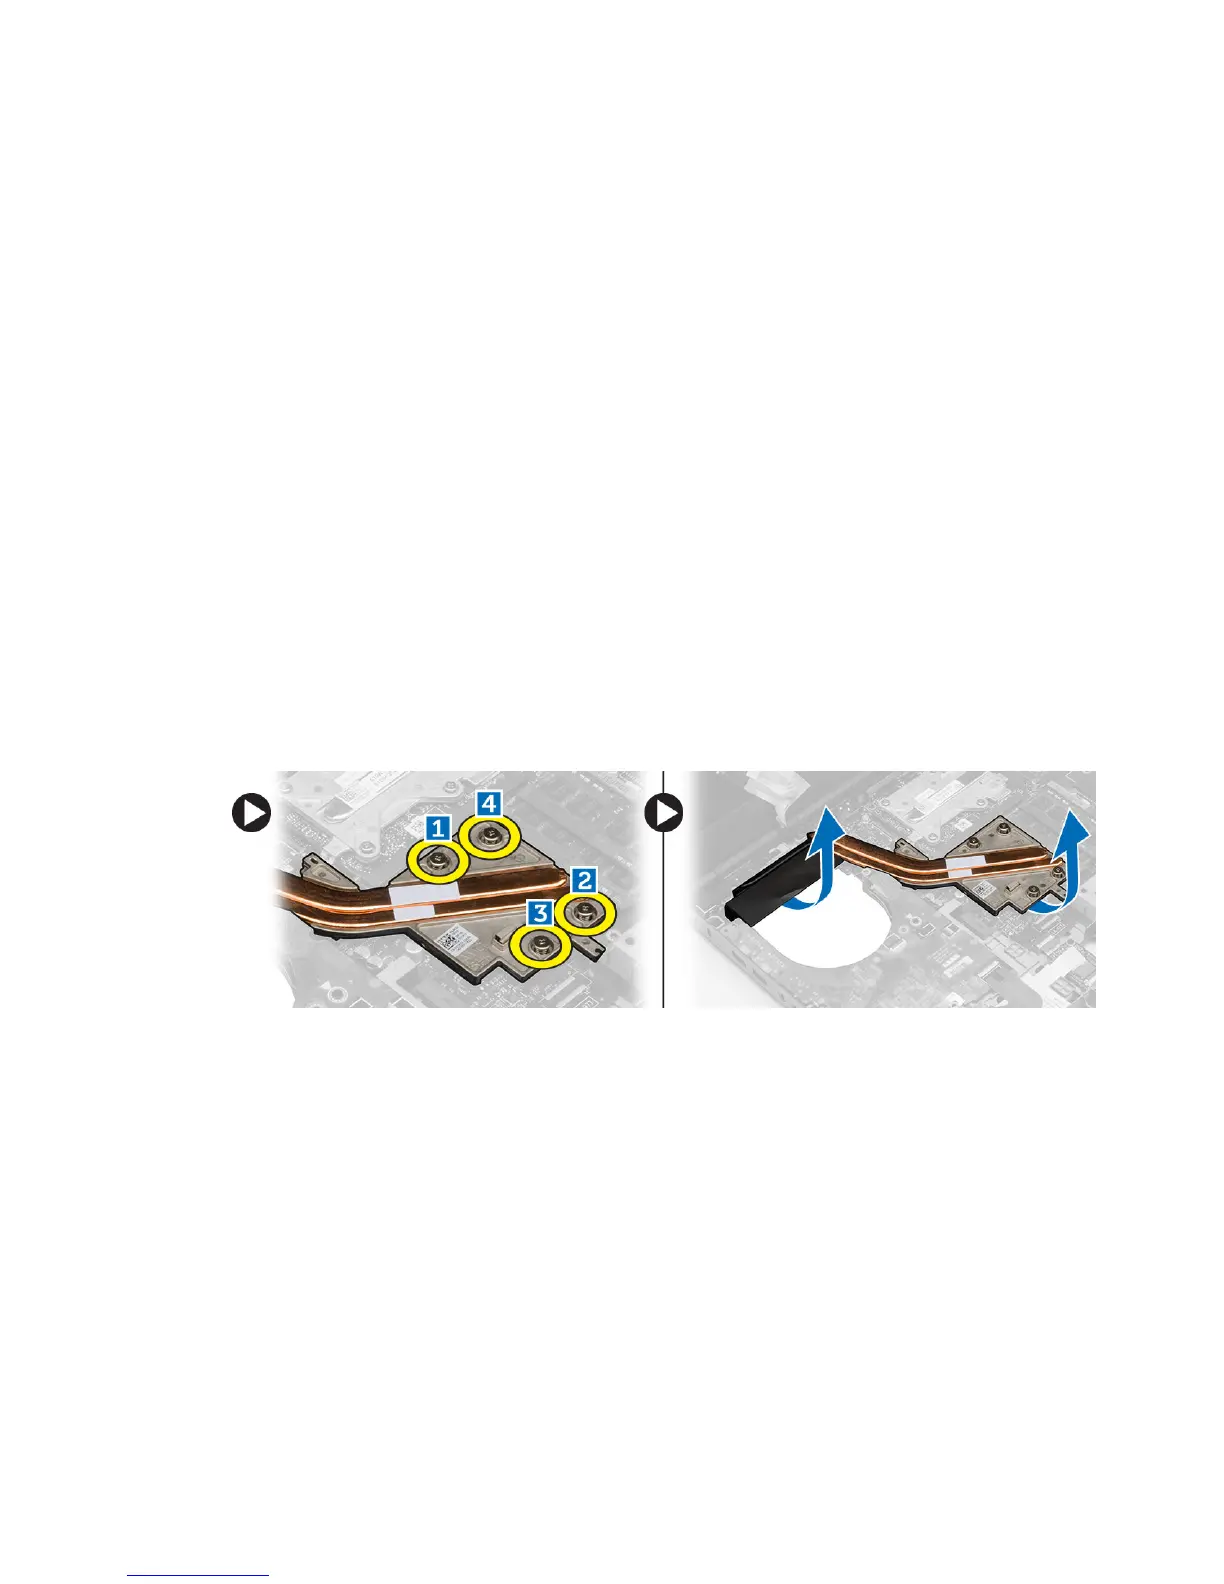
3. Perform the following steps as shown in the illustration:
a) Loosen the captive screws that secure the heat-sink processor to the computer. [1, 2, 3, 4]
b) Lift up and remove the heat-sink processor from the computer.
Installing the Processor Heat-Sink
1. Replace the heat-sink processor in its slot. Tighten the captive screws to secure the heat-sink processor to the
computer.
2. Install the:
a) heatsink
b) processor fan
c) palm rest
d) hard drive
e) optical drive
f) keyboard
g) keyboard trim
h) base cover
34